
Up to this point, we have been using Docker-Compose to configure, start, and stop, our reference implementation. While this approach has been adequate for our development process, a more robust orchestrator is recommended for production deployment.
In our earlier article Microservice Container Orchestration, we introduced two potential candidate orchestration platforms: Docker Swarm and Kubernetes. While both platforms are quite capable, Kubernetes is, by far, the industry leader. Major cloud providers, including Amazon AWS (EKS), Redhat (OKD), Microsoft Azure (AKS), Google Cloud Platform (GKE), IBM (Cloud Kubernetes Service), and Oracle (OKE), as well as many smaller cloud providers, all offer Kubernetes services.
In this article, we will start our journey to Kubernetes by preparing a local development environment to run Kubernetes.
For our purposes, we will set up a small-scale, single node, Kubernetes environment. To make our lives easier, we have two prepackaged small-scale Kubernetes environments to choose from: MiniKube and MicroK8S. Both are suitable for our purpose; however, in this article, we will be focusing exclusively on MicroK8S. MicroK8S is a lightweight, production-grade, conformant Kubernetes available on all major Linux distributions, macOS and Windows. MicroK8S can run as a single node on a developer's workstation or a multi-node cluster. When run on three more nodes together, the MicroK8S cluster will automatically become highly-available.
Snap can also be installed on:
Then run the installer:
During installation, the installer checks that Hyper-V is available and enabled. After installation, you will be prompted to configure MicroK8S.

MicroK8S is now up and running with a minimal complement of add-ons. We will need to enable the following add-ons:
In the next article, we will use kubectl to interact with our instance. For now, check out the kubectl cheatsheet to see what else it can do.
First, we must expose the dashboard outside of the cluster. To do this, we issue the following command:
Our Kubernetes instance uses a self-signed certificate that the browser does not recognize. The browser displays the warning page to alert us to this situation. We can ignore this and click the Advanced button.

We can click the proceed to localhost (unsafe) link, which lets us access the Kubernetes Dashboard.
Here we see the authentication dialog. The default authentication method requires us to supply a token. We can obtain this token by issuing the following commands:
Copy the token into the
Kubernetes Dashboard authentication dialog
token field:
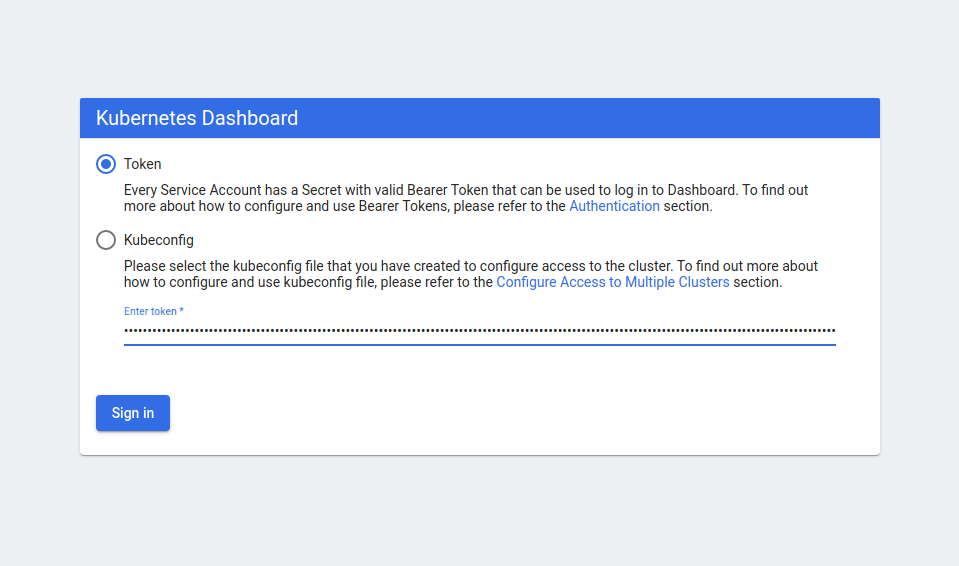
Now click Sign-in.
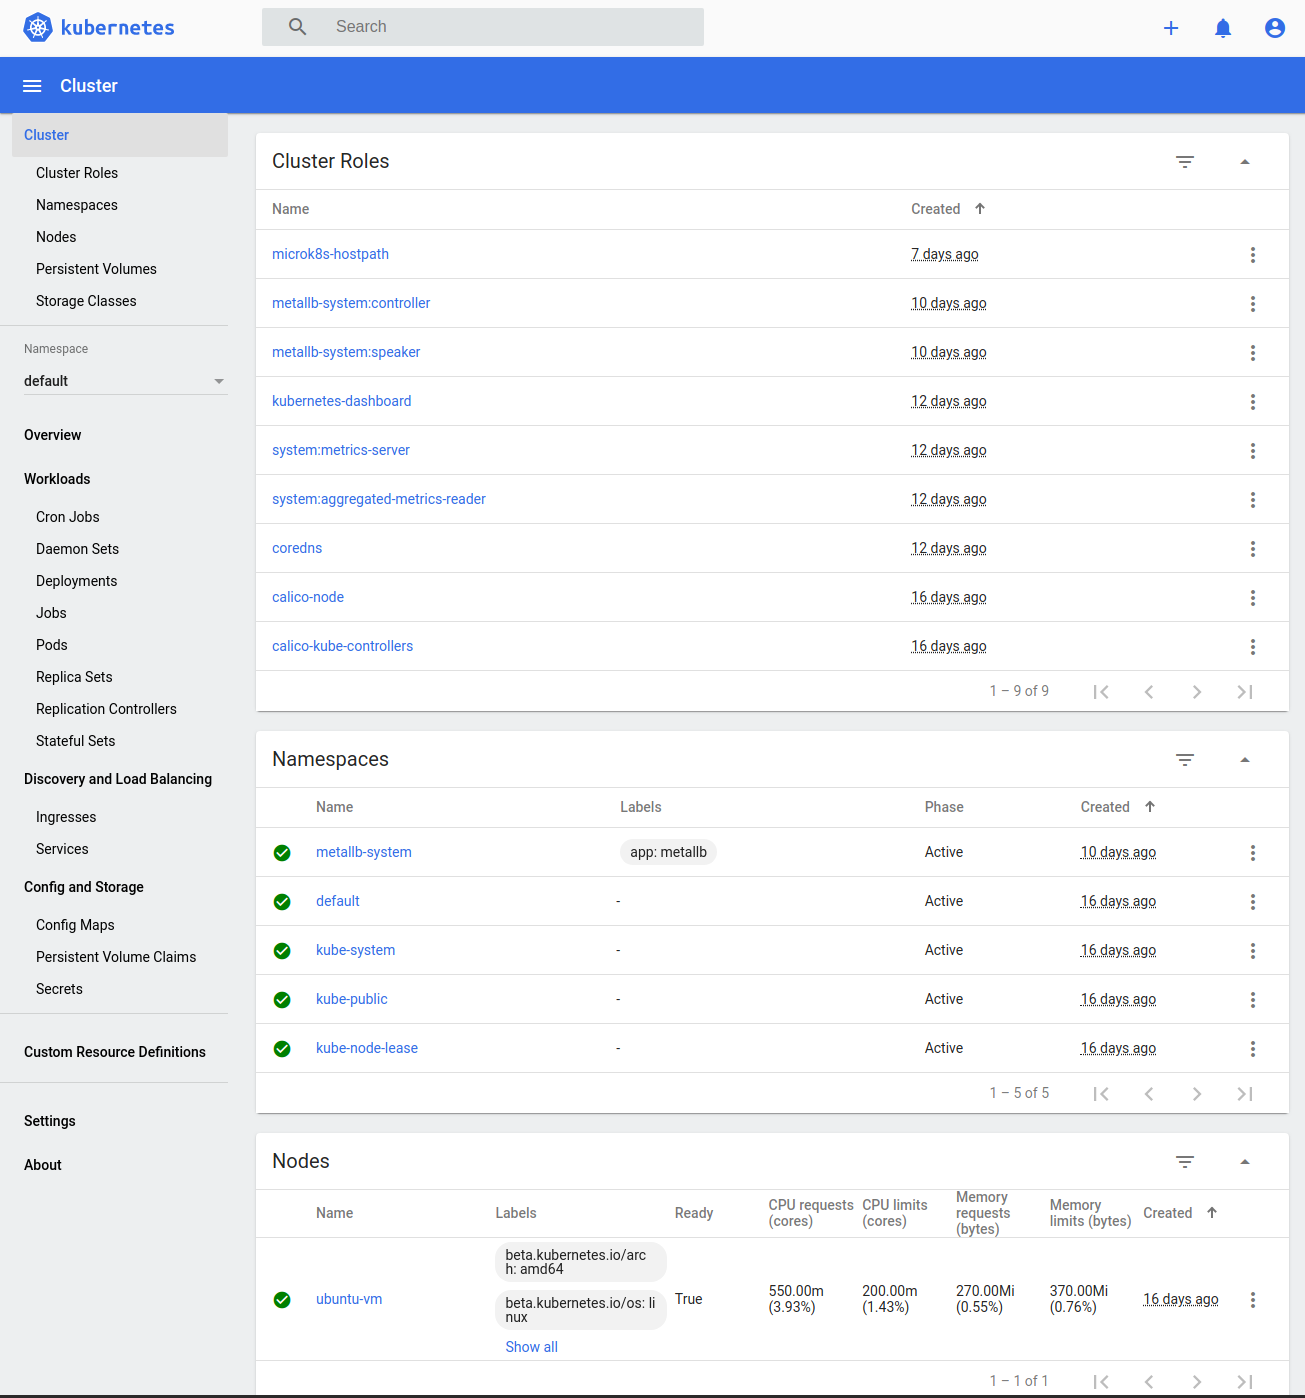
We now have a working instance of MicroK8s running the Kubernetes Dashboard. In this screenshot, we see the dashboard's top-level Cluster page. Feel free to explore the interface. You will see that Kubernetes contains many moving pieces. Don't worry. We will explain the relevant portions in the next article.
In our earlier article Microservice Container Orchestration, we introduced two potential candidate orchestration platforms: Docker Swarm and Kubernetes. While both platforms are quite capable, Kubernetes is, by far, the industry leader. Major cloud providers, including Amazon AWS (EKS), Redhat (OKD), Microsoft Azure (AKS), Google Cloud Platform (GKE), IBM (Cloud Kubernetes Service), and Oracle (OKE), as well as many smaller cloud providers, all offer Kubernetes services.
In this article, we will start our journey to Kubernetes by preparing a local development environment to run Kubernetes.
For our purposes, we will set up a small-scale, single node, Kubernetes environment. To make our lives easier, we have two prepackaged small-scale Kubernetes environments to choose from: MiniKube and MicroK8S. Both are suitable for our purpose; however, in this article, we will be focusing exclusively on MicroK8S. MicroK8S is a lightweight, production-grade, conformant Kubernetes available on all major Linux distributions, macOS and Windows. MicroK8S can run as a single node on a developer's workstation or a multi-node cluster. When run on three more nodes together, the MicroK8S cluster will automatically become highly-available.
Getting started
As of June 2, 2020, MicroK8s runs natively on Linux, macOS, and Windows. You will need at least 4G of RAM and 20G of storage for Linux or 40G for macOS and Windows.Linux
On Linux, MicroK8S is installed using the Snap package manager. Snap is pre-installed on :Snap can also be installed on:
- Arch Linux
- CentOS
- Debian
- Fedora
- Linux Mint
- Pop!_OS
- Red Hat Enterprise Linix (RHEL)
- Raspberry Pi OS, and many others
sudo snap install microk8s --classic
MacOS
On MacOS, we install MicroK8S using the rbew command.brew install ubuntu/microk8s/microk8sthen:
microk8s install
Windows
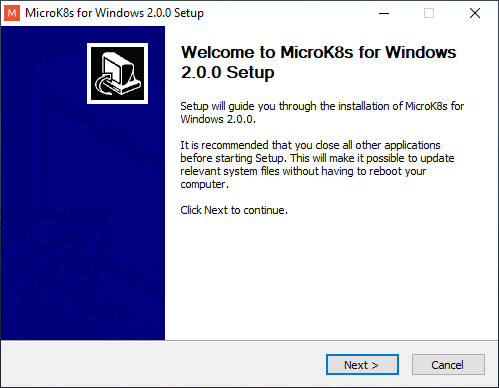
For Windows, me must download the MicroK8S installer.Then run the installer:
During installation, the installer checks that Hyper-V is available and enabled. After installation, you will be prompted to configure MicroK8S.
MicroK8S status
Now that the MicroK8S instance has been installed, it should start automatically. You can check it's status using the following command:microk8s status --wait-ready
microk8s is running
high-availability: no
  datastore master nodes: 127.0.0.1:19001
  datastore standby nodes: none
addons:
  enabled:
    ha-cluster           # Configure high availability on the current node
    helm                 # Helm 2 - the package manager for Kubernetes
    metrics-server       # K8s Metrics Server for API access to service metrics
  disabled:
    ambassador           # Ambassador API Gateway and Ingress
    cilium               # SDN, fast with full network policy
    dashboard            # The Kubernetes dashboard
    dns                  # CoreDNS
    fluentd              # Elasticsearch-Fluentd-Kibana logging and monitoring
    gpu                  # Automatic enablement of Nvidia CUDA
    helm3                # Helm 3 - Kubernetes package manager
    host-access          # Allow Pods connecting to Host services smoothly
    ingress              # Ingress controller for external access
    istio                # Core Istio service mesh services
    jaeger               # Kubernetes Jaeger operator with its simple config
    knative              # The Knative framework on Kubernetes.
    kubeflow             # Kubeflow for easy ML deployments
    linkerd              # Linkerd is a service mesh for Kubernetes and other frameworks
    metallb              # Loadbalancer for your Kubernetes cluster
    multus               # Multus CNI enables attaching multiple network interfaces to pods
    prometheus           # Prometheus operator for monitoring and logging
    rbac                 # Role-Based Access Control for authorisation
    registry             # Private image registry exposed on localhost:32000
    storage              # Storage class; allocates storage from host directory
MicroK8S is now up and running with a minimal complement of add-ons. We will need to enable the following add-ons:
- dashboard- The Kubernetes dashboard provides us with a web-based interface to view our Kubernetes cluster.
- dns-CoreDNS provides the Kubernetes cluster with DNS and internal service discovery.
- metallb-MetalLB provides load-balancing support for the cluster.
- storage-Storage class allows the cluster to allocate persistent storage from the host directory.
microk8s enable dashboard
microk8s enable dns
microk8s enable metallb
microk8s enable storageWe now have our MicroK8S instance configured.
Interacting with Kubernetes
The primary way to interact with Kubernetes is through the kubectl command. With MicroK8s, we call the kubectl command through microk8s:microk8s kubectl
kubectl controls the Kubernetes cluster manager. Find more information at: https://kubernetes.io/docs/reference/kubectl/overview/ Basic Commands (Beginner): create Create a resource from a file or from stdin. expose Take a replication controller, service, deployment or pod and expose it as a new Kubernetes Service run Run a particular image on the cluster set Set specific features on objects Basic Commands (Intermediate): explain Documentation of resources get Display one or many resources edit Edit a resource on the server delete Delete resources by filenames, stdin, resources and names, or by resources and label selector Deploy Commands: rollout Manage the rollout of a resource scale Set a new size for a Deployment, ReplicaSet or Replication Controller autoscale Auto-scale a Deployment, ReplicaSet, or ReplicationController Cluster Management Commands: certificate Modify certificate resources. cluster-info Display cluster info top Display Resource (CPU/Memory/Storage) usage. cordon Mark node as unschedulable uncordon Mark node as schedulable drain Drain node in preparation for maintenance taint Update the taints on one or more nodes Troubleshooting and Debugging Commands: describe Show details of a specific resource or group of resources logs Print the logs for a container in a pod attach Attach to a running container exec Execute a command in a container port-forward Forward one or more local ports to a pod proxy Run a proxy to the Kubernetes API server cp Copy files and directories to and from containers. auth Inspect authorization Advanced Commands: diff Diff live version against would-be applied version apply Apply a configuration to a resource by filename or stdin patch Update field(s) of a resource using strategic merge patch replace Replace a resource by filename or stdin wait Experimental: Wait for a specific condition on one or many resources. convert Convert config files between different API versions kustomize Build a kustomization target from a directory or a remote url. Settings Commands: label Update the labels on a resource annotate Update the annotations on a resource completion Output shell completion code for the specified shell (bash or zsh) Other Commands: alpha Commands for features in alpha api-resources Print the supported API resources on the server api-versions Print the supported API versions on the server, in the form of "group/version" config Modify kubeconfig files plugin Provides utilities for interacting with plugins. version Print the client and server version information Usage: kubectl [flags] [options] Use "kubectlSince we will frequently use the kubectl command, it is often useful to set a command alias to minimize our keystrokes. Here we will alias the command with the letter k.--help" for more information about a given command. Use "kubectl options" for a list of global command-line options (applies to all commands).
alias k='microk8s.kubectl'Unfortunately, the alias command is only available for Linux and mcOS users. However, Windows users can install Cygwin to enjoy similar functionality. To view everything running in our Kubernetes default namespace, we issue the following command:
k get all
NAME                 TYPE        CLUSTER-IP     EXTERNAL-IP   PORT(S)   AGE
service/kubernetes   ClusterIP   10.152.183.1   <none>        443/TCP   16d
Here we see the Kubernetes service is running, but nothing else has been deployed.
In the next article, we will use kubectl to interact with our instance. For now, check out the kubectl cheatsheet to see what else it can do.
Kubernetes Dashboard
Earlier, we enabled the Kubernetes dashboard. However, there are a few more steps that we must perform before we can bask in the reflected glory of its web interface.First, we must expose the dashboard outside of the cluster. To do this, we issue the following command:
microk8s kubectl port-forward -n kube-system service/kubernetes-dashboard 10443:443
Forwarding from 127.0.0.1:10443 -> 8443
Forwarding from [::1]:10443 -> 8443
This command will forward port 10443 to the kubernetes-dashboard service running in the kube-system namespace. Open up a browser and navigate to https://localhost:10433.
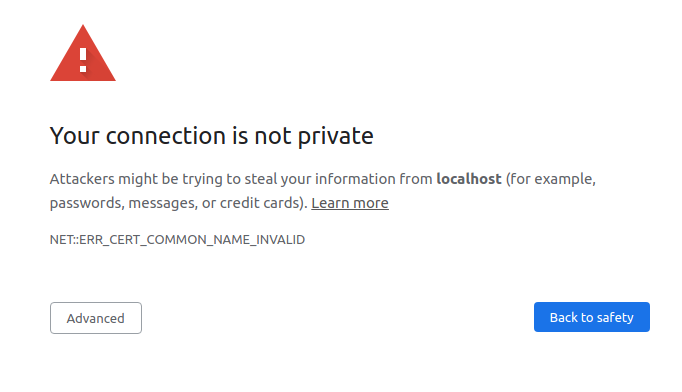
Our Kubernetes instance uses a self-signed certificate that the browser does not recognize. The browser displays the warning page to alert us to this situation. We can ignore this and click the Advanced button.
We can click the proceed to localhost (unsafe) link, which lets us access the Kubernetes Dashboard.
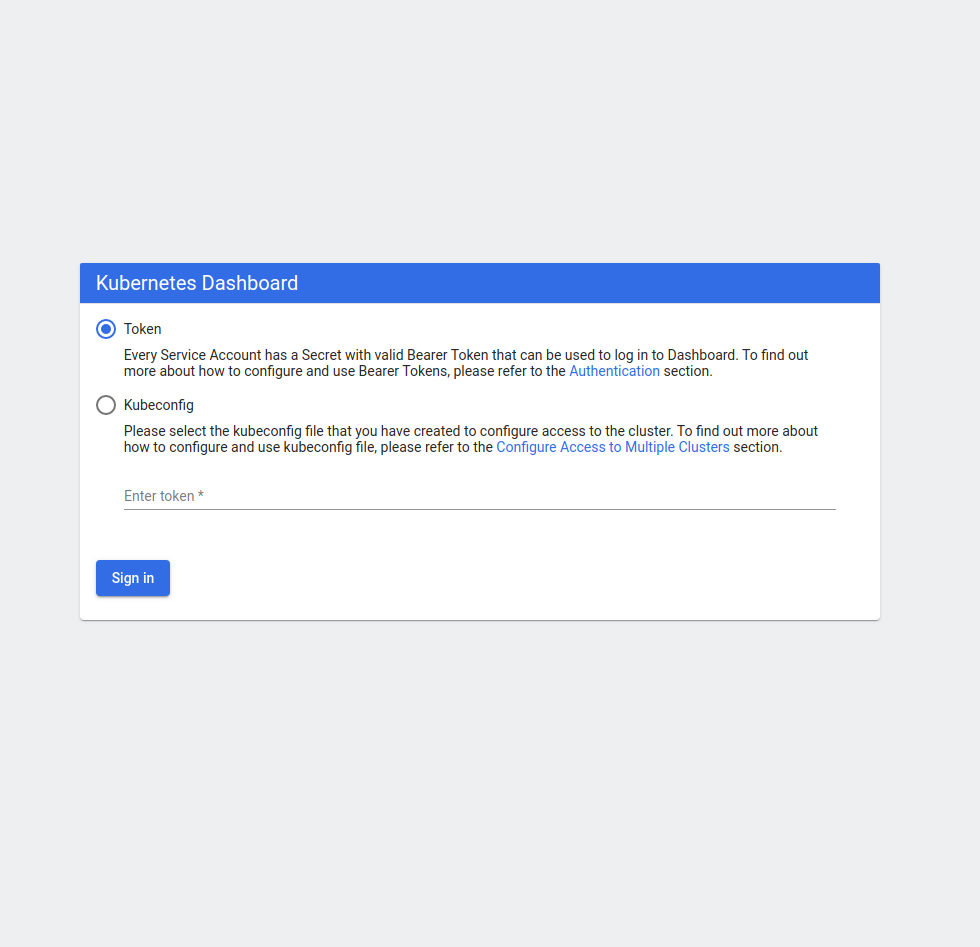
Here we see the authentication dialog. The default authentication method requires us to supply a token. We can obtain this token by issuing the following commands:
token=$(microk8s kubectl -n kube-system get secret | grep default-token | cut -d " " -f1)and
microk8s kubectl -n kube-system describe secret $tokenThis will describe our token:
 Name:         default-token-jctrz
Namespace:    kube-system
Labels:       <none>
Annotations:  kubernetes.io/service-account.name: default
              kubernetes.io/service-account.uid: 0f8cc6c5-526f-40b0-9ca7-6d58050f76e0

Type:  kubernetes.io/service-account-token

Data
====
ca.crt:     1103 bytes
namespace:  11 bytes
token:      eyJhbGciOiJSUzI1NiIsImtpZCI6InFzQTZLT1QyUy16SzRXc0hYRTZtVXpaRXMwUGh3NFlmSkFmQzU0WHJnM28ifQ.eyJpc3MiOiJrdWJlcm5ldGVzL3NlcnZpY2VhY2NvdW50Iiwia3ViZXJuZXRlcy5pby9zZXJ2aWNlYWNjb3VudC9uYW1lc3BhY2UiOiJrdWJlLXN5c3RlbSIsImt1YmVybmV0ZXMuaW8vc2VydmljZWFjY291bnQvc2VjcmV0Lm5hbWUiOiJkZWZhdWx0LXRva2VuLWpjdHJ6Iiwia3ViZXJuZXRlcy5pby9zZXJ2aWNlYWNjb3VudC9zZXJ2aWNlLWFjY291bnQubmFtZSI6ImRlZmF1bHQiLCJrdWJlcm5ldGVzLmlvL3NlcnZpY2VhY2NvdW50L3NlcnZpY2UtYWNjb3VudC51aWQiOiIwZjhjYzZjNS01MjZmLTQwYjAtOWNhNy02ZDU4MDUwZjc2ZTAiLCJzdWIiOiJzeXN0ZW06c2VydmljZWFjY291bnQ6a3ViZS1zeXN0ZW06ZGVmYXVsdCJ9.Ag6dH-n0Uo_-_yvokdasUiLNodSod99hFZtmp3UTYSsaxDkjzw_TxV7O-EUcvMvOsAmOdyXTvb52p_C9w9KWrtGtrXJx3pTsvJzpJrJv0Je3jkEB2AsMDQ6jvM9BPWnfTdb6YsijKAqc7Q-CpJAlDXvUYCdHGbVt6h2dWATIxvIUxuo3SEE75CxWasruC4CvqRma3FYzPQPWgbH5uAetn1yqZJnbRVhU-zk9tZNs60IMjjodLUVxpXyRRHLkpN6I_tv0sRqigimOPC1sUqWgX_MKueu_KhU-bYOYxIUIXrn9o82xK7s5ib5mqih05WyEkhobkxt-zKoZRSWnPs3T
Now click Sign-in.
We now have a working instance of MicroK8s running the Kubernetes Dashboard. In this screenshot, we see the dashboard's top-level Cluster page. Feel free to explore the interface. You will see that Kubernetes contains many moving pieces. Don't worry. We will explain the relevant portions in the next article.

Twitter
Facebook
Reddit
LinkedIn
Email