

The Stateless storage problem
One of the key advantages of microservices is the ability to quickly scale up or down. To achieve this type of scalability, we must build stateless microservices. As the name implies, the microservice doesn't directly maintain any state. Instead, this approach allows any service to handle any request. Statelessness, of course, forces us to find a new home for our state. We have several options to choose from, including databases, caches, and object storage. In this article, we will focus on object storage.Object Storage
Object storage provides a high-level abstraction over traditional hierarchical filesystems or block storage and allows us to store large amounts of unstructured data. As its name implies, Object Storage stores data as managed objects. Each object consists of data and metadata and is addressed by a universally unique identifier (UUID).While similar to key-value stores, Object Stores are optimized for large amounts of data, and as mentioned earlier, each object has a corresponding metadata set.
Cloud Object Storage
Whether an application runs in the cloud or a local data center, many enterprises use a cloud object storage provider for object persistence. Every major cloud provider has an Object Storage offering. Of course, Amazon's Simple Storage Service (S3) is the gold standard for object storage. Still, Google Cloud Storage, IBM Cloud Object Storage, Azure Blob Storage, Digital Ocean Spaces, Oracle Cloud Infrastructure Object Storage, and a host of others provide some form of Object Storage service. And if you need Object storage for data archiving and long-term backup, Amazon's S3 Glacier service provides an alternative to its own classic S3 offering.Minio

Of course, what if you don't want to use a cloud provider for your object store requirement? What options do you have? One option is to use MinIO. MinIO is a high-performance, open-source ( GNU Affero GPL v3.0) object-store. It provides support for handling unstructured data with a maxiumum object size of up to 5TB. It also mirrors Amazon's S3 API allowing it to act as a plug-in replacement for S3.
MinIO is perfect when you want an S3 object store but choose not to use Amazon S3. Possible use cases include:
- S3 features on private cloud infrastructure.
- S3 features on a non-Amazon cloud.
- Local S3 for development/testing environments.
- S3 backup server (e.g., Restic, etc...
Starting a local instance
You can install MinIO locally, or, as is de rigueur here, you can spin it up as a Docker container. Let's first create a Docker network so other containers can communicate with our instance.
docker network create minio-net
We can start both the MinIO server and console with the following commands:
docker run --name minio --network minio-net -v /mnt/data:/data --rm -p 9000:9000 -p 9001:9001 -e MINIO_ROOT_USER=minioadmin -e MINIO_ROOT_PASSWORD=minioadmin minio/minio server /data --console-address ":9001"
This will start up the named MinIO container with the specified network ( minio-net), volume ( /mnt/data:/data) and ports (server: 9000, console: 9001). MINIO_ROOT_USER and MINIO_ROOT_PASSWORD set the admin credentials.
The output should appear similar to:
Terminal
Unable to find image 'minio/minio:latest' locally
latest: Pulling from minio/minio
dde93efae2ff: Already exists
94249d6f79d2: Already exists
3e755bf6ed19: Pull complete
ad89dbbca77f: Pull complete
6f5c845dd91f: Pull complete
b32620c594da: Pull complete
cd79de406f93: Pull complete
Digest: sha256:978048b2d240fb657a5f8d21b639632e6f6ddf4c7c8eaef63c2840f44bcd5486
Status: Downloaded newer image for minio/minio:latest
API: http://172.21.0.2:9000  http://127.0.0.1:9000

Console: http://172.21.0.2:9001 http://127.0.0.1:9001

Documentation: https://docs.min.io
WARNING: Detected default credentials 'minioadmin:minioadmin', we recommend that you change these values with 'MINIO_ROOT_USER' and 'MINIO_ROOT_PASSWORD' environment variables
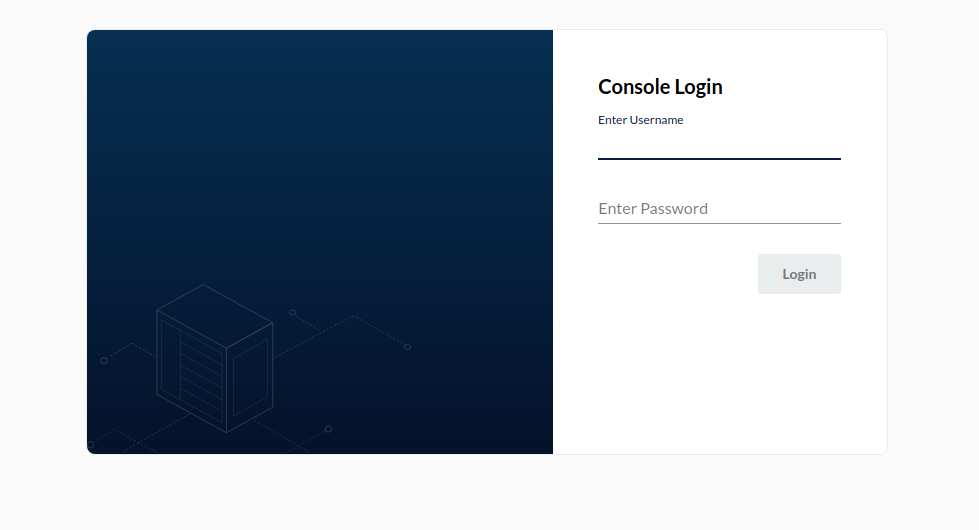
Open a browser and navigate to http://localhost:9001, and your browser should display the MinIO console login screen.
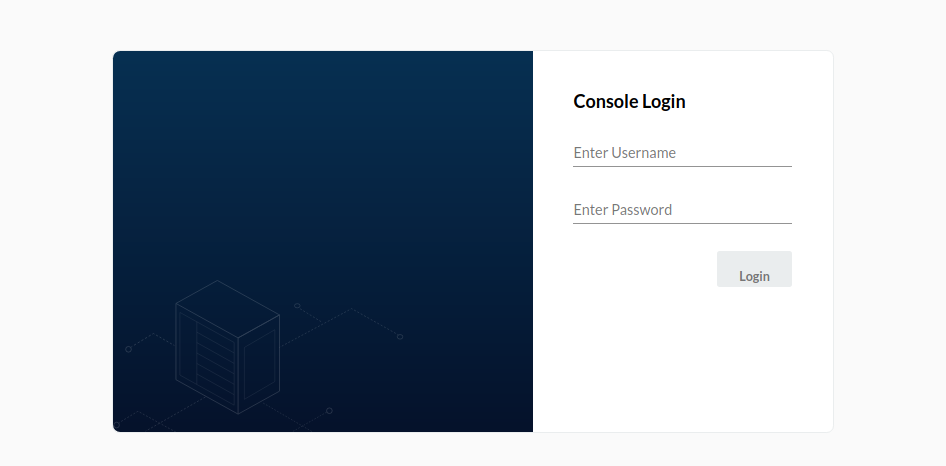
Supply the user credentials you included when starting the Docker container ( minioadmin/minioadmin) to log on. Once authenticated, your browser will display the MinIO dashboard.
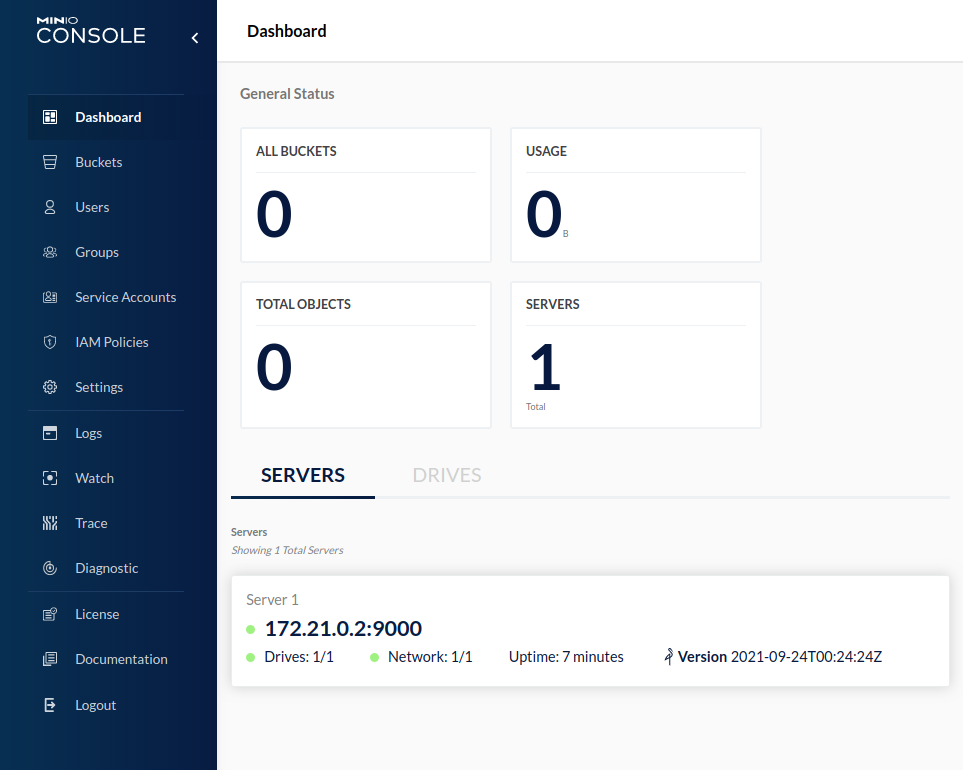
Here we see that we have a pristine MinIO instance with no buckets and no objects. In MinIO (as in S3), we organize our objects into buckets. Buckets are roughly analogous to directories; however, they are not hierarchical.
Clicking on the Buckets link will bring up the Buckets page.
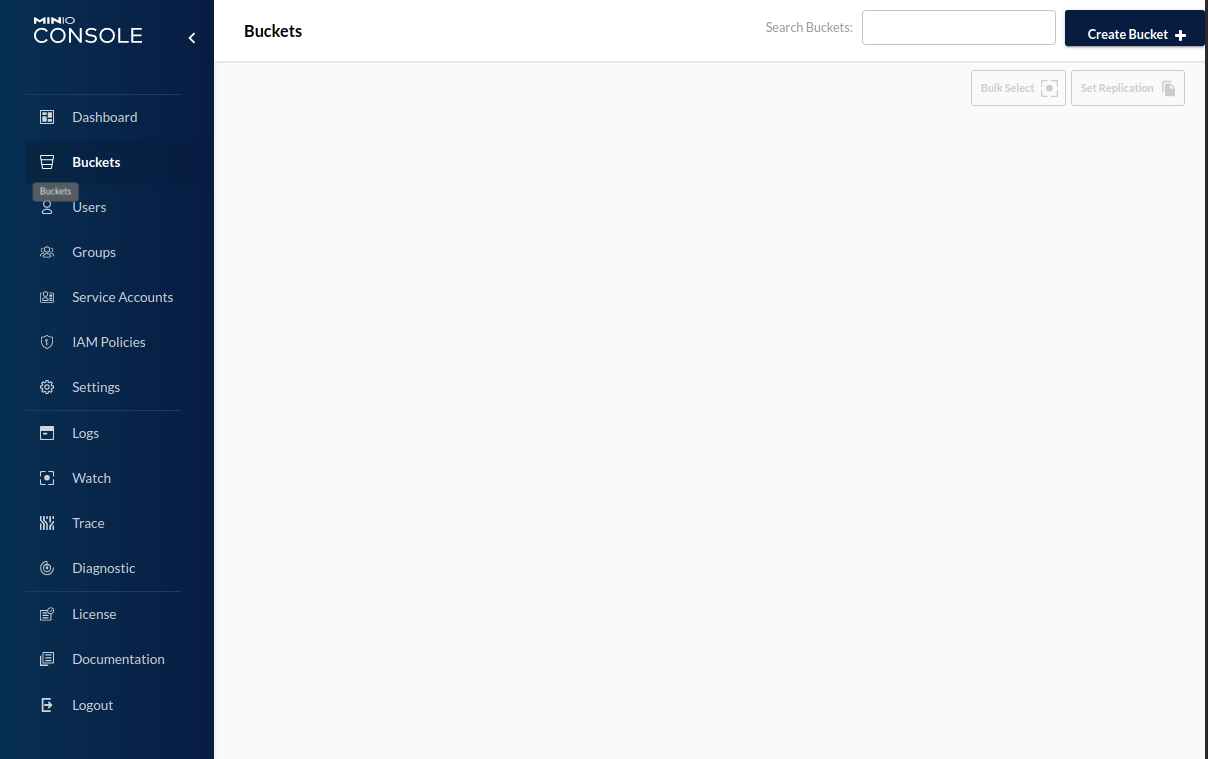
We can create a bucket by clicking the create bucket button, which will display the Create Bucket dialog.
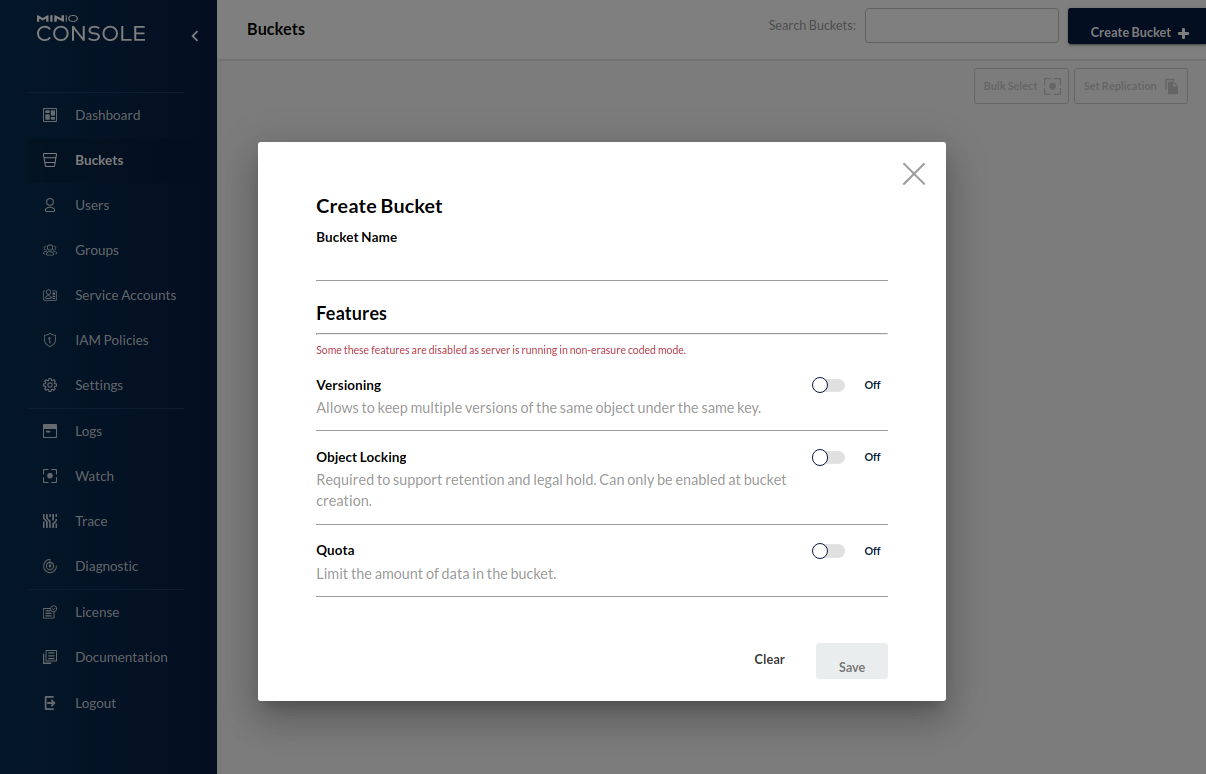
We will provide it with the imaginatively named new-bucket.
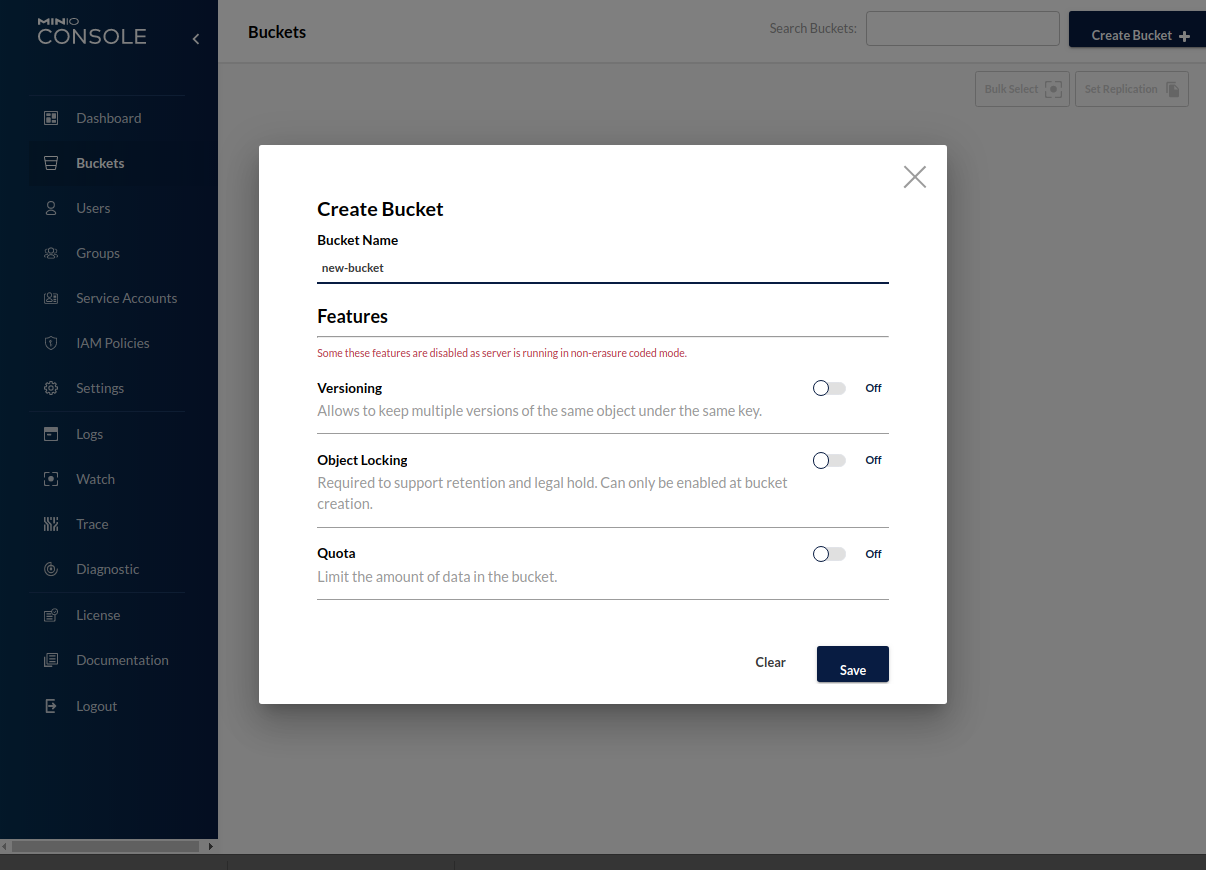
We will skip the rest of the options and click Save. The Buckets page now displays a shiny new bucket named new-bucket.
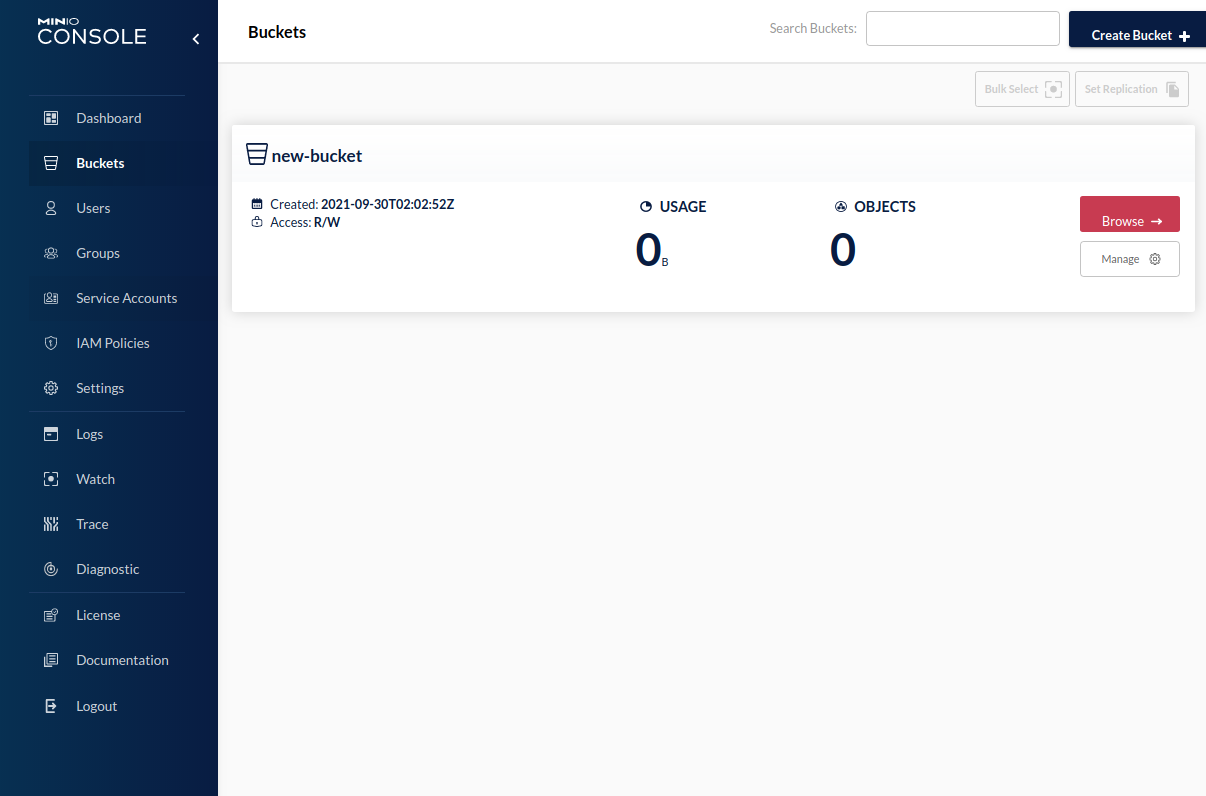
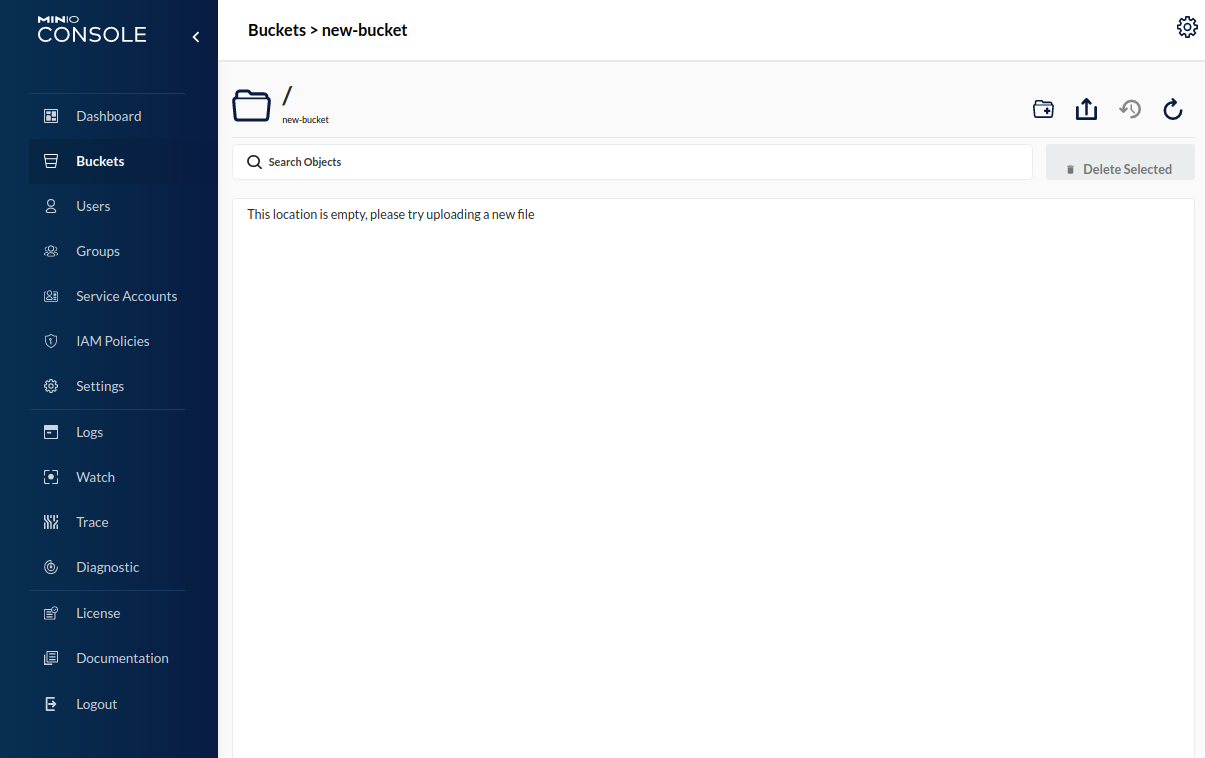
Currently, the bucket contains 0 objects.We can browse the contents of the bucket by clicking the Browse button.
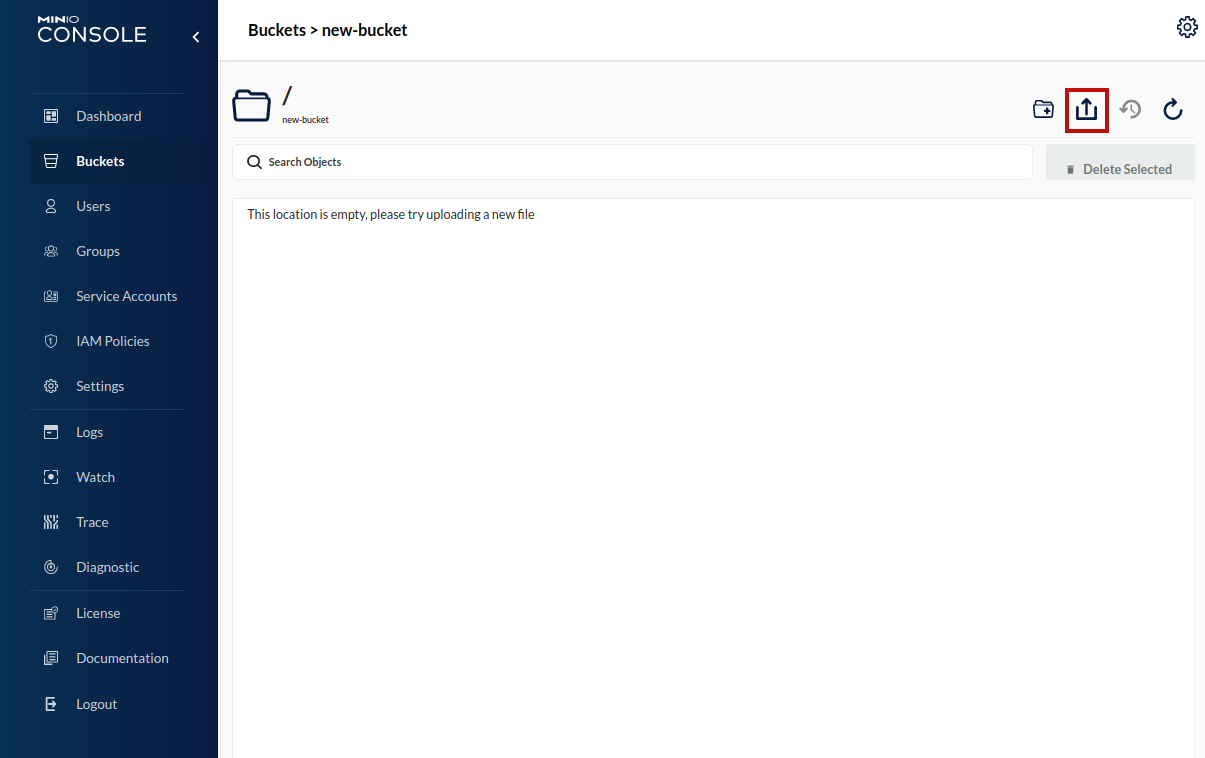
We can add files to our new bucket by clicking the upload button. This button will open a file dialog and allow you to select a file for upload. For example, we will choose the file testfile.txt.
Once the file has been uploaded, it will appear in the list.
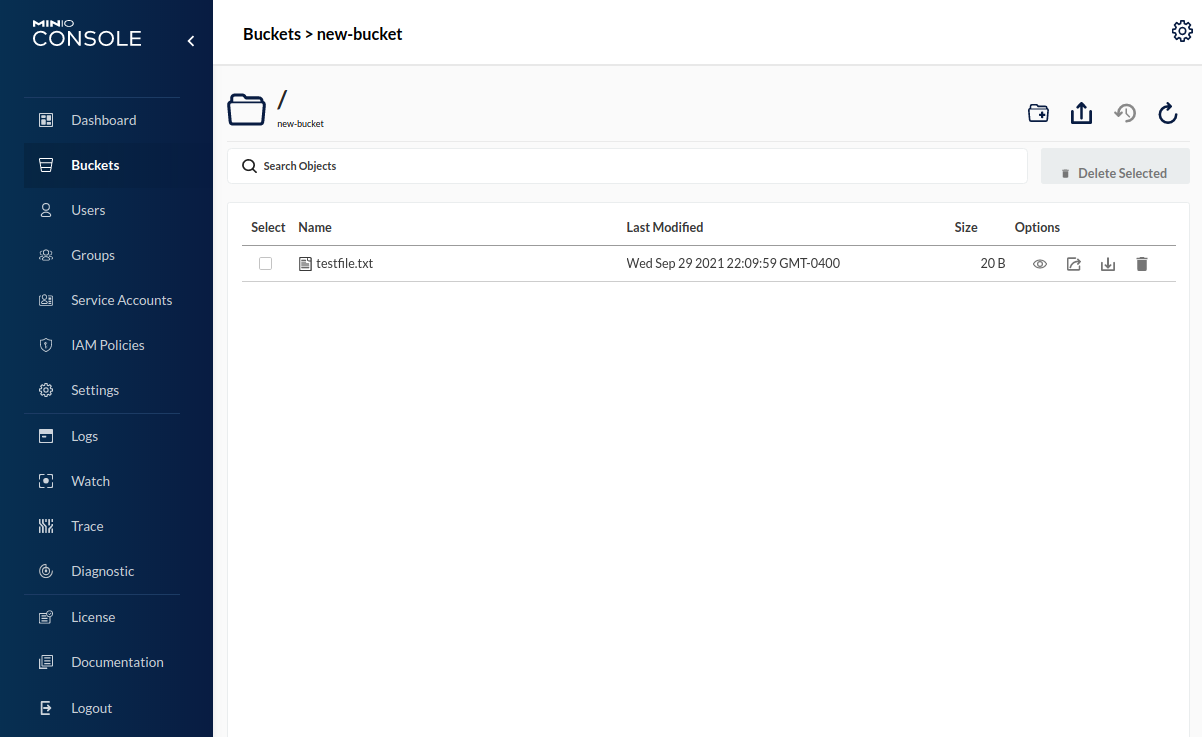
Clicking on the object's row in the list will display its details.
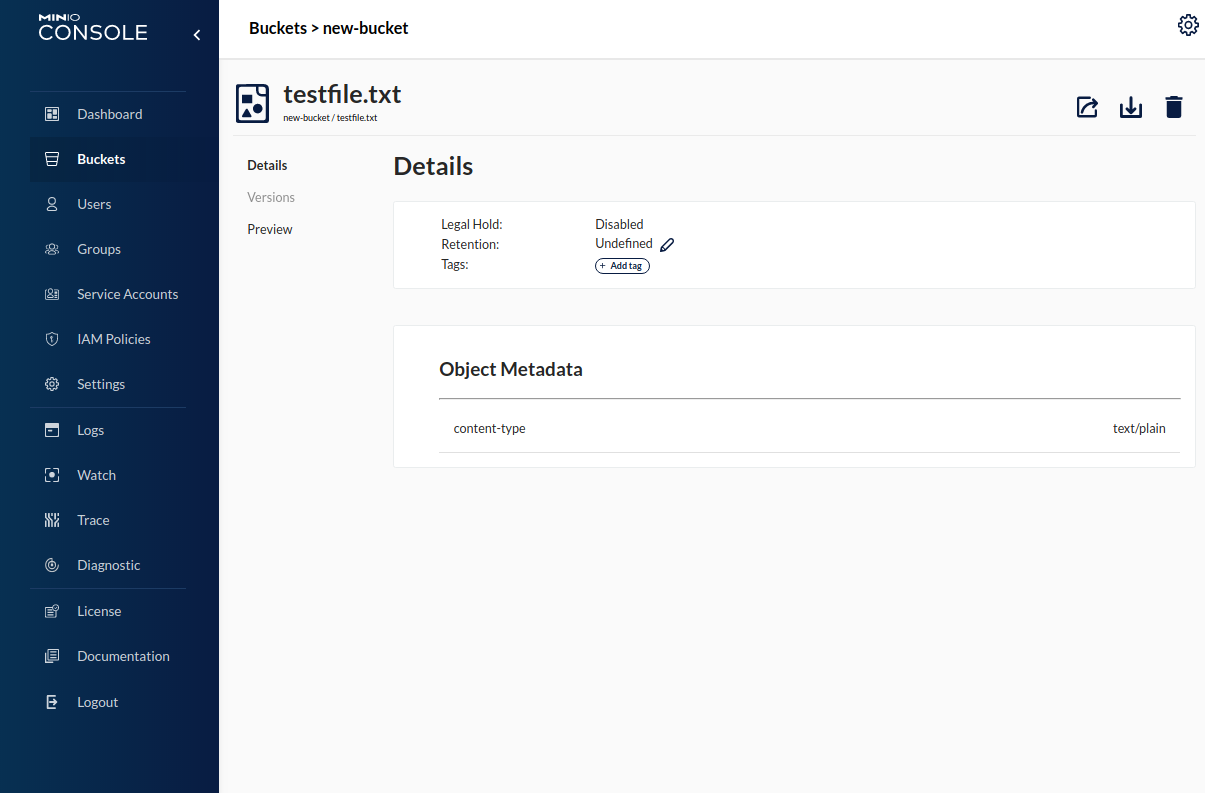
Here we can see the object's status as well as any metadata associated with it. We can view the object's contents by clicking the preview link on the left side of the details page.
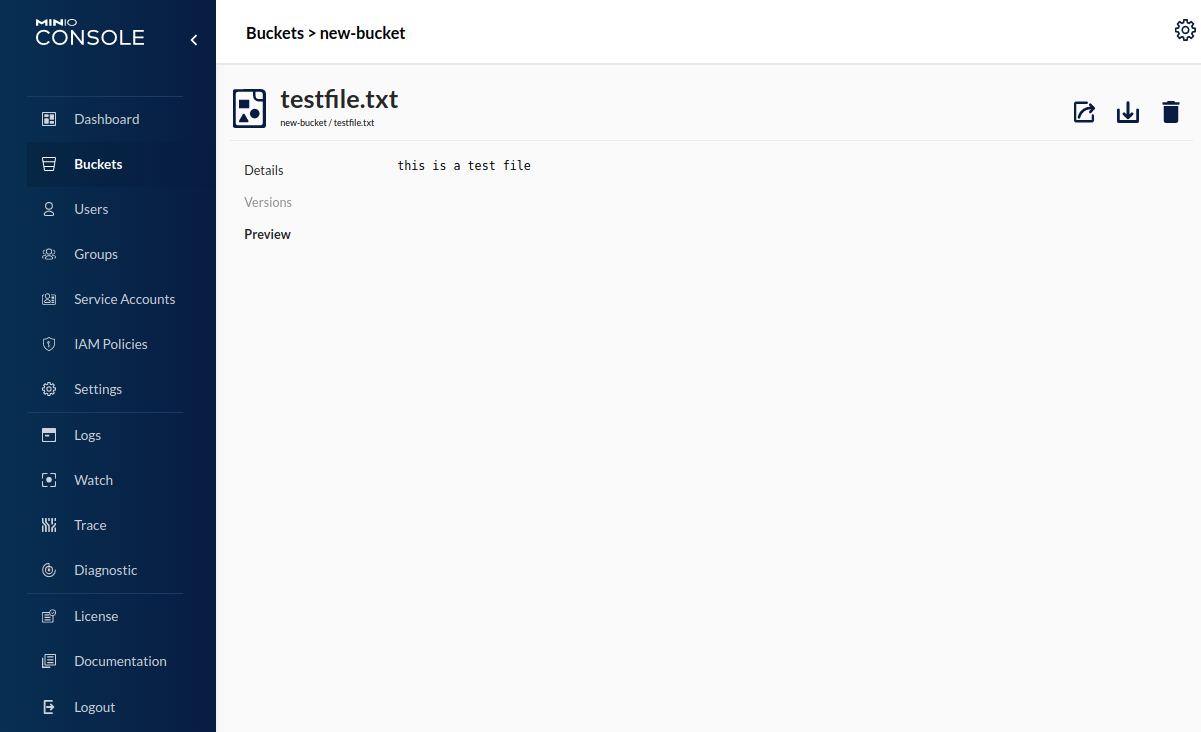
The preview displays the contents of the testfile.txt.
We have seen how we can create a bucket, upload an object to it, and then view its details, but you might be asking, "how can access the object without using the console"? Like Amazon S3, we can access it by its URL. Its URL is a combination of its protocol://host:port/bucket/object-name
Let's use curl to access this object.
curl http://localhost:9000/new-bucket/testfile.txt
Your output should look similar to the following:
Terminal
<?xml version="1.0" encoding="UTF-8"?>
<Error>
	<Code>AccessDenied</Code>
	<Message>Access Denied.</Message>
	<Key>testfile.txt</Key>
	<BucketName>new-bucket</BucketName>
	<Resource>/new-bucket/testfile.txt</Resource>
	<RequestId>16A9A2E76E37B659</RequestId>
	<HostId>c4dd75e8-ee1b-4bc4-a8a6-8315c1eed2c2</HostId>
</Error>

via MEME
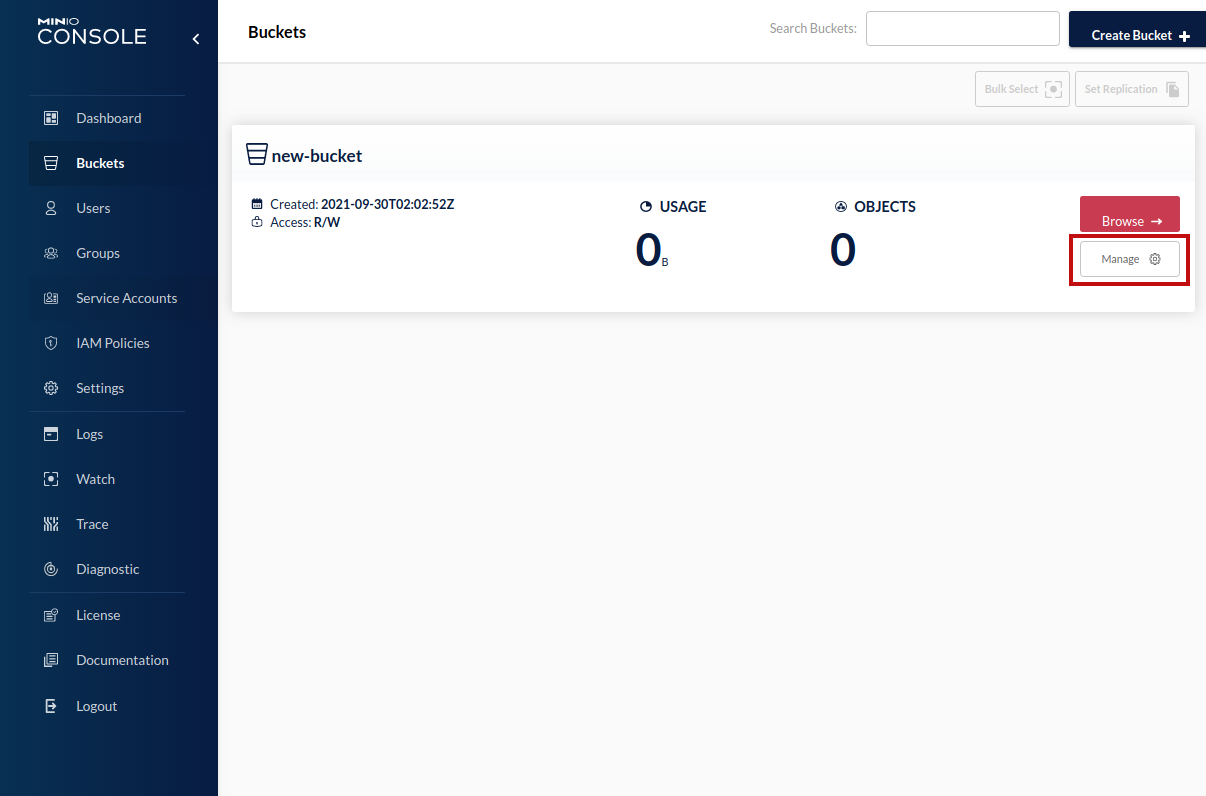
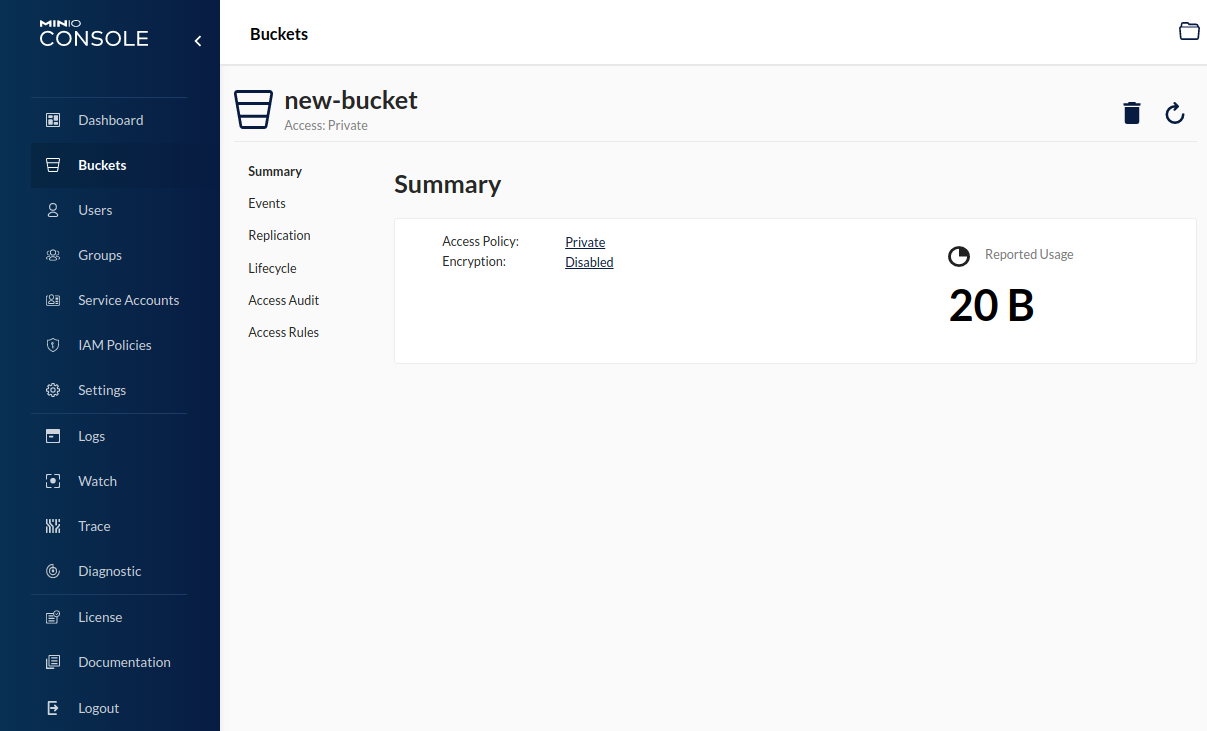
By default, when we create a new bucket, its Access Policy is set to Private. However, we must explicitly set the policy to Public if we want to make it directly accessible by URL. Fortunately, we can change the Access Policy from the Buckets page by clicking the bucket's Manage button.
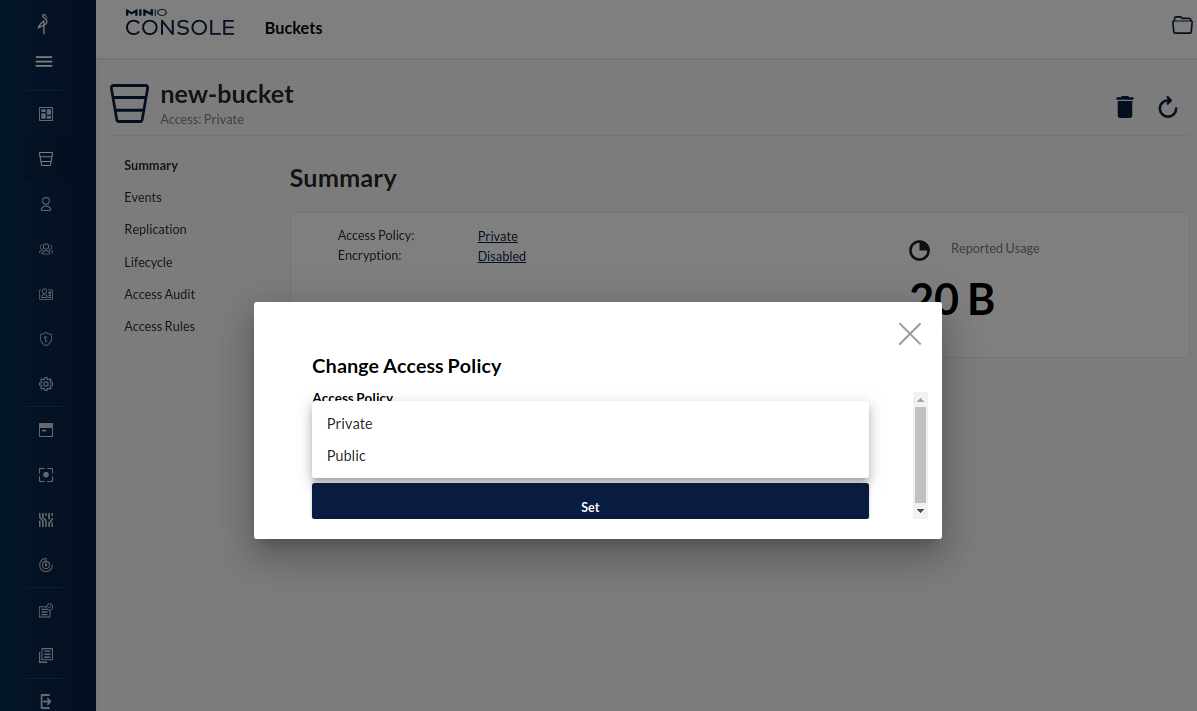
In the Summary, we see that the bucket's Access Policy is currently set to Private. Clicking the Private link will open the Change Access Policy dialog.
Clicking the Access Policy selector displays our possible options.
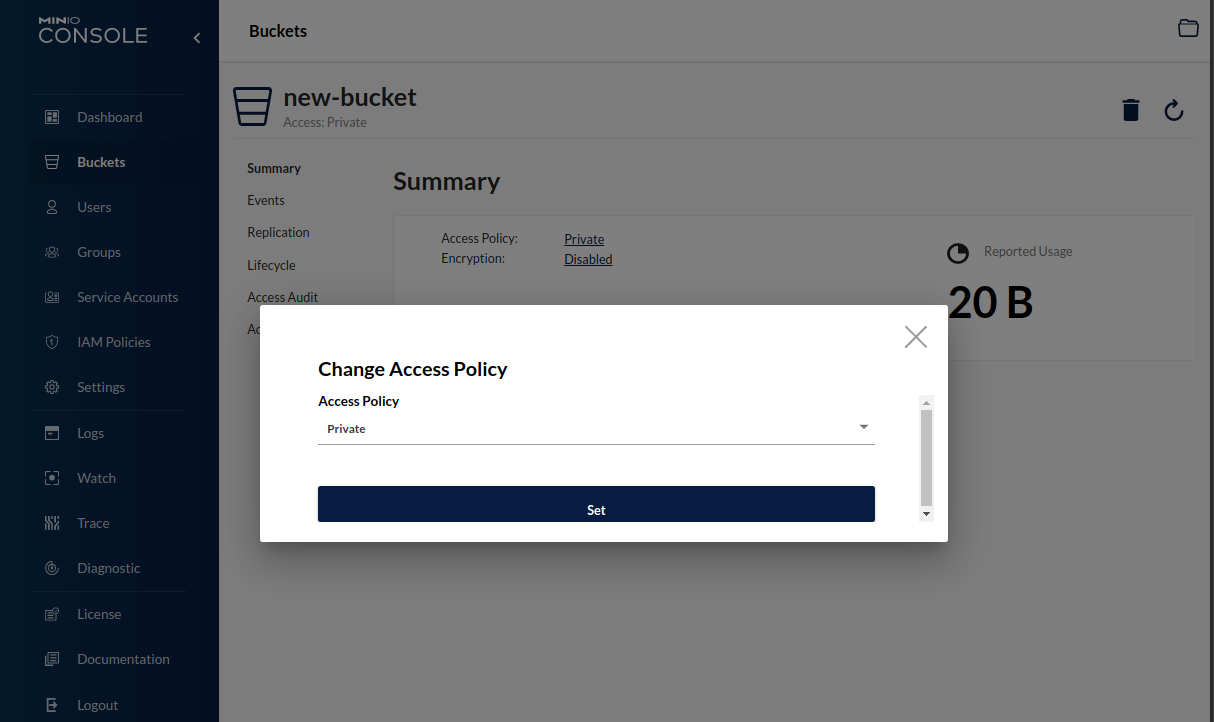
Selecting Public and clicking set will make this bucket publicly accessible. Now we can try accessing it again.
You can now access the object from curl with the same link ( http://localhost:9000/new-bucket/testfile.txt)
curl http://localhost:9000/new-bucket/testfile.txt
This time we will get the object's contents.
Terminal
this is a test file
Now that we know how to use MinIO's console, let's look at building a service that accesses our object store.
Storage Client service
We will demonstrate MinIO integration by building a Spring-Boot-based Storage Client service. This service will provide a REST interface to MinIO using the MinIO Java SDK. The service will expose the following features:- Get All Buckets.
- Create a Bucket.
- List Bucket contents.
- Delete a Bucket.
- Upload a File.
- Get a File.
- Delete a File.
Service Implementation
Configuration
loading...loading...Spring Service
We may want to support an object store other than S3/MinIO in the future so we will abstract our implementation behind a common service interface.Storage Service Interface
loading...Here we declare the bucket and object methods we expect from our storage service implementations.
Minio Storage Service Impl
loading...We first obtain our S3/MinIO connection information from our application properties. Then, we defer connection to the object store until the first method requiring the client is called. When needed, we call the getMinioClient method and check if the client has already been connected. If not, we call the MinioClient builder and return a new client.
REST Controller
We expose our storage service through a REST controller.loading...The controller is relatively straightforward, and most methods simply call the corresponding storage service interface method. However, the uploadFile method requires us to employ a MultipartFile instance to obtain the uploaded file from the request's form data.
Building the Jar
We can build the jar file with the following command:
mvn clean package
Container Image
While the project is currently built to leverage the Spring Native AOT generated executable and image, a known defect throws an exception at runtime and currently prevents us from using the native image executable and Docker image. Unfortunately, this is the cost of using beta releases from the Spring Projects Experimental repository.We can, however, still generate a container image the old-fashioned way. We will manually create a Dockerfile and call the Docker CLI. Here is a simple (non-optimized) Dockerfile to hold us over until the Spring Native issue is resolved.
loading...We can build the container with the following command:
docker build -t storage-client:latest .
Running the Container
We can run the StorageClient container with the following command:
docker run --network minio-net -p 8080:8080 storage-client:latest --minio.host.url=http://minio:9000
Note: we set the --minio.host.url environment variable with http://minio:9000 to override the default value of http://localhost:9000.
The output should look similar to:
Terminal
=================================================================
   _____ __                              _________            __
  / ___// /_____  _________ _____ ____  / ____/ (_)__  ____  / /_
  \__ \/ __/ __ \/ ___/ __ `/ __ `/ _ \/ /   / / / _ \/ __ \/ __/
 ___/ / /_/ /_/ / /  / /_/ / /_/ /  __/ /___/ / /  __/ / / / /_
/____/\__/\____/_/   \__,_/\__, /\___/\____/_/_/\___/_/ /_/\__/
                          /____/

Application: storage-client
    Version: (0.0.1-SNAPSHOT)

================================================================


2021-09-28 21:13:11.399  INFO 1 --- [           main] c.t.s.client.StorageClientApplication    : Starting StorageClientApplication v0.0.1-SNAPSHOT using Java 11.0.12 on ffd1bf8c875b with PID 1 (/app.jar started by root in /)
2021-09-28 21:13:11.404  INFO 1 --- [           main] c.t.s.client.StorageClientApplication    : No active profile set, falling back to default profiles: default
2021-09-28 21:13:13.957  INFO 1 --- [           main] o.s.b.w.embedded.tomcat.TomcatWebServer  : Tomcat initialized with port(s): 8080 (http)
2021-09-28 21:13:13.980  INFO 1 --- [           main] o.apache.catalina.core.StandardService   : Starting service [Tomcat]
2021-09-28 21:13:13.981  INFO 1 --- [           main] org.apache.catalina.core.StandardEngine  : Starting Servlet engine: [Apache Tomcat/9.0.53]
2021-09-28 21:13:14.089  INFO 1 --- [           main] o.a.c.c.C.[Tomcat].[localhost].[/]       : Initializing Spring embedded WebApplicationContext
2021-09-28 21:13:14.089  INFO 1 --- [           main] w.s.c.ServletWebServerApplicationContext : Root WebApplicationContext: initialization completed in 2522 ms
2021-09-28 21:13:14.231  INFO 1 --- [           main] c.t.s.c.s.minio.MinioStorageServiceImpl  : MinioStorageServiceImpl postConstruct
2021-09-28 21:13:14.235  INFO 1 --- [           main] c.t.s.c.s.minio.MinioStorageServiceImpl  : Uploaded files are temporarily stored in:/tmp
2021-09-28 21:13:15.034  INFO 1 --- [           main] o.s.b.w.embedded.tomcat.TomcatWebServer  : Tomcat started on port(s): 8080 (http) with context path ''
2021-09-28 21:13:15.072  INFO 1 --- [           main] c.t.s.client.StorageClientApplication    : Started StorageClientApplication in 4.993 seconds (JVM running for 6.048)
2021-09-28 21:13:25.506  INFO 1 --- [nio-8080-exec-1] o.a.c.c.C.[Tomcat].[localhost].[/]       : Initializing Spring DispatcherServlet 'dispatcherServlet'
2021-09-28 21:13:25.507  INFO 1 --- [nio-8080-exec-1] o.s.web.servlet.DispatcherServlet        : Initializing Servlet 'dispatcherServlet'
2021-09-28 21:13:25.509  INFO 1 --- [nio-8080-exec-1] o.s.web.servlet.DispatcherServlet        : Completed initialization in 2 ms
Exercising the Storage Client
With MinIO and StorageClient containers running, we are ready to exercise the StorageClient.Bucket List
We can get the current list of buckets using the following command:
curl http://localhost:8080/buckets
The output should be:
Terminal
[ {
  "name" : "new-bucket",
  "creationDate" : {
    "zonedDateTime" : "2021-09-29T02:02:52Z"
  }
} ]
We see the bucket we created from the console.
Create new bucket
Let's create another bucket service-bucket, this time from our service (like we did in the MinIO console) with the following command.
curl -X POST http://localhost:8080/buckets/service-bucket
We can verify that our new bucket was created by calling curl http://localhost:8080/buckets again.
curl http://localhost:8080/buckets
The output should be:
Terminal
[ {
  "name" : "new-bucket",
  "creationDate" : {
    "zonedDateTime" : "2021-09-29T02:02:52Z"
  }
}, {
  "name" : "service-bucket",
  "creationDate" : {
    "zonedDateTime" : "2021-09-29T02:02.404Z"
  }
} ]
We now see the bucket we created from the console ( new-bucket), and the bucket created by the service ( service-bucket).
Delete bucket
We can try to delete the bucket we created from the console using:
curl -X DELETE http://localhost:8080/buckets/new-bucket
The output should look like:
Terminal
com.thinkmicroservices.storage.client.service.StorageException: Can't remove [new-bucket], bucket is not empty
Doh! We can't delete a bucket unless it is empty. So let's look in the container and see what it contains.
List bucket contents
We can check the bucket's contents with the following command:
curl http://localhost:8080/new-bucket
The output should be similar to:
Terminal
[ {
  "etag" : "\"4221d002ceb5d3c9e9137e495ceaa647\"",
  "objectName" : "testfile.txt",
  "lastModified" : {
    "zonedDateTime" : "2021-10-01T12:39:20.128Z"
  },
  "owner" : {
    "id" : "02d6176db174dc93cb1b899f7c6078f08654445fe8cf1b6ce98d8855f66bdbf4",
    "displayName" : "minio"
  },
  "size" : 20,
  "storageClass" : "STANDARD",
  "isLatest" : false,
  "versionId" : null,
  "userMetadata" : null,
  "isDir" : false,
  "encodingType" : "url",
  "latest" : false,
  "dir" : false,
  "deleteMarker" : false
} ]
Well, that explains it. We still have the testfile.txt object we created in the console. Let's remove that now.
Delete Bucket Object
We can delete the bucket object using the following command:
curl -X DELETE http://localhost:8080/new-bucket/testfile.txt
Let's check that the object was deleted by getting the bucket listing again.
curl http://localhost:8080/new-bucket
The output is now:
[ ]
We have successfully removed the testfile.txt object in the bucket. Let's try to remove the bucket now.
Delete bucket- attempt #2
Now that we know the bucket is empty, let's try to delete it again.
curl -X DELETE http://localhost:8080/buckets/new-bucket
This time we don't receive an error. We can verify the bucket was deleted using the same command as before:
curl http://localhost:8080/buckets
Terminal
[ {
  "name" : "service-bucket",
  "creationDate" : {
    "zonedDateTime" : "2021-10-01T12:57:48.404Z"
  }
} ]
Now the list of buckets only contains the service-bucket we created.
Create new bucket object
We've seen how to create buckets and delete objects, let's put an object into our service-bucket. We will use the testfile.txt file again.
curl -F 'filename=@./testfile.txt' http://localhost:8080/service-bucket
The output should be:
Terminal
{
  "key" : "testfile.txt"
}
In the next , we will verify that it did indeed upload by attempting to retrieve it.
Get Bucket Object
curl http://localhost:8080/service-bucket/testfile.txt
The ouput should be:
this is a test file
We have successfully demonstrated how to duplicate the MinIO console functionality from our Spring service.
But why stop there? Let's deploy MinIO to Kubernetes.
MinIO on Kubernetes
In addition to providing a high-performance, S3-compatible object store, MinIO provides a multi-tenant Kubernetes operator to make it easier to run it on public and private clouds.
We will install the MinIO operator on the same MicroK8s instance we have been using in past articles.
Microk8s add-ons
If you don't already have the following add-ons enabled, enable them now.Krew
Before installing the MinIO operator, we will first install Krew. Krew is a kubectl plugin that acts as a plugin manager for kubect. We will use Krew to install our MinIO operator.
Installing Krew
Before installing Krew, ensure that you have Git installed in your local environment.To download and install Krew, run the following command:
Terminal
(
  set -x; cd "$(mktemp -d)" &&
  OS="$(uname | tr '[:upper:]' '[:lower:]')" &&
  ARCH="$(uname -m | sed -e 's/x86_64/amd64/' -e 's/\(arm\)\(64\)\?.*/\1\2/' -e 's/aarch64$/arm64/')" &&
  curl -fsSLO "https://github.com/kubernetes-sigs/krew/releases/latest/download/krew.tar.gz" &&
  tar zxvf krew.tar.gz &&
  KREW=./krew-"${OS}_${ARCH}" &&
  "$KREW" install krew
)
Now export the following PATH environment variable to your .bashrc file:
export PATH="${KREW_ROOT:-$HOME/.krew}/bin:$PATH"
Once added, you will need to restart your shell.
We can verify Krew installed correctly with the following command:
microk8s kubectl krew
The output should appear similar to the following:
Terminal
krew is the kubectl plugin manager.
You can invoke krew through kubectl: "kubectl krew [command]..."

Usage:
  kubectl krew [command]

Available Commands:
  help        Help about any command
  index       Manage custom plugin indexes
  info        Show information about an available plugin
  install     Install kubectl plugins
  list        List installed kubectl plugins
  search      Discover kubectl plugins
  uninstall   Uninstall plugins
  update      Update the local copy of the plugin index
  upgrade     Upgrade installed plugins to newer versions
  version     Show krew version and diagnostics

Flags:
  -h, --help      help for krew
  -v, --v Level   number for the log level verbosity

Use "kubectl krew [command] --help" for more information about a command.
We can get the installed version with:
microk8s kubectl krew version
and get:
Terminal
OPTION            VALUE
GitTag            v0.4.1
GitCommit         ffa2933
IndexURI          https://github.com/kubernetes-sigs/krew-index.git
BasePath          /home/workspace/.krew
IndexPath         /home/workspace/.krew/index/default
InstallPath       /home/workspace/.krew/store
BinPath           /home/workspace/.krew/bin
DetectedPlatform  linux/amd64
Now that we have Krew installed let's make sure we have the lates tlist of plugins.
microk8s kubectl krew update
The output should be:
Updated the local copy of plugin index.
Let's search for MinIO:
microk8s kubectl krew search minio
The output should be:
Terminal
NAME   DESCRIPTION                                     INSTALLED
minio  Deploy and manage MinIO Operator and Tenant(s)  yes
With Krew successfully installed, we can install the MinIO operator.
Installing The Minio operator
You have probably guessed the first step to installing the MinIO operator. If not, here it is:
microk8s kubectl krew install minio
The output should be:
Terminal
Updated the local copy of plugin index.
Installing plugin: minio
Installed plugin: minio
\
 | Use this plugin:
 |  kubectl minio
 | Documentation:
 |  https://github.com/minio/operator/tree/master/kubectl-minio
 | Caveats:
 | \
 |  | * For resources that are not in default namespace, currently you must
 |  |   specify -n/--namespace explicitly (the current namespace setting is not
 |  |   yet used).
 | /
/
WARNING: You installed plugin "minio" from the krew-index plugin repository.
   These plugins are not audited for security by the Krew maintainers.
   Run them at your own risk.
We will now generate a yaml file to initialize the operator:
microk8s kubectl minio init --output > minio-init.yaml
The yaml file created is too large to include , but you can cat the minio-init.yaml file to see its contents.
Now lets apply the minio-init.yaml file:
microk8s kubectl apply -f minio-init.yaml
You should see the following:
Terminal
namespace/minio-operator created
serviceaccount/minio-operator created
clusterrole.rbac.authorization.k8s.io/minio-operator-role created
clusterrolebinding.rbac.authorization.k8s.io/minio-operator-binding created
customresourcedefinition.apiextensions.k8s.io/tenants.minio.min.io created
service/operator created
deployment.apps/minio-operator created
serviceaccount/console-sa created
clusterrole.rbac.authorization.k8s.io/console-sa-role created
clusterrolebinding.rbac.authorization.k8s.io/console-sa-binding created
configmap/console-env created
service/console created
deployment.apps/console created
With the MinIO operator installed, we can now create a Minio tenant.
Create a Tenent
Before we can use our MinIO operator, we must first create a tenant that will house our objects. Let's start by creating a new namespace.
microk8s kubectl create ns example
The output should be:
microk8s kubectl create ns example
Now let's create the tenant. The following YAML will provision our tenant with a pool of 4, 10Gig persistent volumes.
Terminal
## MinIO Root Credentials secret
apiVersion: v1
kind: Secret
metadata:
  namespace: example
  name: minio-autocert-no-encryption-minio-creds-secret
type: Opaque
data:
  ## Tenant base64 access key (minio-tenant-access-key)
  accesskey: bWluaW8tdGVuYW50LWFjY2Vzcy1rZXk=
  ## Tenant base64 secret key (minio-tenant-secret-key)
  secretkey: bWluaW8tdGVuYW50LXNlY3JldC1rZXk=
---
##  MinIO Console secret
apiVersion: v1
kind: Secret
metadata:
  namespace: example # your namespace here
  name: minio-autocert-no-encryption-console-secret
type: Opaque
data:
  ## Passphrase to encrypt jwt payload, base64 encoded (echo -n 'SECRET' | base64)
  CONSOLE_PBKDF_PASSPHRASE: U0VDUkVU
  ## Salt to encrypt jwt payload, base64 encoded (echo -n 'SECRET' | base64)
  CONSOLE_PBKDF_SALT: U0VDUkVU
  ## MinIO User Access Key (used for Console Login), base64 encoded (echo -n 'YOURCONSOLEACCESS' | base64)
  CONSOLE_ACCESS_KEY: WU9VUkNPTlNPTEVBQ0NFU1M=
  ## MinIO User Secret Key (used for Console Login), base64 encoded (echo -n 'YOURCONSOLESECRET' | base64)
  CONSOLE_SECRET_KEY: WU9VUkNPTlNPTEVTRUNSRVQ=
---
## MinIO Tenant Definition
apiVersion: minio.min.io/v2
kind: Tenant
metadata:
  namespace: example
  name: minio-autocert-no-encryption
  ## Optionally pass labels to be applied to the statefulset pods
  labels:
    app: minio-autocert-no-encryption-minio
  ## Annotations for MinIO Tenant Pods
  annotations:
    prometheus.io/path: /minio/v2/metrics/cluster
    prometheus.io/port: "9000"
    prometheus.io/scrape: "true"


spec:
  ## Registry location and Tag to download MinIO Server image
  image: minio/minio:RELEASE.2021-08-17T20-53-08Z
  imagePullPolicy: IfNotPresent

  ## Secret with credentials to be used by MinIO Tenant.
  ## Refers to the secret object created above.
  credsSecret:
    name: minio-autocert-no-encryption-minio-creds-secret

  ## Specification for MinIO Pool(s) in this Tenant.
  pools:
    - servers: 1
      volumesPerServer: 4
      volumeClaimTemplate:
        metadata:
          name: data
        spec:
          accessModes:
            - ReadWriteOnce
          resources:
            requests:
              storage: 10Gi # your storage here
  ## Mount path where PV will be mounted inside container(s).
  mountPath: /data
    ## Sub path inside Mount path where MinIO stores data.
    # subPath: /data

  ## Enable automatic Kubernetes based certificate generation and signing as explained in
  ## https://kubernetes.io/docs/tasks/tls/managing-tls-in-a-cluster
  requestAutoCert: false

  ## This field is used only when "requestAutoCert" is set to true. Use this field to set CommonName
  ## for the auto-generated certificate. Internal DNS name for the pod will be used if CommonName is
  ## not provided. DNS name format is *.minio.default.svc.cluster.local
  certConfig:
    commonName: ""
    organizationName: []
    dnsNames: []

  ## PodManagement policy for MinIO Tenant Pods. Can be "OrderedReady" or "Parallel"
  ## Refer https://kubernetes.io/docs/tutorials/stateful-application/basic-stateful-set/#pod-management-policy
  ## for details.
  podManagementPolicy: Parallel
Copy the yaml to a local file named minio-tenant.yaml and issue the following command:
microk8s kubectl apply -f minio-tenant.yaml
The output should appear similar to the following:
Terminal
secret/minio-autocert-no-encryption-minio-creds-secret created
secret/minio-autocert-no-encryption-console-secret created
tenant.minio.min.io/minio-autocert-no-encryption created
Let's verify everything started with the following command.
microk8s kubectl get all --namespace example
If everything started, you should see something similar to:
Terminal
NAME READY STATUS RESTARTS AGE pod/minio-autocert-no-encryption-ss-0-0 1/1 Running 0 3m NAME TYPE CLUSTER-IP EXTERNAL-IP PORT(S) AGE service/minio ClusterIP 10.152.183.14180/TCP 3m2s service/minio-autocert-no-encryption-console ClusterIP 10.152.183.100 9090/TCP 3m2s service/minio-autocert-no-encryption-hl ClusterIP None 9000/TCP 3m1s NAME READY AGE statefulset.apps/minio-autocert-no-encryption-ss-0 1/1 3m
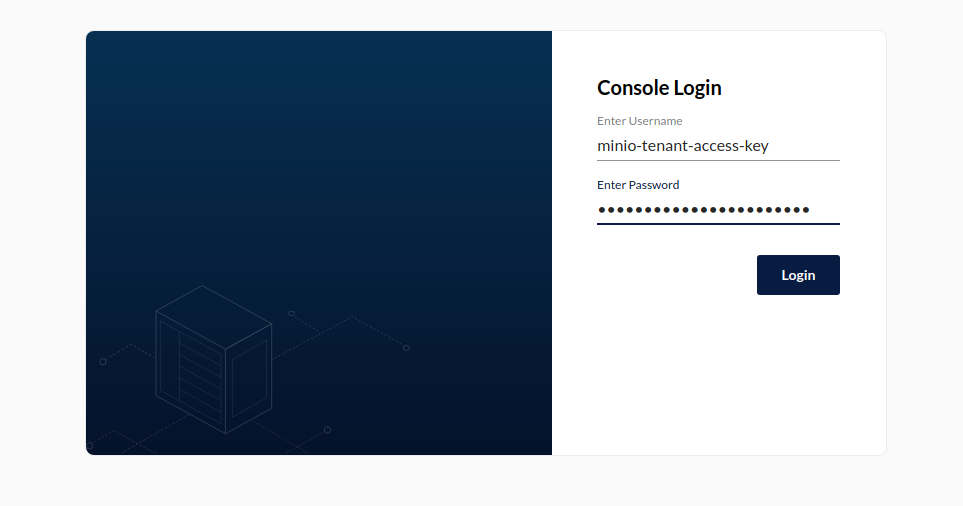
We see that our tenant pod ( pod/minio-autocert-no-encryption-ss-0-0) is running, and several services were created. We are primarily interested in the service/minio-autocert-no-encryption-console service which in our instance is exposed on address 10.152.183.100 and port 9090 If we open up a browser and navigate to http://10.152.183.100:9090, we should see the familiar MinIO console login screen.
To log on, we supply it with the credentials we declared in the minio-tenant.yaml.
| Username | minio-tenant-access-key |
| Password | minio-tenant-secret-key |
Once authenticated, the MinIO Console Dashboard is displayed.
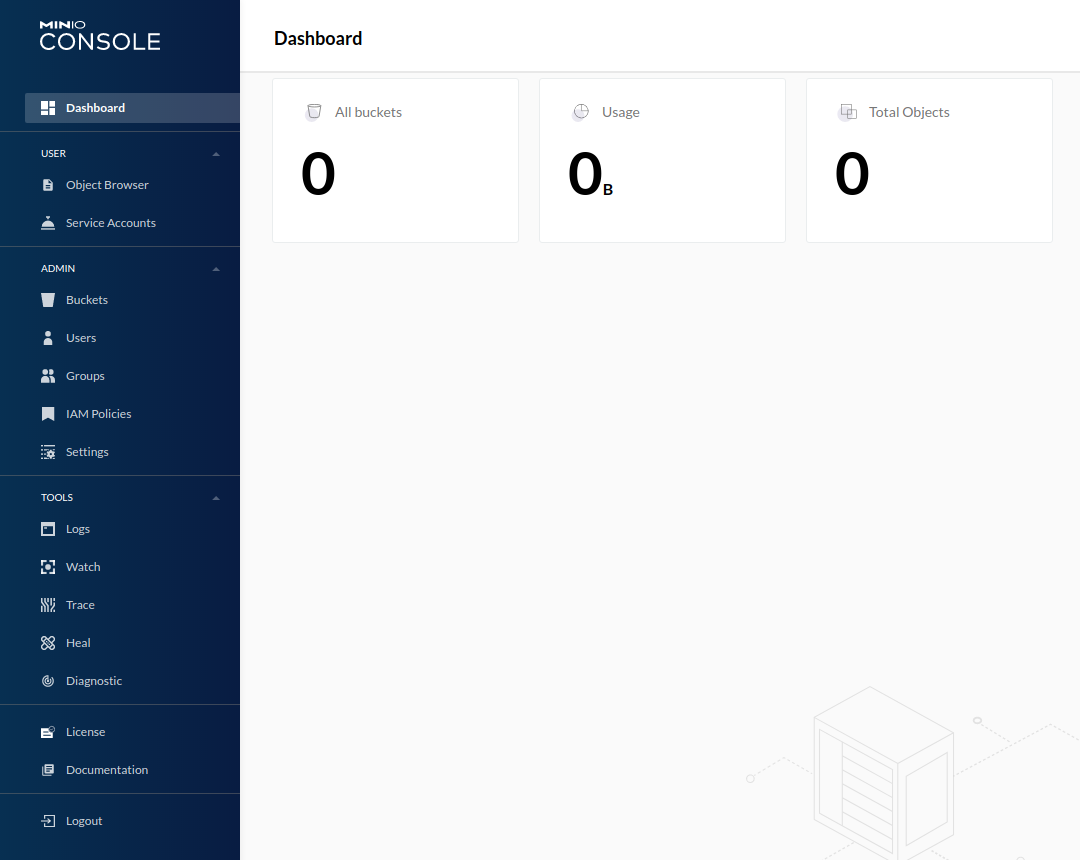
Here we see the new tenant instance we just created.
Persistent Storage
You may be wondering where the tenant stores its data? Unlike the earlier Docker instance, The MinIO operator takes advantage of Kubernetes/Microk8s PersistentVolume subsystem to abstract the storage details. It is composed of two parts, Persistent Volumes, and Persistent Volume Claims.Persistent Volumes
In the minio-tenant.yaml executed previously, we requested a set of four PersistentVolumes be created.we can view these by querying our Microk8s instance with the following command:
microk8s kubectl get pv --namespace example
This command will retrieve the tentants Persistent Volumes.
Terminal
NAME                                       CAPACITY   ACCESS MODES   RECLAIM POLICY   STATUS   CLAIM                                               STORAGECLASS        REASON   AGE
pvc-e2daa35c-713e-42b5-9e8f-bb9972445c41   10Gi       RWO            Delete           Bound    example/data0-minio-autocert-no-encryption-ss-0-0   microk8s-hostpath            9m
pvc-a574546f-088f-4a37-81c1-196b79d5fc6d   10Gi       RWO            Delete           Bound    example/data1-minio-autocert-no-encryption-ss-0-0   microk8s-hostpath            9m
pvc-27132db3-9c83-4a6f-a76b-f45a807aad0e   10Gi       RWO            Delete           Bound    example/data2-minio-autocert-no-encryption-ss-0-0   microk8s-hostpath            9m
pvc-d2b2c0ce-5e2e-4bdf-9d39-c1594759ac2d   10Gi       RWO            Delete           Bound    example/data3-minio-autocert-no-encryption-ss-0-0   microk8s-hostpath            9m
We can obtain finer detail for each with the following command by substituting the persistent volume name:
microk8s kubectl get pv -o yaml --namespace example pvc-e2daa35c-713e-42b5-9e8f-bb9972445c41
We will get output similar to:
Terminal
apiVersion: v1
kind: PersistentVolume
metadata:
  annotations:
    hostPathProvisionerIdentity: ubuntu-vm
    pv.kubernetes.io/provisioned-by: microk8s.io/hostpath
  creationTimestamp: "2021-11-05T17:51:45Z"
  finalizers:
  - kubernetes.io/pv-protection
  name: pvc-e2daa35c-713e-42b5-9e8f-bb9972445c41
  resourceVersion: "2123"
  selfLink: /api/v1/persistentvolumes/pvc-e2daa35c-713e-42b5-9e8f-bb9972445c41
  uid: e46abf68-d0c9-4a26-a8ef-16b9ed57756d
spec:
  accessModes:
  - ReadWriteOnce
  capacity:
    storage: 10Gi
  claimRef:
    apiVersion: v1
    kind: PersistentVolumeClaim
    name: data0-minio-autocert-no-encryption-ss-0-0
    namespace: example
    resourceVersion: "2079"
    uid: e2daa35c-713e-42b5-9e8f-bb9972445c41
  hostPath:
    path: /var/snap/microk8s/common/default-storage/example-data0-minio-autocert-no-encryption-ss-0-0-pvc-e2daa35c-713e-42b5-9e8f-bb9972445c41
    type: ""
  persistentVolumeReclaimPolicy: Delete
  storageClassName: microk8s-hostpath
  volumeMode: Filesystem
status:
  phase: Bound
Persistent Volume Claims
A PersistentVolumeClaim is a request for storage by a user (in this case, MinIO). The claim allows us to specify the size and access modes (e.g., ReadWriteOnce, ReadOnlyMany or ReadWriteMany, see AccessModes) for our storage.We can view the tenant's PersistentVolumeClaims using the following command:
microk8s kubectl get pvc --namespace example
This command will retrieve the tentants Persistent Volume Claims. It should appear similar to this:
Terminal
NAME                                        STATUS   VOLUME                                     CAPACITY   ACCESS MODES   STORAGECLASS        AGE
data0-minio-autocert-no-encryption-ss-0-0   Bound    pvc-e2daa35c-713e-42b5-9e8f-bb9972445c41   10Gi       RWO            microk8s-hostpath   9m
data1-minio-autocert-no-encryption-ss-0-0   Bound    pvc-a574546f-088f-4a37-81c1-196b79d5fc6d   10Gi       RWO            microk8s-hostpath   9m
data2-minio-autocert-no-encryption-ss-0-0   Bound    pvc-27132db3-9c83-4a6f-a76b-f45a807aad0e   10Gi       RWO            microk8s-hostpath   9m
data3-minio-autocert-no-encryption-ss-0-0   Bound    pvc-d2b2c0ce-5e2e-4bdf-9d39-c1594759ac2d   10Gi       RWO            microk8s-hostpath   9m
We can obtain finer detail for the peristent claim with the following (substituting the persistant volume claim name):
microk8s kubectl get pvc -o yaml --n example data0-minio-autocert-no-encryption-ss-0-0
The output should be similar to:
Terminal
apiVersion: v1
kind: PersistentVolumeClaim
metadata:
  annotations:
    control-plane.alpha.kubernetes.io/leader: '{"holderIdentity":"821cf2d8-3e5e-11ec-891a-c26de80b5f1e","leaseDurationSeconds":15,"acquireTime":"2021-11-05T17:51:43Z","renewTime":"2021-11-05T17:51:46Z","leaderTransitions":0}'
    pv.kubernetes.io/bind-completed: "yes"
    pv.kubernetes.io/bound-by-controller: "yes"
    volume.beta.kubernetes.io/storage-provisioner: microk8s.io/hostpath
  creationTimestamp: "2021-11-05T17:51:43Z"
  finalizers:
  - kubernetes.io/pvc-protection
  labels:
    v1.min.io/console: minio-autocert-no-encryption-console
    v1.min.io/pool: ss-0
    v1.min.io/tenant: minio-autocert-no-encryption
  name: data0-minio-autocert-no-encryption-ss-0-0
  namespace: example
  resourceVersion: "2144"
  selfLink: /api/v1/namespaces/example/persistentvolumeclaims/data0-minio-autocert-no-encryption-ss-0-0
  uid: e2daa35c-713e-42b5-9e8f-bb9972445c41
spec:
  accessModes:
  - ReadWriteOnce
  resources:
    requests:
      storage: 10Gi
  storageClassName: microk8s-hostpath
  volumeMode: Filesystem
  volumeName: pvc-e2daa35c-713e-42b5-9e8f-bb9972445c41
status:
  accessModes:
  - ReadWriteOnce
  capacity:
    storage: 10Gi
  phase: Bound
Summary
MinIO provides us with a tool to supplement or replace Amazon S3 object stores. We have seen that both the Docker-ized, and Kubernete-ized instances are ridiculously easy to provision and use. We have also seen that with the use of MinIO Java SDK, integrating MinIO with Spring Boot services is relatively pain-less.Resources
- MinIO website.
- MinIO documentation.
- MinIO Java SDK.
- MinIO Docker Hub repo
- MinIO operator Github repo.
- krew kubctl plugin manager
- Storage Client Service Github repo.

Twitter
Facebook
Reddit
LinkedIn
Email