
The Stateless storage problem - Caching
In the previous article, we looked at how we can store persistent file data in an object-store ( Minio). In session-based systems, it is common to store data between requests. Unfortunately, in microservice architectures, we can't depend on subsequent requests being processed by the same instance. Hence, we need an alternative approach. In this article, we look at storing data in an external object-cache, specifically, Redis.What is a cache?
A
cache is a hardware or software component that stores data so that future requests for that data can be served faster; the data stored in a cache might be the result of an earlier computation or a copy of data stored elsewhere.
With caching, we expand our focus beyond simply persisting data to performance. Specifically, our focus is on reducing the performance impact of reading and writing data to a database on our application.
Cache Performance
Most caches provide their performance benefits by keeping their data in memory. This approach avoids the aggregate performance penalty imposed by a database engine's query overhead and slower persistent storage access. However, there is no such thing as a free lunch ( TINSTAAFL). Cache memory is orders of magnitude smaller than database storage. Therefore, we should avoid wasting cache memory and only cache data frequently used and sourced from an existing, slower-performing data source.Hit & Miss
When we request an object from a cache, it will either return a value if the cache contains the requested key (a cache-hit), or we get back a null response( cache-miss). When we encounter a cache-miss, we are forced to retrieve the requested value, usually from a significantly slower source.Cache Cleanup
Caches are finite in size. Therefore, we must periodically clean up the cache's contents. Optimally, a cache should only contain frequently used objects. However, over time, the contents of a cache change. These changes generally correspond to who and how users are interacting with the application. So, how do the infrequently used items get deleted?Cache Replacement policies
We generally refer to the automatic deletion of cache objects as eviction. We can employ various cache replacement policies to accomplish eviction. While there are many eviction strategies, here are several that are commonly used:- Least Recently Used (LRU)- as its name implies, the cache must track how frequently every object is accessed relative to other elements.
- Time aware Least Recently Used (TLRU)- This strategy enhances the LRU with a Time-To-Use value (TTU). If the object's (TTU) has expired, the object will be evicted.
- Least Frequently Used (LFU)- The Least Frequently used scheme counts each object's access and evicts those requested the least.
- LFU with Dynamic Aging (LFUDA)- With LFUDA, we add a cache age factor to each object's reference count.This approach increases the number of candidates for eviction and reduces the cache size quicker.
Caching Strategies
When implementing caching, we have several different strategies to choose from:cache-aside
In the cache-aside strategy, The application directly communicates with the cache and the database to find the requested information. The application checks the cache first. If the information is found ( cache hit), it is returned to the client. If the data isn't in the cache ( cache-miss), the application queries the database for data. After reading the data from the database, we store it in the cache and return a copy to the caller.Cache-aside is often used for read-heavy scenarios and can significantly increase throughput while reducing database load. It is also resilient. If the cache server is unreachable, the application bypasses the cache and goes directly to the database
write-through
The write-through strategy places the cache between the application and the database. All data is written to the cache first to make it immediately available to subsequent calls. Once written to the cache, it is then written to the database. This approach increases cache availability at the cost of increased database write latencyread-through
The mirror twin of the write-through strategy is the read-through strategy. Again, the cache exists between the application and the database. When a read returns a cache miss, the data is retrieved from the database and is added to the cache. The strategy is often paired with the write-through cache to ensure data consistency.As expected, the downside to this strategy is the additional latency incurred by a cache miss.
write-back
The write-back strategy (A.K.A write-behind) is often used in write-heavy scenarios. In this strategy, data is written to the cache and queued for asynchronous writes to the database. This approach increases write performance and is often paired with a read-through cache.write-around
In the write-around strategy, data is only written to the database. It is usually paired with the cache-aside or read-through strategy which only populates the cache after a cache-miss. This approach is often used when data is written once and rarely read.Cache Peristence
In general, the performance benefits of caching are derived from the fact that we are storing data in memory. However, when the cache server goes down, we lose the data that has been stored in memory. On cache restart, we have an empty cache. We must either incur the initial performance penalty of repopulating the cache after a cache-miss, or provide a mechanism that repopulates the cache on startup. Many cache providers supply a custom persistence mechanism to address this (e.g., Redis). These mechanisms return the cache contents to the last known state prior to shutdown. However, this approach can introduce data inconsistencies if you are not using read-through/write-through caching strategies.Redis
Redis is an open-source, in-memory data store. Its name is a contraction of Remote Dictionary Server. Here, the term Dictionary is best understood with its data structure definition: an object containing a set of key-value pairs. Beyond caching, Redis can also be used as a database, a streaming-engine, and a message broker. In this article, we will be focusing on its use as a cache.Getting started with Redis
You can install Redis locally; however, for consistency, we will use a Docker-ized version to simplify the process.Docker-ized Redis
To start our Redis instance, we simply issue the following command:
docker run --name my-redis -p 6379:6379 -d redis
This command will pull the official Redis instance from Docker Hub and spin up our Redis instance.
REDIS-CLI
We can test our Redis instance by starting a new interactive session with our docker container using the following command:
docker exec -it my-redis sh
This command will give us access to the interactive shell. From the shell we can call the built-in Redis Command Line Interface (CLI). The Redis CLI provides us with a terminal client to our Redis instance. To run the Redis CLI from the interactive terminal inside our Redis container, we use the following command :
redis-cli
Your shell should now display something similar to:
127.0.0.1:6379>
We can ping our server using the Redis CLI with the following command:
127.0.0.1:6379>ping
You should receive the following response:
PONG
With our Redis instance working, we can try inserting key-value pairs in the cache. To do this, we use the Redis CLI command Set KEY_NAME VALUE, where KEY_NAME and VALUE are both character strings.
SET key1 "Redis works!"
If everything worked, Redis should respond with an OK.
SET key1 "Redis works!" OK
We can now use the corresponding GET KEY_NAME command to retrieve our cached element:
127.0.0.1:6379> GET key1
Redis should respond with:
"Redis works!"
Creating a Caching service
Now that we have a basic understanding of Redis, we will create a Spring Boot-based, Redis-backed caching service that supports the caching of Account entities. The service will be configured to support Swagger to generate a user interface for the service.Let's take a look at the code:
Maven Project File
loading...We start by including the Spring Boot web starter to provide the basic Spring REST goodness. We also add Spring's support for Redis, which requires a Redis implementation. Next we use the jedis dependency to provide client access. We also include Lombok to minimize some of the usual boilerplate code. The last dependency of note is the Springfox dependencies. These allow us to provide Swagger support to our REST endpoint.
Configuration properties
We externalize the caching services' configuration with the following application properties file.loading...Properties of note:
- redis.cluster.enabled-When true enables clustering within the service.
- redis.cluster.nodes-provides a comma-separated list of nodes when using clustered Redis.
Caching Service Application
Caching Service application entry point.loading...Redis Configuration
We need to create a connection factory bean and template bean to communicate with Redis. This class creates a JedisConnectionFactory and RedisTemplate using the externalized application properties.loading...Swagger Configuration
To enable Swagger, we need to supply a Docket bean. This class provides the necessary configuration.loading...Account Model
This class defines the Account object that the service will be caching.loading...The class leverages Lombok's to provide accessor/mutator pairs ( @Data) for each private member variable and constructor implementations ( @AllArgsConstructor, @NoArgsConstructor). Lastly, we use Spring's @RedisHash annotation and the key( id) for creating the actual key used to persist the object.
Account Repository
The account repository wraps our RedisTemplate in a data access object.loading...Account Cache Service
Here we define the interface that the cache service will expose to our REST endpoint.loading...Redis Cache Service Implementation
Here we implement the Account Cache Service interface contract with a Redis Implementation.loading...Account Controller
Finally, the AccountController class provides a REST endpoint to our cache service.loading...Building the Caching Service project
We build the application using the Spring Boot build-image Maven target.
mvn spring-boot:build-image
Maven will build and package the caching service as a runnable jar file, and a Docker image.
Running the CachingService & Redis
We have two ways of running the Caching Service. We can use a single Redis instance build a cluster of Redis instances. The following docker-compose files demonstrate both configurationsCaching Service with standalone Redis
The following docker-compose file will configure and start a single instance of the CachingService and Redis.loading...To run a single instance of Redis, we can use the following command:
docker-compose -f caching-redis-cluster.yaml up
Caching Service with Redis Cluster
This docker-compose file will configure and start a single instance of the CachingService and a cluster of six Redis instances.loading...To run a cluster of Redis instances, we can use the following command:
docker-compose -f caching-redis-cluster.yaml up
Note: use the docker-compose -f
Swagger
With our caching service and Redis instance running, we can begin exercising our REST endpoint. As mentioned earlier, the caching service includes a Swagger endpoint. You can view it in your browser by navigating to http://localhost:9090/swagger-ui/index.html.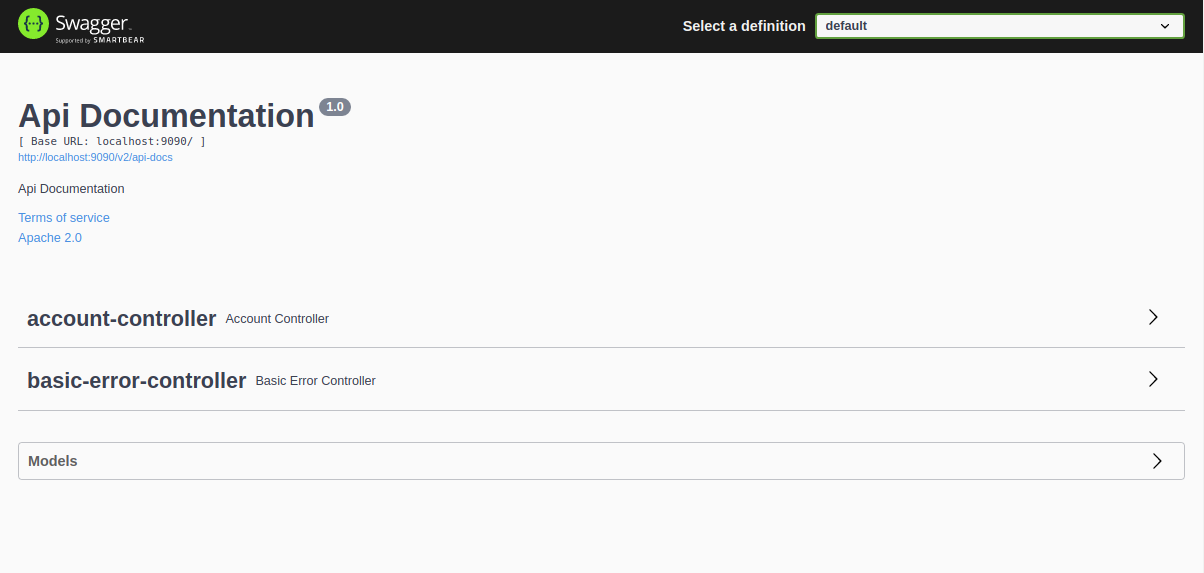
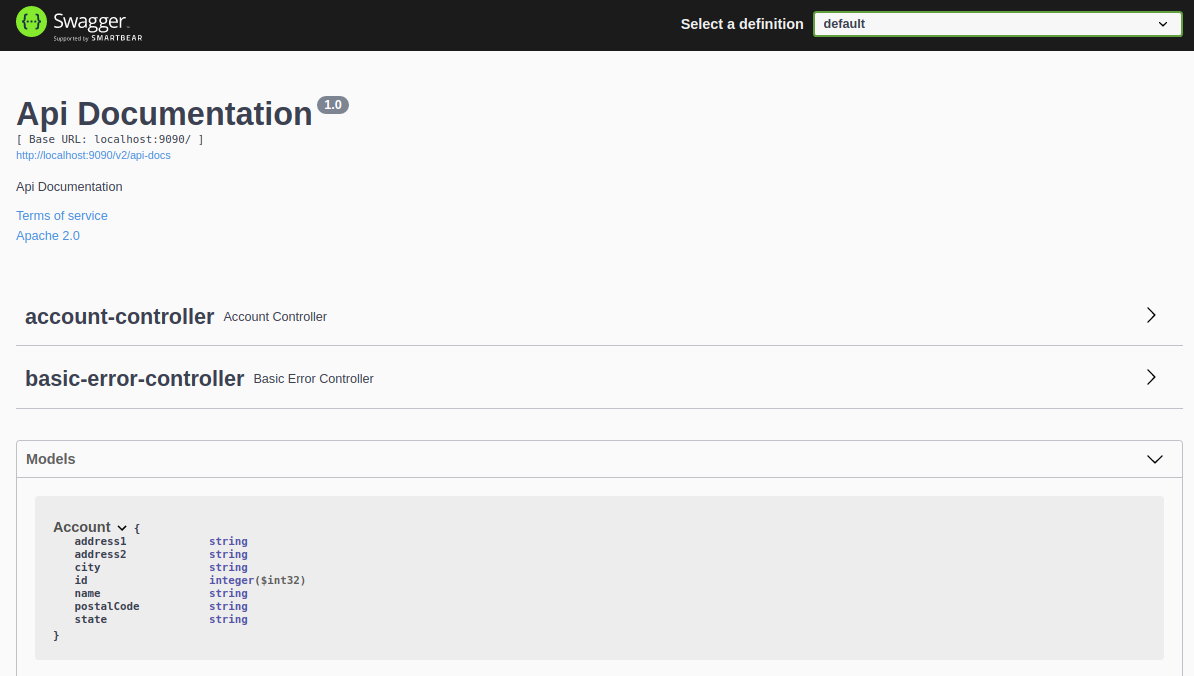
The page displays the service's controllers and a set of models. We can click on each to view their details. Expand the Models section and then the Account model to view it.
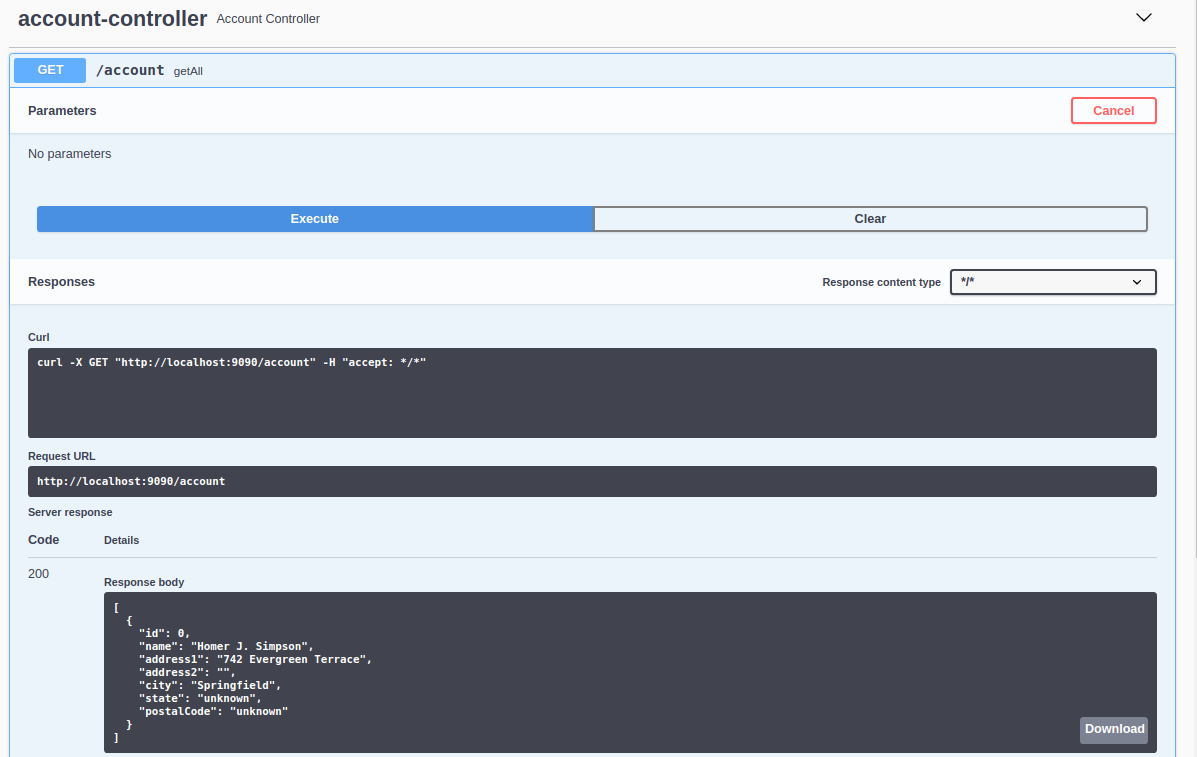
We can use the Swagger interface to interact with the caching service by expanding the account controller.
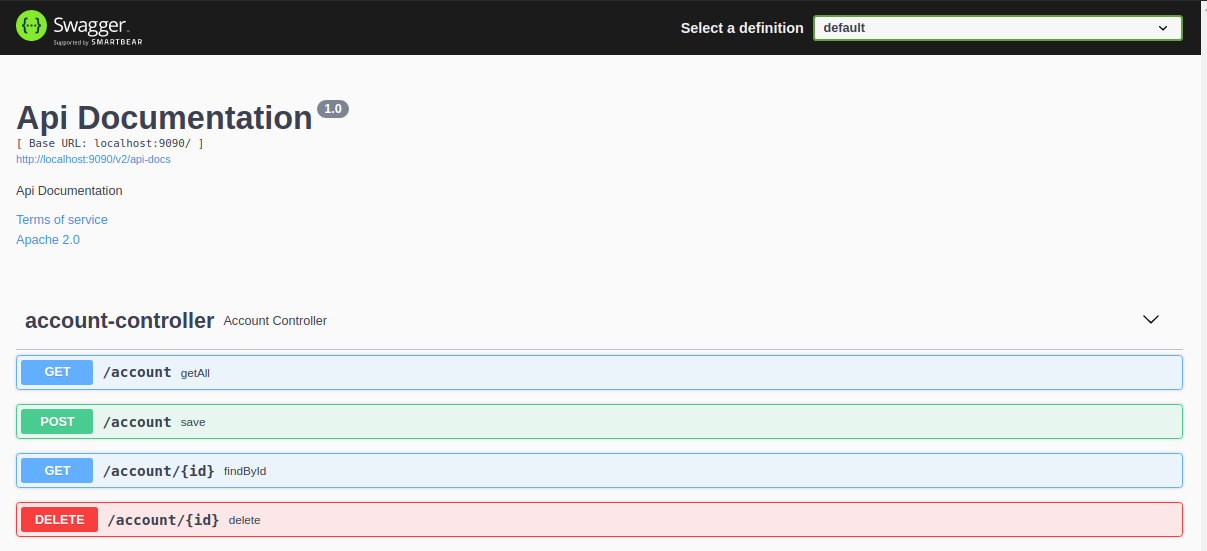
We can further expand each of the individual methods for more detail.
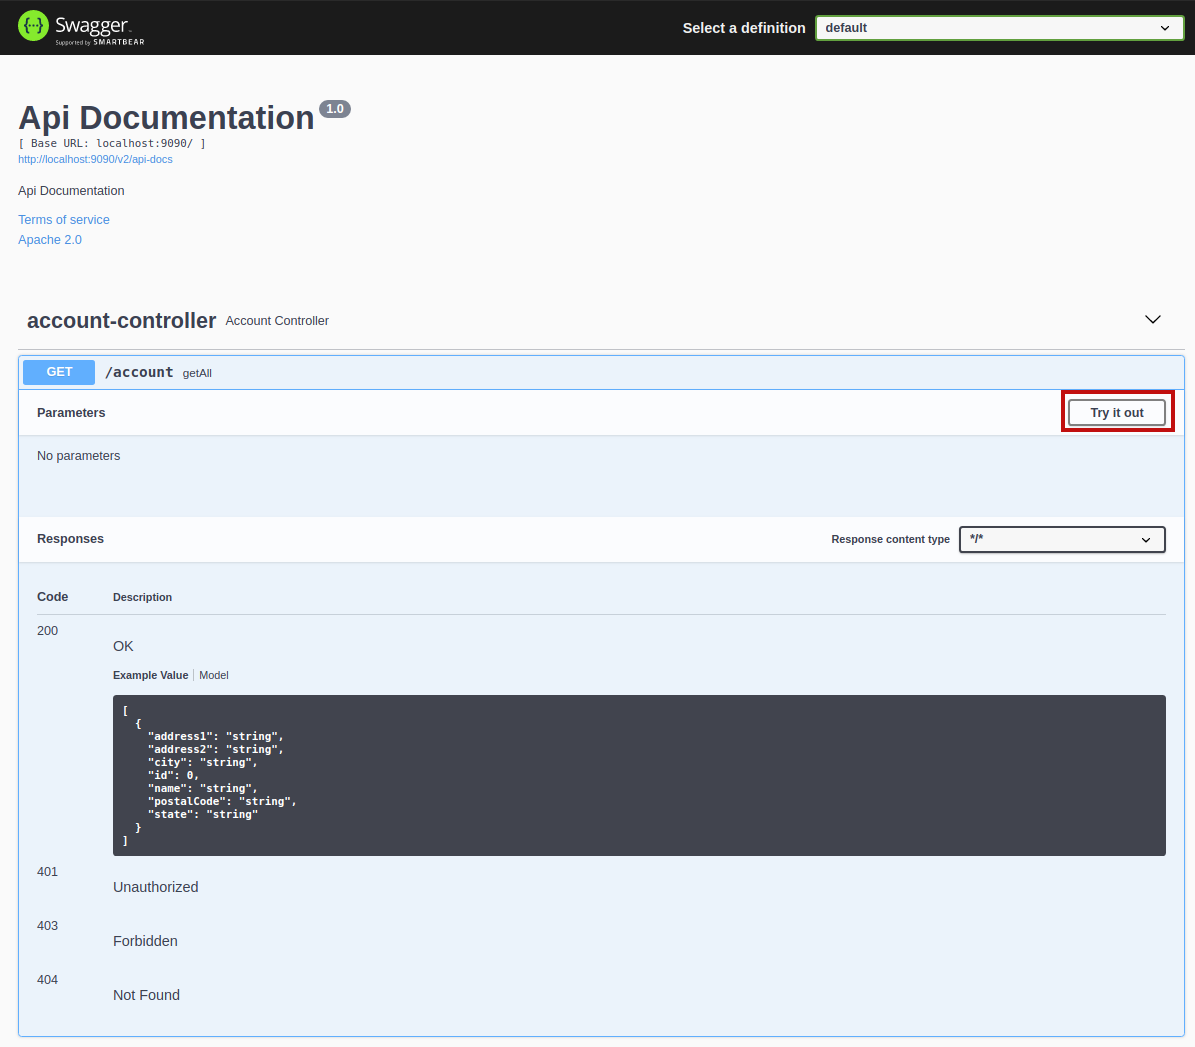
To exercise this method, we can click the Try it out button, which displays the following:

The method takes no parameters, so we can just click the Execute button.
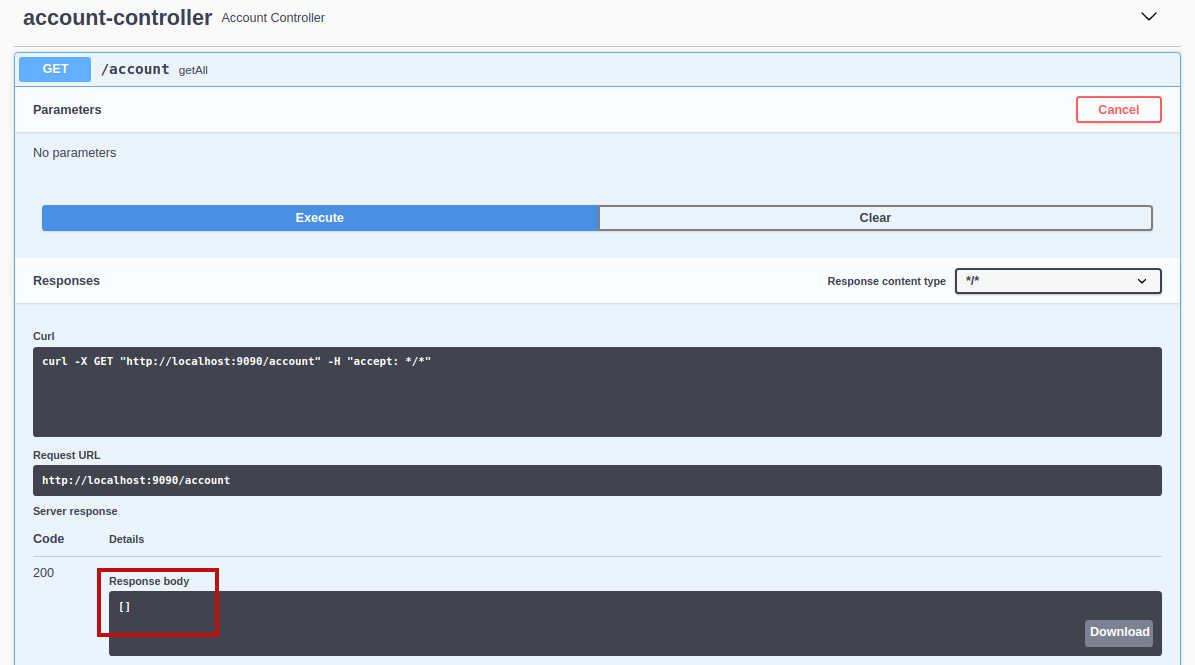
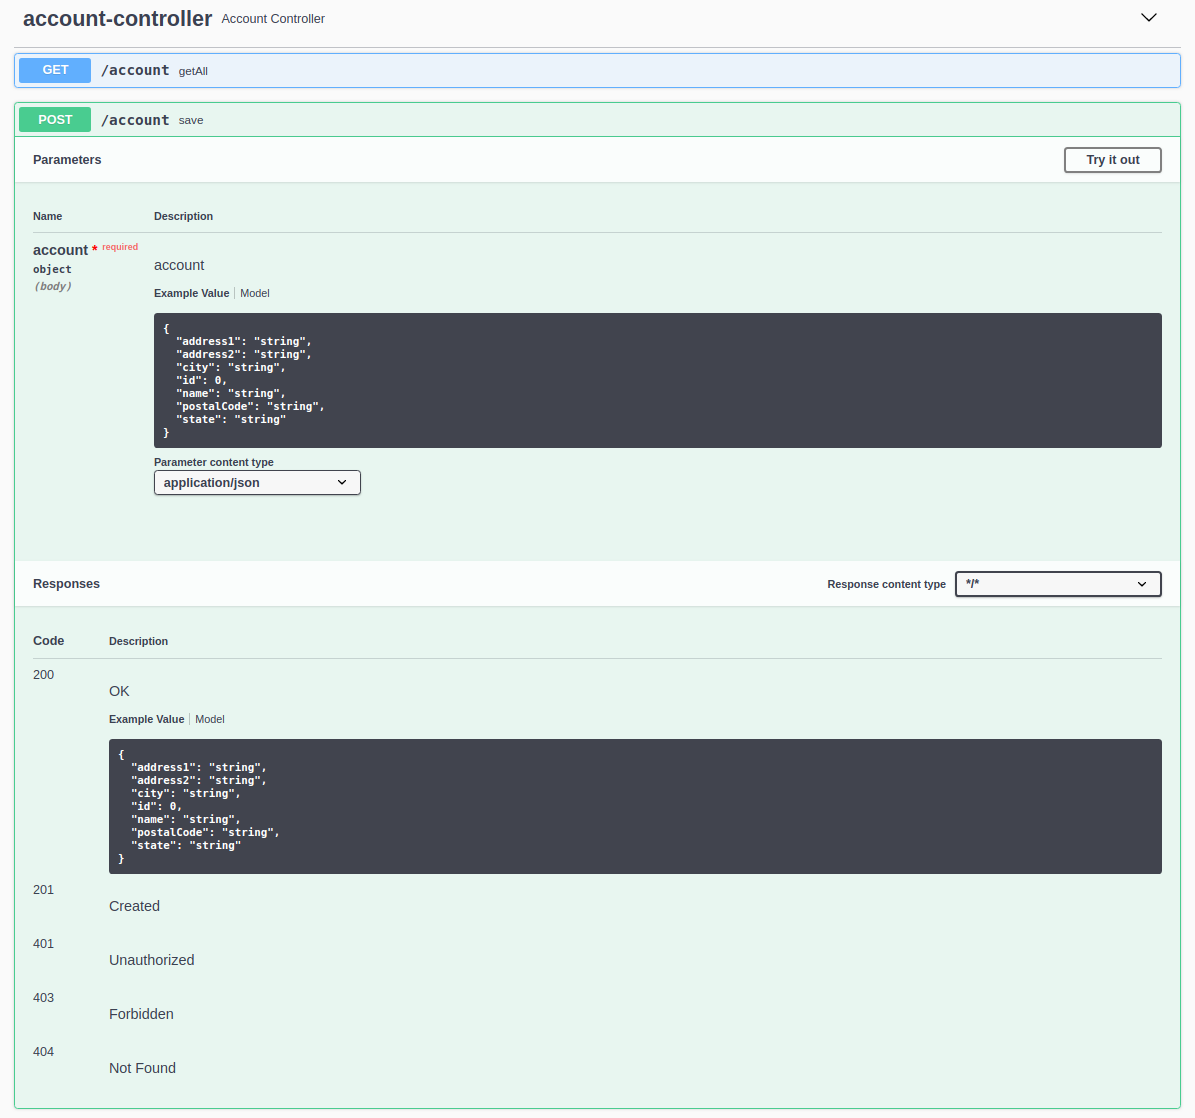
Looking at the Response body section, we get an empty array indicating that our account cache is empty. Let's add a new cache entry. Collapse the current section and expand the Post /account save section:
Once again, we will click the Try it out button. We are presented with the following form:
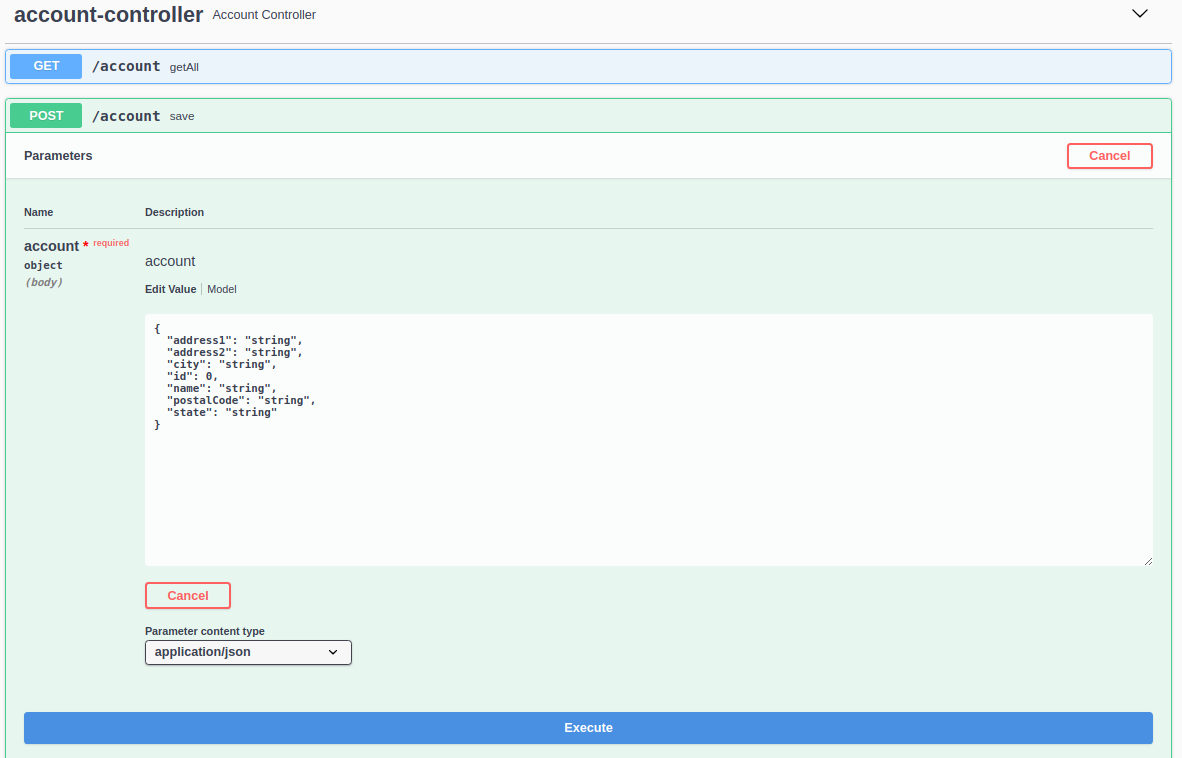
This form allows us to edit the JSON payload we will send to the caching service. Edit the JSON fields to something meaningful:
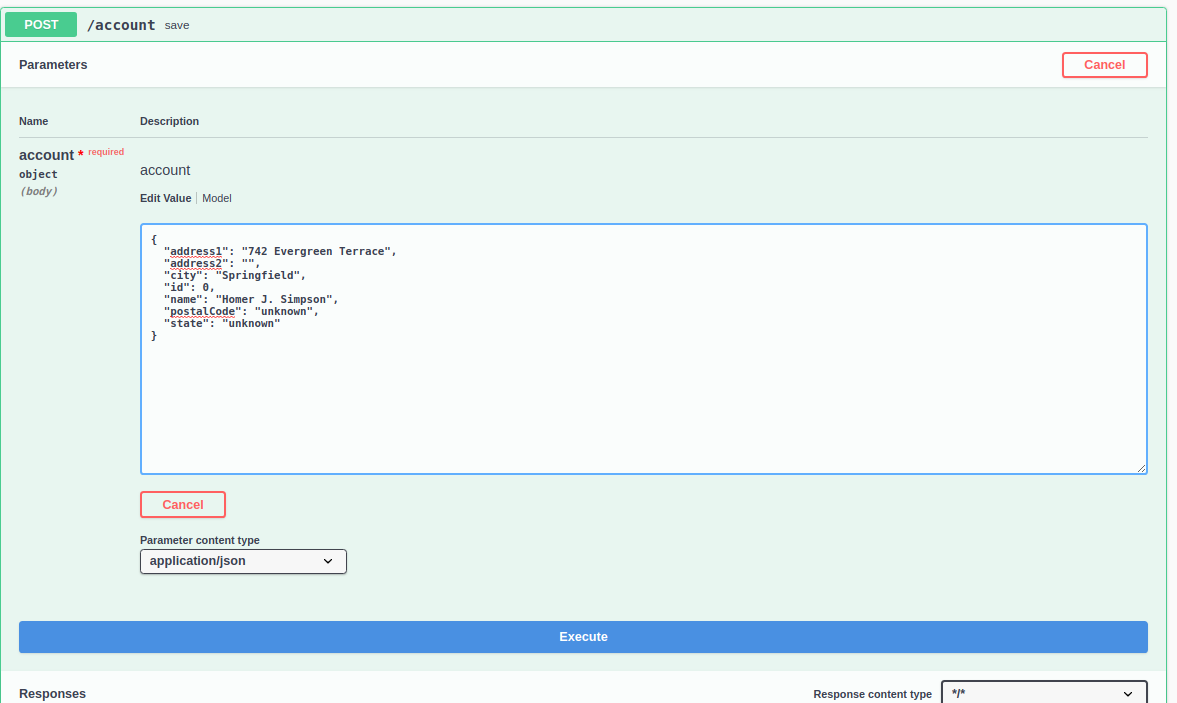
Click Execute to post the JSON to the service. You should receive a response similar to the following:
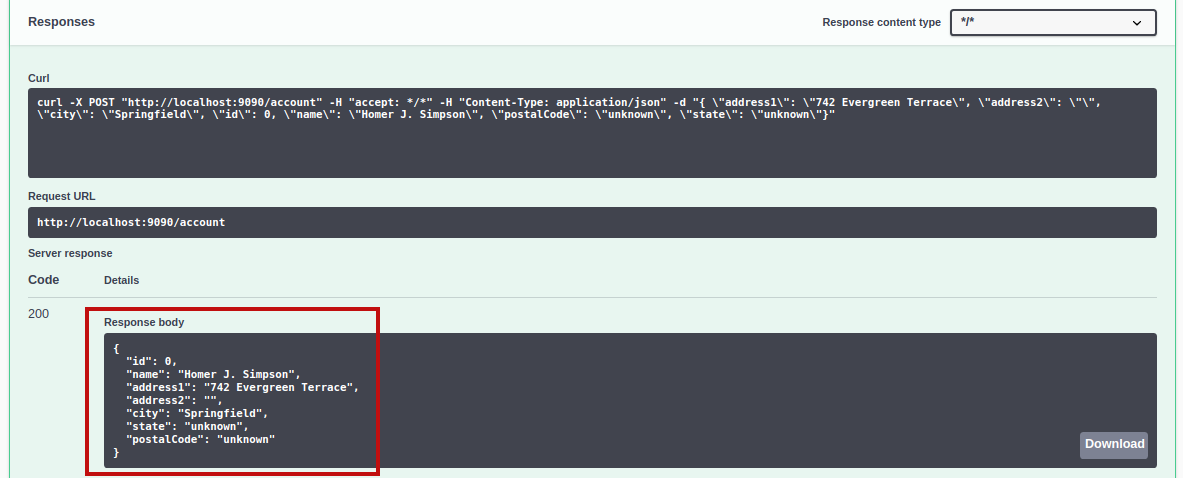
Now, if we revisit the GET /account getAll method, when we click Execute, the response includes our new cache entry.
Enhancing the caching service
The caching service shown here can be further expanded to support additional object types. To do that, we implement the following for each new type:- model
- controller
- repository
- service interface & Redis implementation
Redis Kubernetes Operator
In addition to running our Redis instance in docker-compose, we can also run it in a Kubernetes cluster. To simplify this process, Redis provides us with a Kubernetes operator. If you read the previous article, you were introduced to the Kubernetes MinIO operator, which deployed the MinIO S3-compatible object-store. Kubernetes operators are application-specific controllers that we can use to create, configure, and manage complex applications in our Kubernetes clusters.Redis Operator installation
To install the Redis operator, you will need a Kubernetes cluster. We will continue using an instance of MicroK8s since it is packaged as a Snap and is embarrassingly easy to install. We also need to have Helm3 installed. If you are using MicroK8s, you can install Helm3 with the following command:
microk8s enable helm3
We can now install our Redis operator. We will start by creating the namespace:
( Note: If you are not using MicroK8s, omit the microk8s prefix from the following commands.)
microk8s kubectl create namespace redis-operator
Now, let's use helm to add the repository:
microk8s helm3 repo add ot-helm https://ot-container-kit.github.io/helm-charts/
Now let's install the operator:
microk8s helm3 upgrade redis-operator ot-helm/redis-operator --install --namespace redis-operator
If everything goes correctly, you should see something similar to:
Terminal
Release "redis-operator" does not exist. Installing it now.
NAME: redis-operator
LAST DEPLOYED: Tue Mar 15 18:44:19 2022
NAMESPACE: redis-operator
STATUS: deployed
REVISION: 1
TEST SUITE: None
We can verify that the operator is running with the command:
microk8s kubectl get pods -n redis-operator
The output of that command should look similar to:
Terminal
NAME                              READY   STATUS    RESTARTS   AGE
redis-operator-7c4f8f96dd-wgsbb   1/1     Running   0          40m

Twitter
Facebook
Reddit
LinkedIn
Email