

Introduction
While this site focuses on back-end microservices, we will make a brief digression to the client-side and look at an example of an Angular application client. This article does not explain how to build the client. However, the source is available on the ThinkMicroservices Github repository for the curious. Instead, we will navigate through the user interface and identify which services the user interface is exercising.Requirements
To test the Angular client, you will need to run all of the services we have built so far. To start up all the necessary services, refer to the preceding Peer Signaling service article for instructions.Angular
The Angular framework is an open-source web application initially created by Google. Angular applications are written in TypeScript and transcompiled into Javascript. The choice of the Angular framework is not an endorsement of the framework over any other technology. However, Angular is mature, well established, and simple enough to understand even if you are not a full-stack developer.Bootstrap
In addition to Angular, the client application also uses Bootstrap to provide the application's styling and responsive layout.PrimeNG
The application uses the PrimeNG component library to provide advanced components, including tabs, dialogs, tables, and trees,Accessing the Angular Application Client
After all the application services have started, Open a browser and navigate to the following URL:https:localhost:8443/content/web-client/index.html
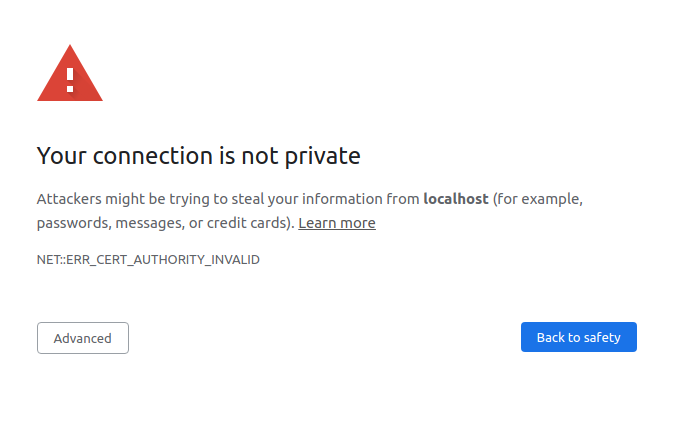
The application uses a self-signed certificate, so you will be greeted with a security warning the first time you run the application. Here we see the Chrome browser's warning.
Click the Advanced button.
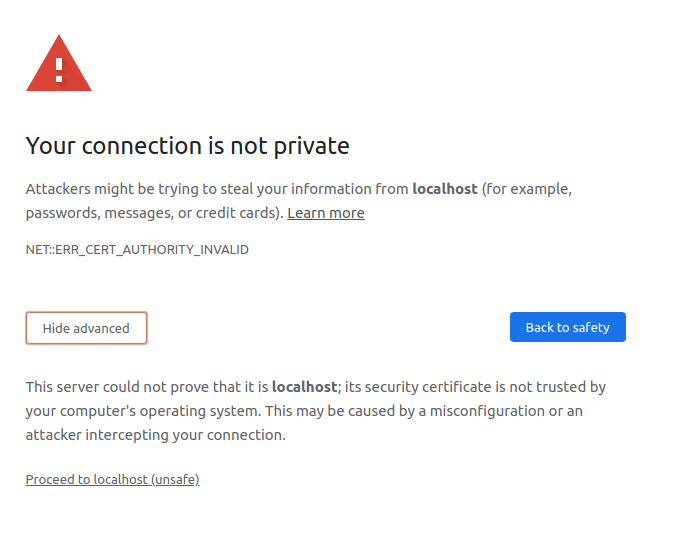
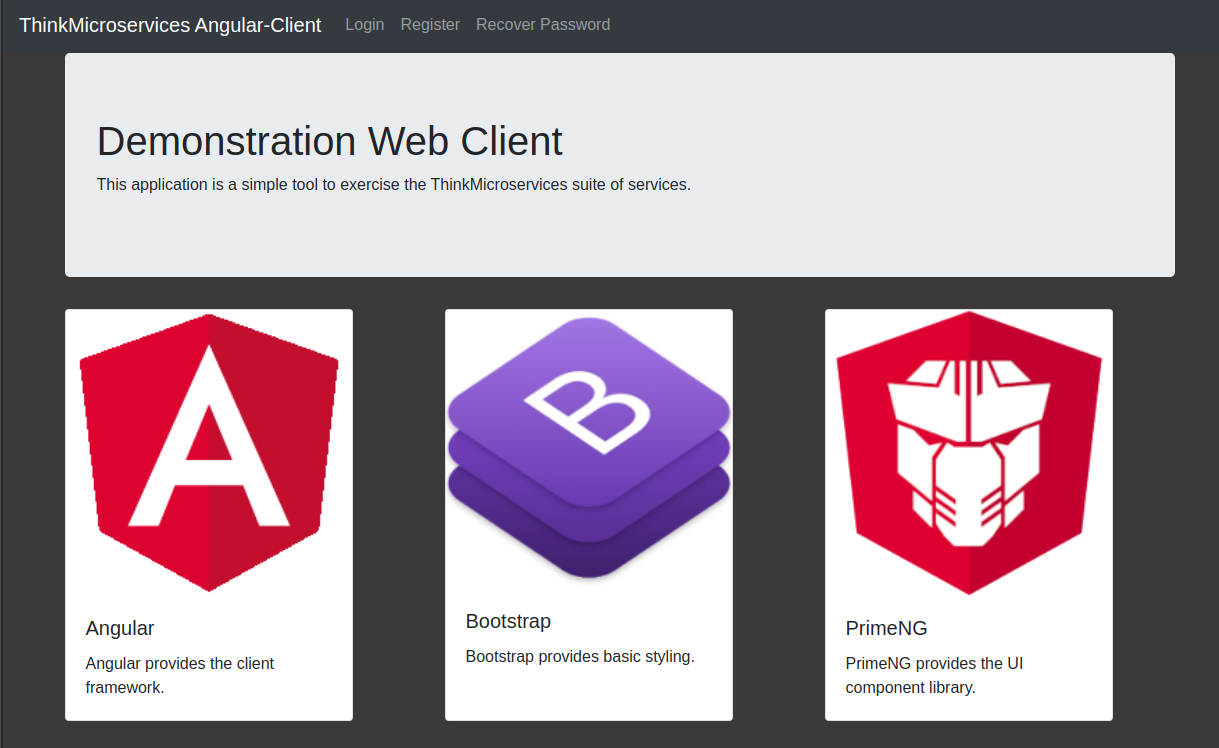
We now have a link to proceed to localhost (unsafe). Clicking this link connects us to the application using the https protocol. Once the page loads, we arrive at the application client's landing page.
Exercising the Interface
Authentication (Login)
Our first step in exploring the application client is to log in. When the Authentication Service starts, it (by default) will automatically create a user with administrative privileges. This user can exercise both basic and administrative features. We will authenticate with these credentials to explore the entire application. By default, the credentials are:| Username | Password |
|---|---|
| admin@thinkmicroservices.com | Password_1 |
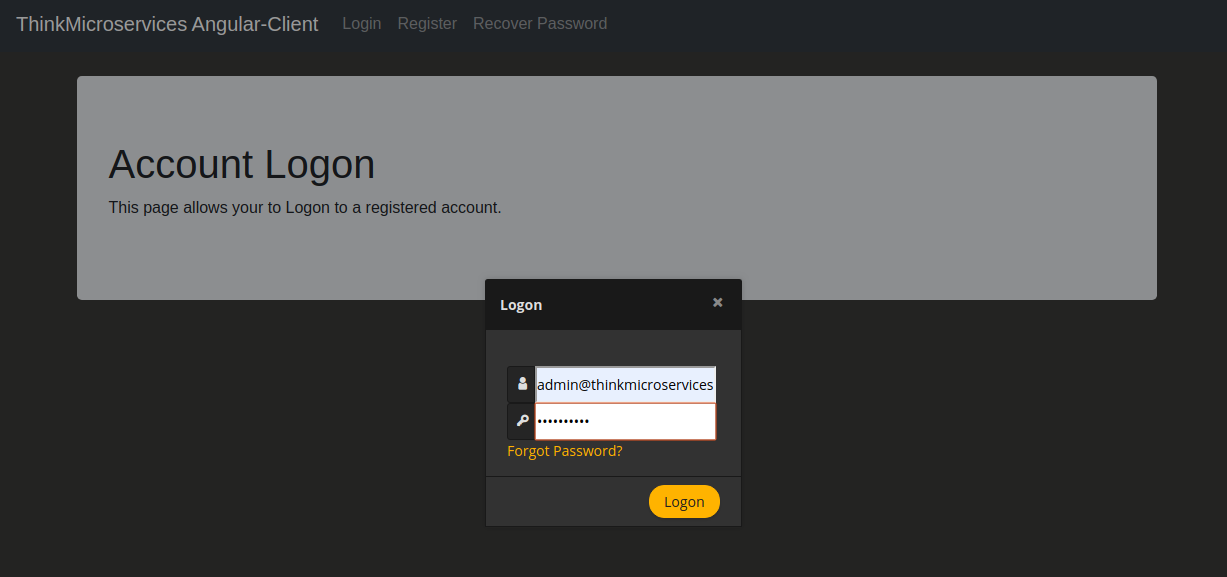
From the top level menu select Logon

Supply the credentials in the Logon dialog and click the dialog's Logon button.
The client application calls the AuthenticationService's authenticate method via the API Gateway Service. If successful, the client will receive an authorization token for subsequent service calls. If the authorization token expires during the client's use, additional calls will be made to the AuthenticationService's refreshToken to obtain fresh tokens. After the user has successfully authenticated, a call is made to the ProfileService to obtain the authenticated user's profile data. A second call is then made to the FeatureService to obtain a set of feature toggles for the client. The client evaluates each feature toggle, and its corresponding features is enabled or disabled. At this point, the client displays the authenticated landing page.
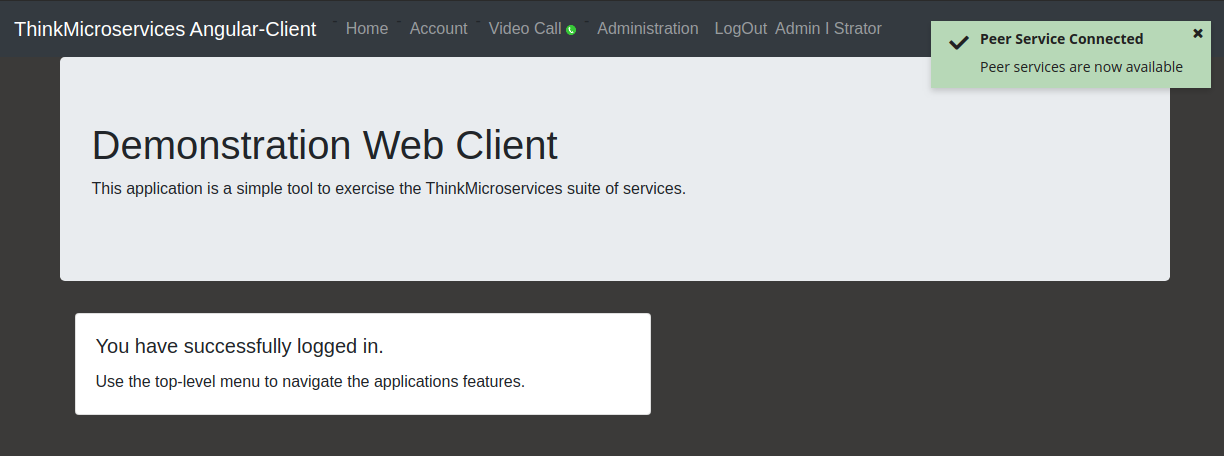
Here we see the landing page for an authenticated user. The Video Call feature toggle is enabled, displaying its corresponding menu option, and the Peer Service connection is enabled.
Registration
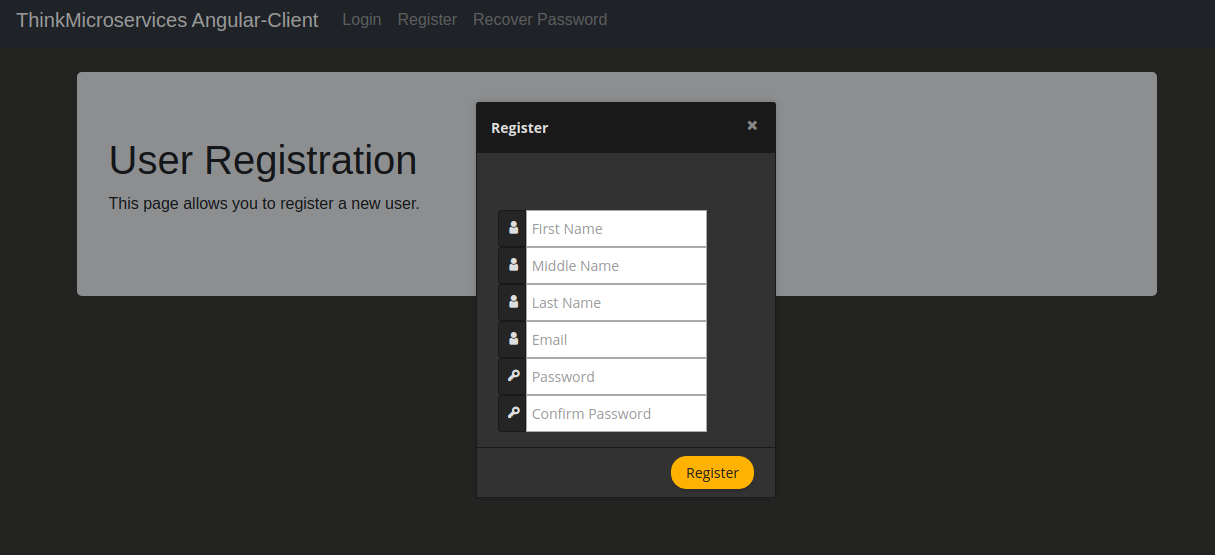
While the AuthenticationService automatically creates an administrative user by default, the client provides a mechanism to register new users via the Register menu option.
The registration dialog form contains the fields required needed to create a new user.
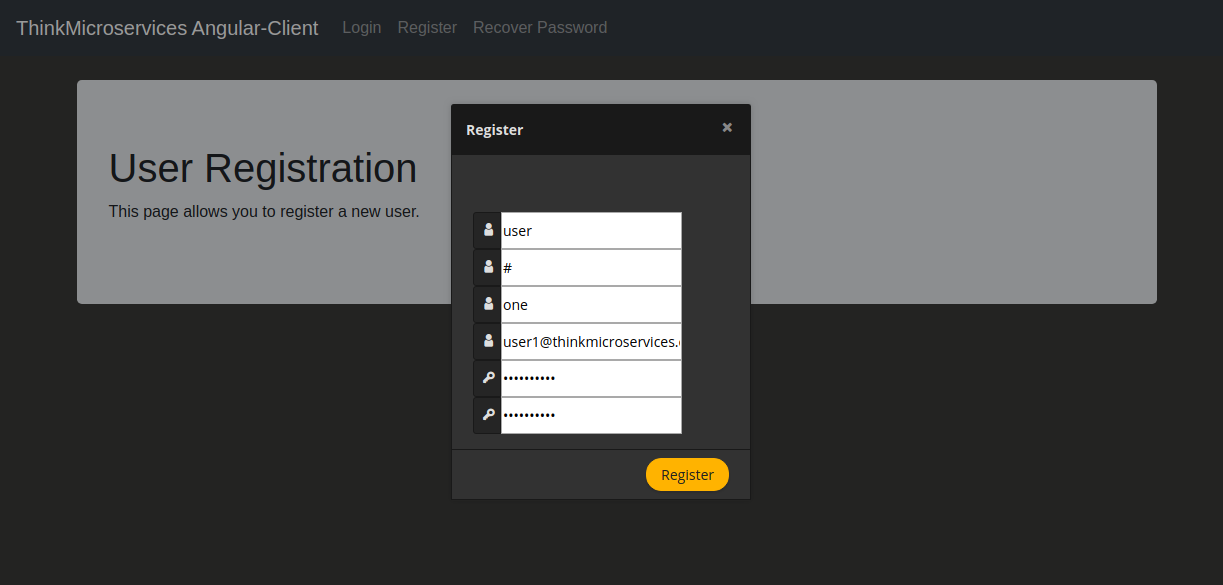
Here we create the new user user1@thinkmicroservices.com.
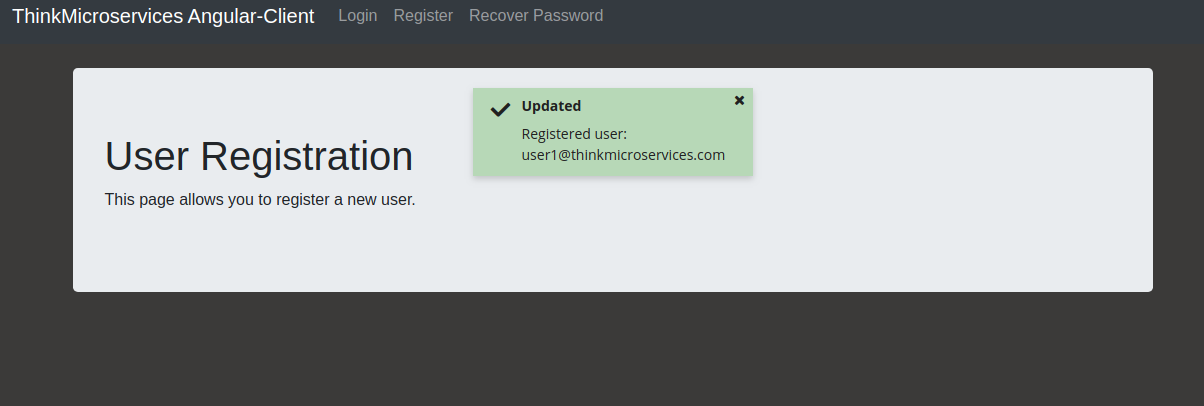
When the user clicks the Register button, the client posts the form data to the AuthenticationService's register method. If successful, the dialog will disappear, and the message Registered user: user1@thinkmicroservices.com" will be displayed.
Password Recovery
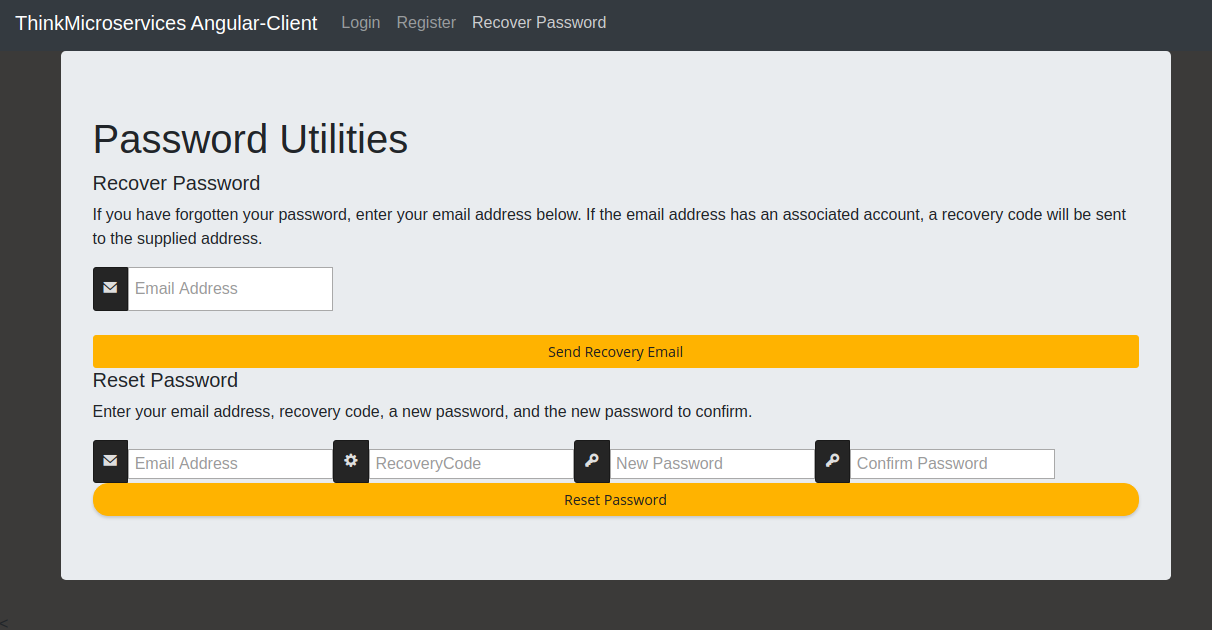
In the event the user forgets their password, the client provides the Recover Password menu option. When selected, the client displays the Password Utilities page.
This page provides two forms: the Recover Password and the Reset Password. The Recover Password form accepts the user's email address and posts the data to the AuthenticationService's recoverPassword method. If the email address corresponds to a registered user account, a recovery code is generated and sent to the OutboundEmailService via the NotificationService.
The Reset Password form accepts the user's email address, the recovery code, the new password, and a field to confirm the password. The form is posted to the AuthenticationService's resetPassword method, which confirms the recovery code and updates the account password. Note: the recovery code has a finite lifespan. If the user does not reset the password before the recovery code expires, the user will need to generate a new code.
User Account
Each registered user account has a corresponding Account Profile and Account History. The Account Profile contains personal data associated with a specific user, and the Account History contains a log of all account-related events generated from the account's inception. To access this information, an authenticated user clicks the Account menu option form the top-level menu.
The Account page contains both the Account Profile and Account History tab components.
Account Profile
The Account Profile enables the user to view and edit their account profile data.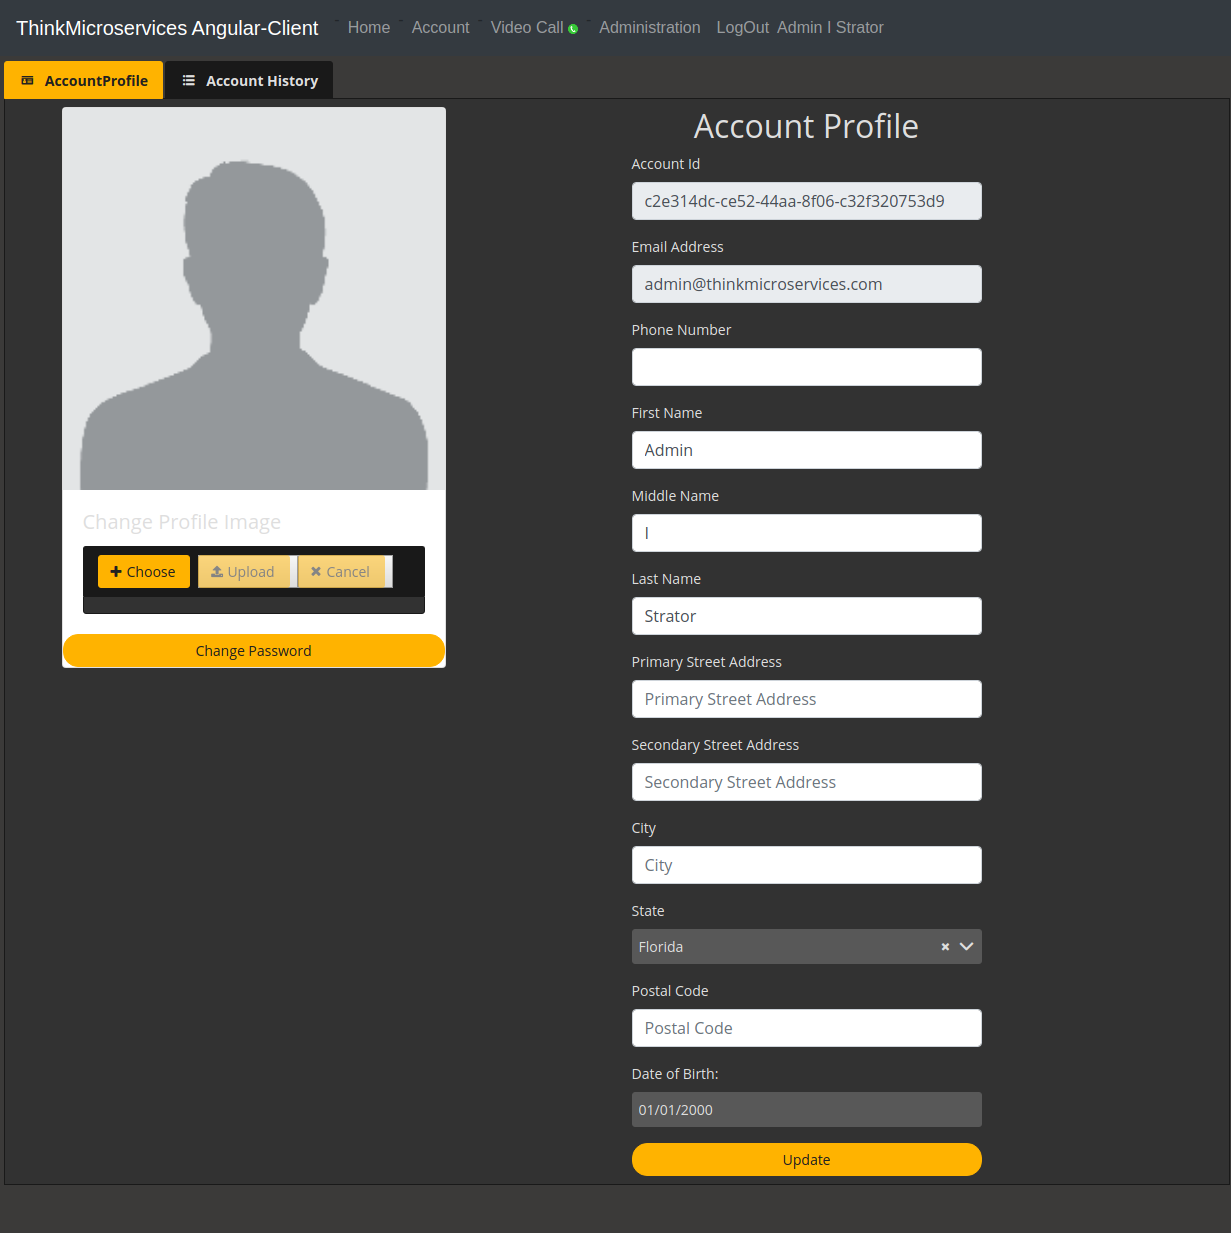
Upload Profile Image
The Account Profile allows the user to update their profile image by clicking the Choose Button below their profile image. A file selector dialog appears, allowing the user to navigate and select the desired image. Once selected, the user clicks the Upload button, which calls the AccountProfileService's updateProfileImage method. To stop the upload, the user can simply click the Cancel button.The profile image now displays the uploaded image.
Change Password
The Account Profile also allows the user to change their password by clicking the Change Password button below the profile image. This action will open the Change Password dialog.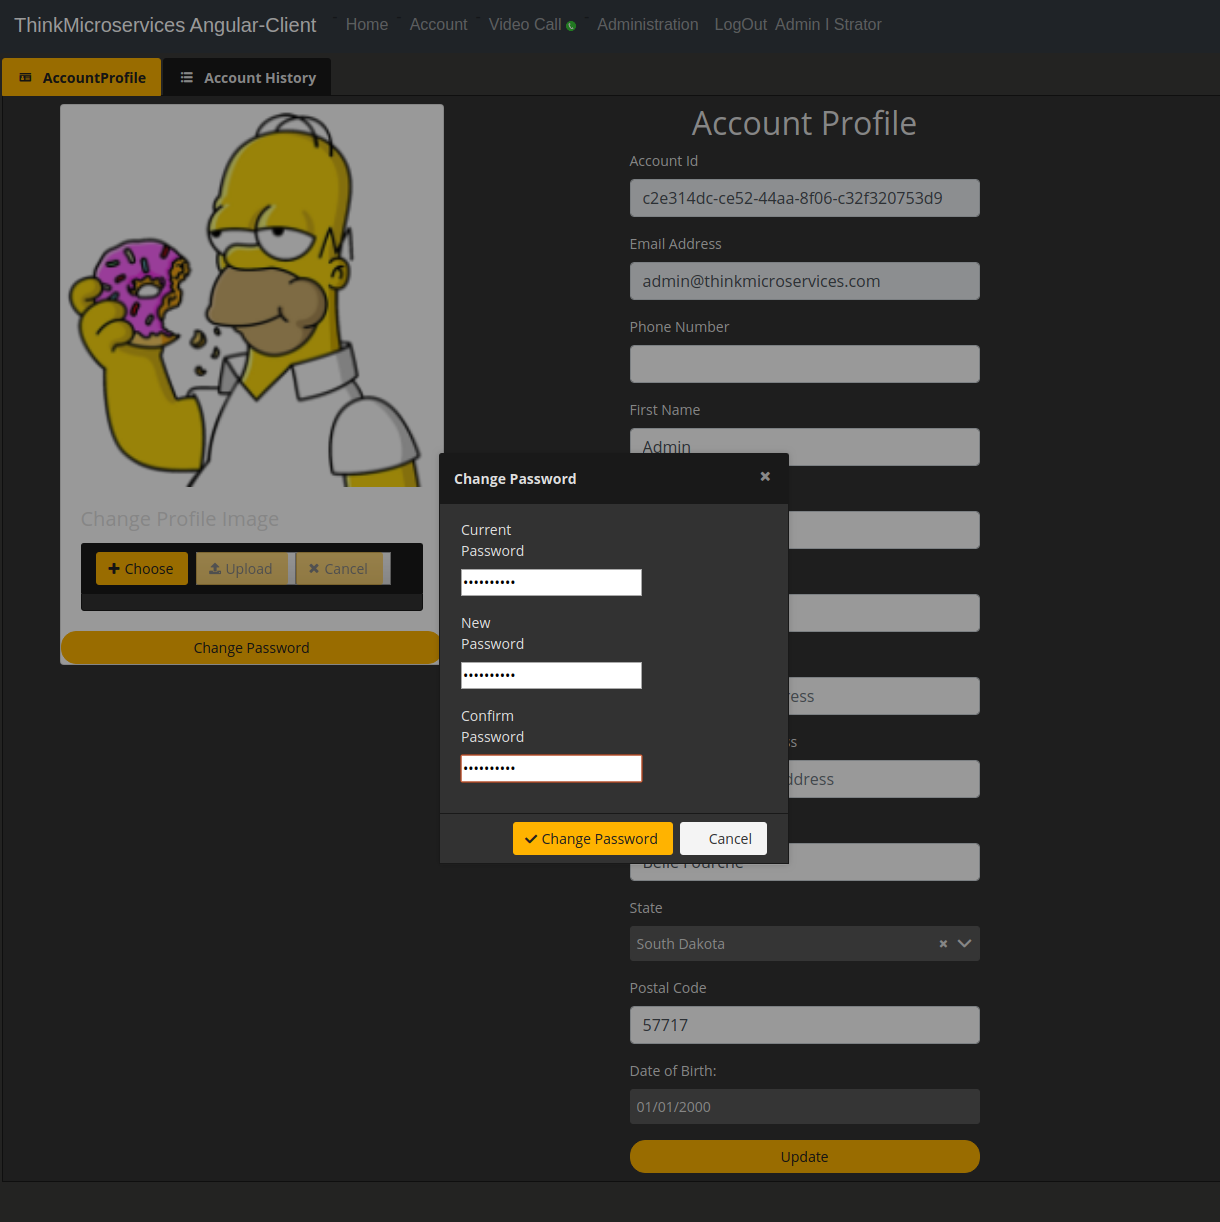
The user must supply their current password, the new password, and confirm the new password. By clicking the Change Password button, the client will post the data to the AuthenticationService's changePassword method.
Personal Data
The Account Profile page also allows the user to update personal data including name, address, date of birth, and phone number.
Account History
Every action that affects a user's account creates a corresponding event. These events are captured and persisted by the AccountHistoryService. This data provides an audit trail for user account operations. The Account History tab provides a pageable chronological history of the user. When the page loads or refreshes it calls the AccountHistoryService's find method, supplying the current accountId parameter to retrieve the page of text.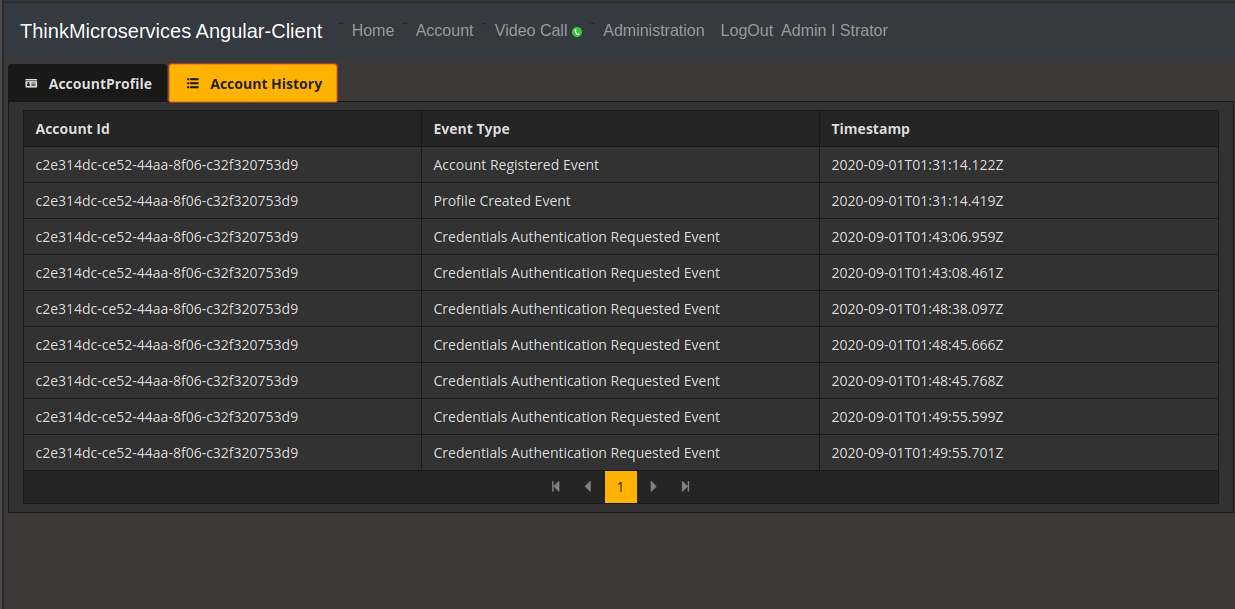
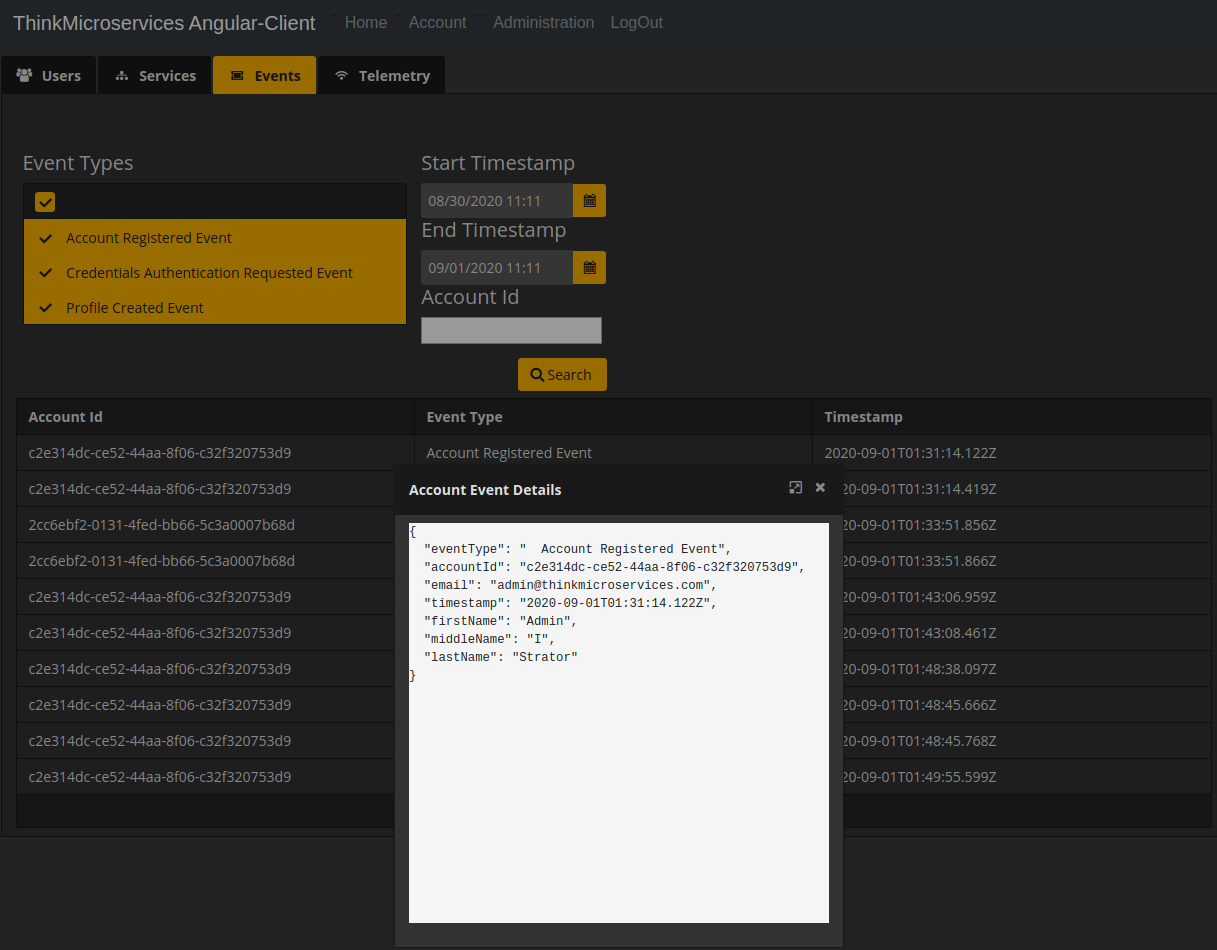
Clicking on a row in the table will display the event's details.
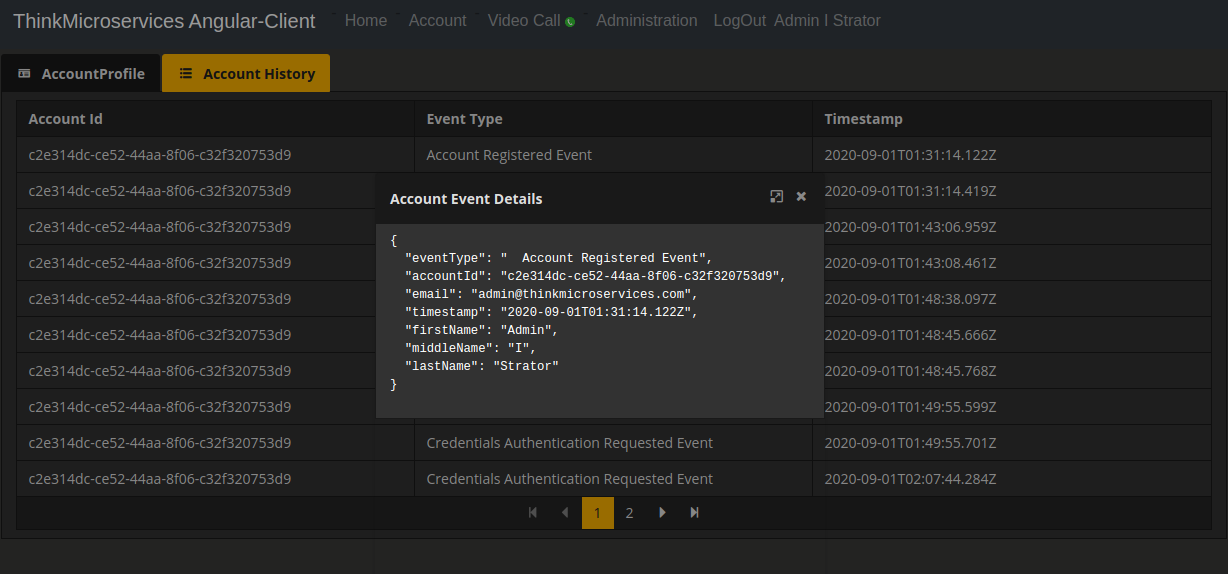
This event details the Account Registered Event for the administration account.
Administration
Users with the administrator role will have a top-level menu that contains the Administration menu item. The Administration page provides a basic administration interface for the application.
The Administration page is composed of four tabs: Users, Services, Events, and Telemetry.
Users
The Users tab displays a searchable & pageable table of all registered users. A Keyword search field is provided that matches the keyword across all fields in the AccountProfile persistence store. This page calls the AdministrationService's all when this page loads, when the page changes, and for keyword searches.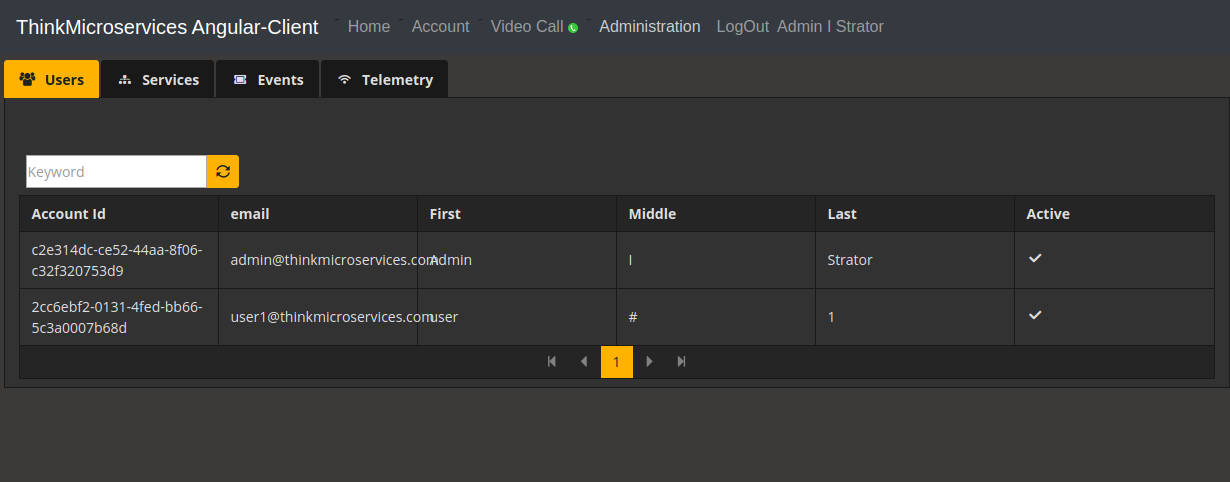
Clicking on a row will display the selected user's details.
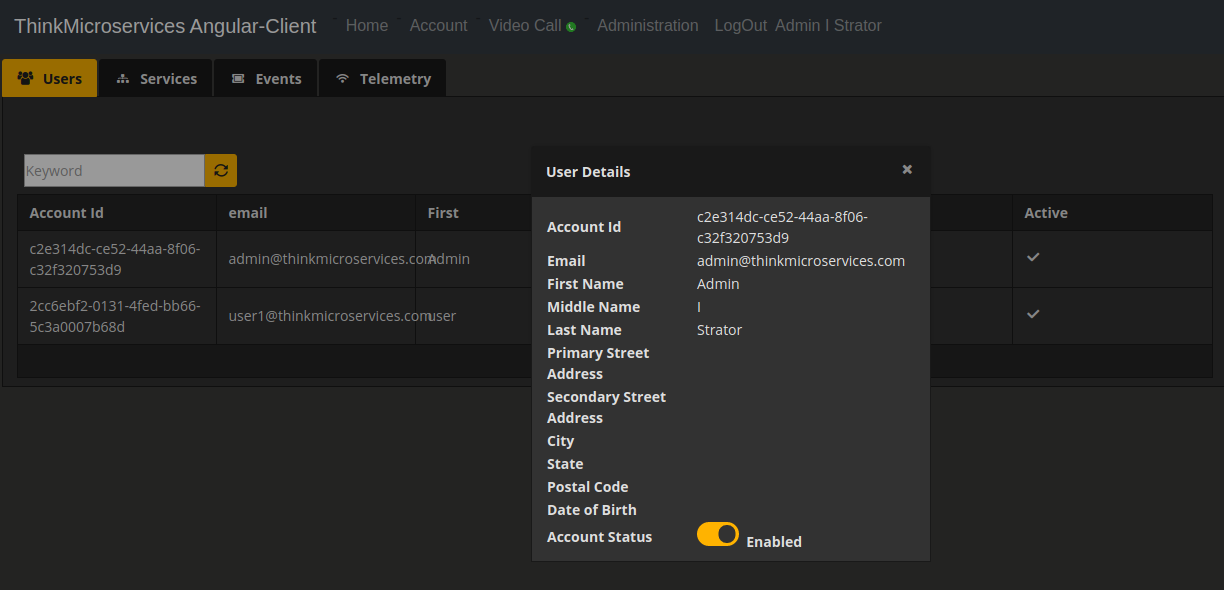
In addition to displaying the user's profile, the User Details dialog also includes the Account Status toggle button. This toggle button allows the administrative user to enable or disable the selected user's ability to logon to the application. When the toggle button state changes, the client calls the AdministrativeService's setUserActiveStatus method.
Services
The Services tab displays the current tree of registered services and their active instances. When the component loads, the client calls the AdministrationService's getServiceInstances method to retrieve the service data from the DiscoveryService.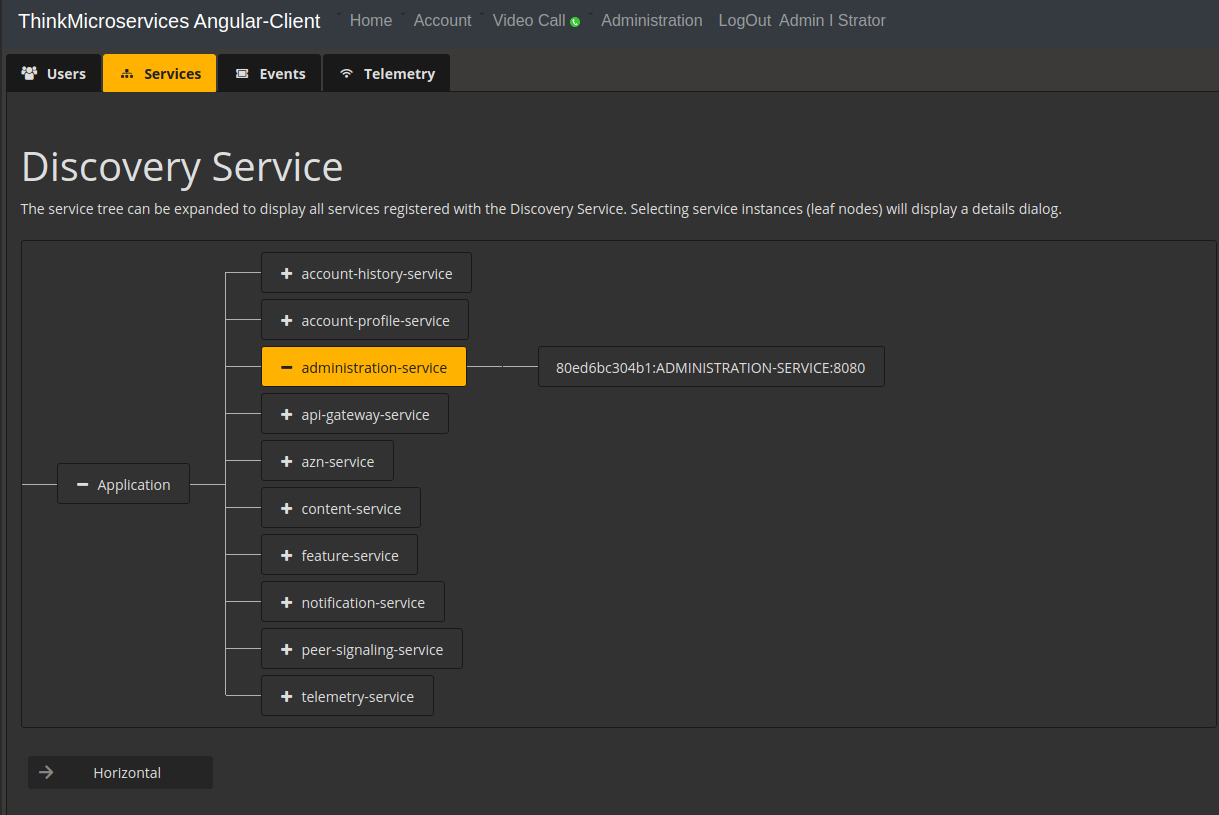
Clicking on the leaf node of any branch will display a detail dialog for that service instance.
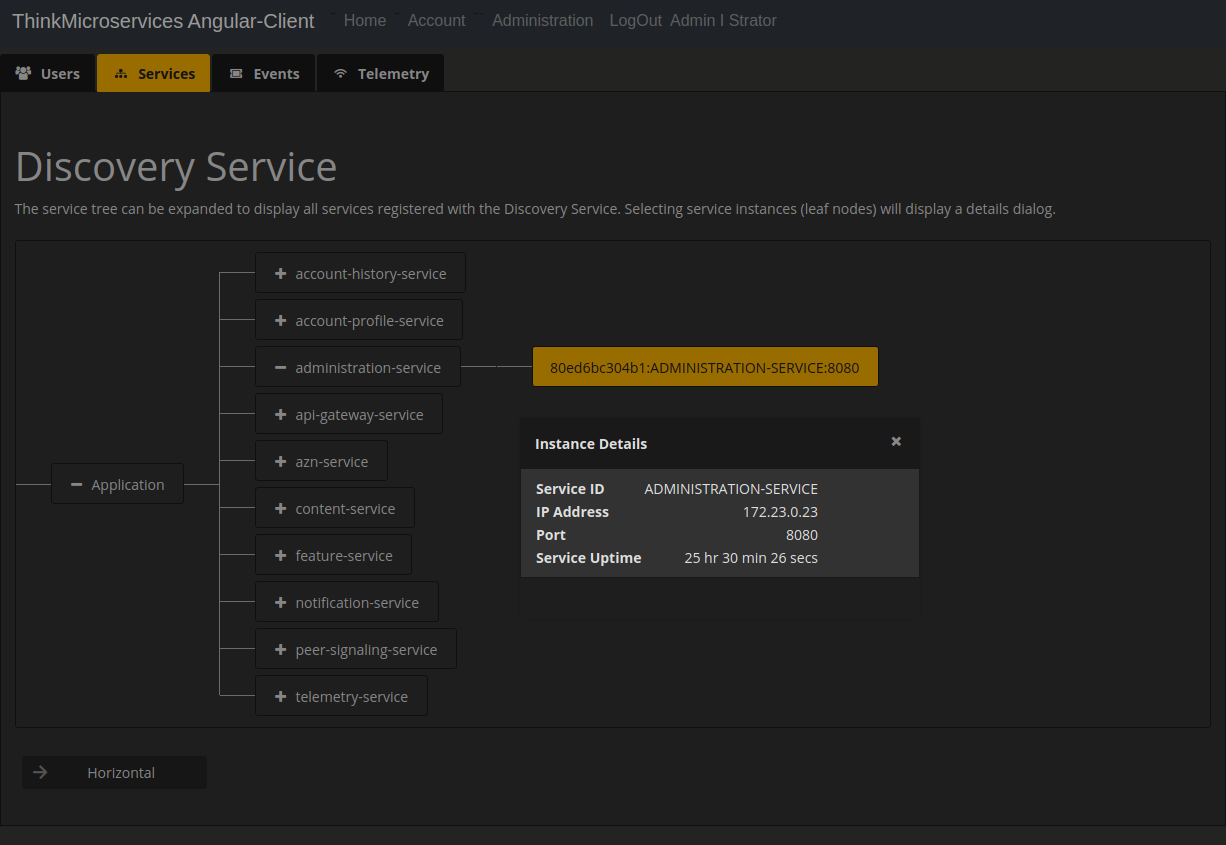
The Instance Details provides the registered service name, its accessible IP address and port, and its current service uptime.
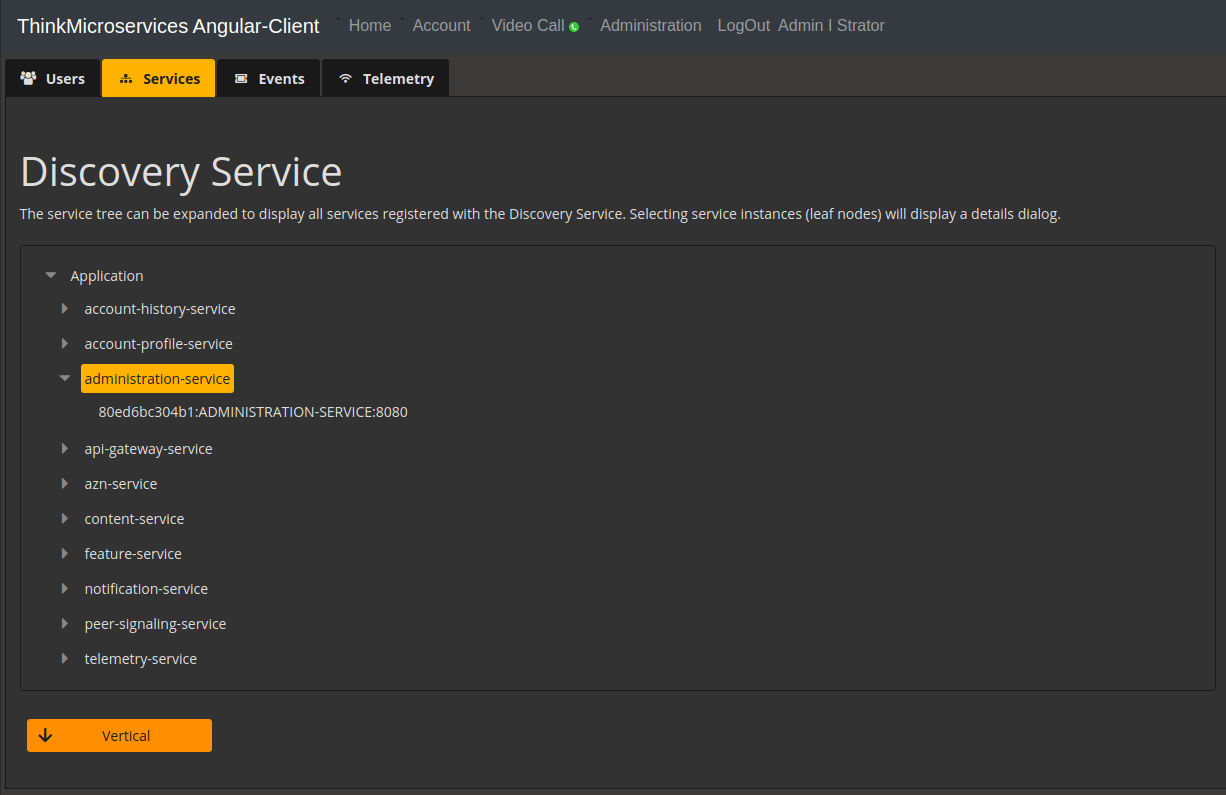
The service tree is rendered horizontally by default. The mode toggle button at the bottom of the page displays the current layout mode. Clickthe mode button to toggle between Horizontal and Vertical layouts.
Events
The Events tab provides administrative users with an event query form. Users can query be account history events, timestamp range, event type, and by account id. The client calls the AccountHistoryService's eventTypes method to retrieve the set of available event types.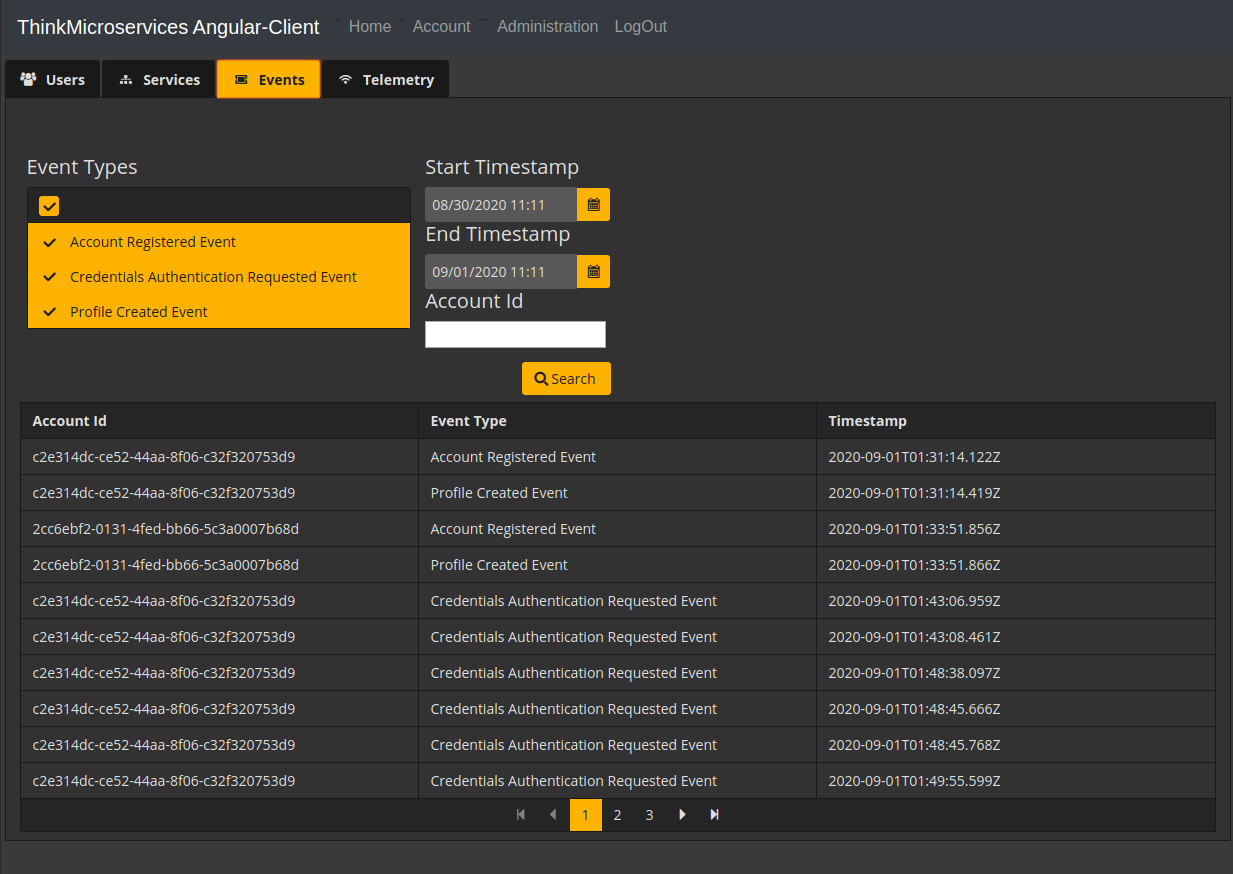
Clicking on a row in the results will display a dialog of the event details.
Telemetry
The Telemetry tab provides administrative users with the ability to query telemetry events by timestamp range, event type, and account id. The client posts all queries to the AdministrativeService's getTelemetryByAccountId method. In the following example we select the Info and Debug event types, a timestamp range, and the desired account id.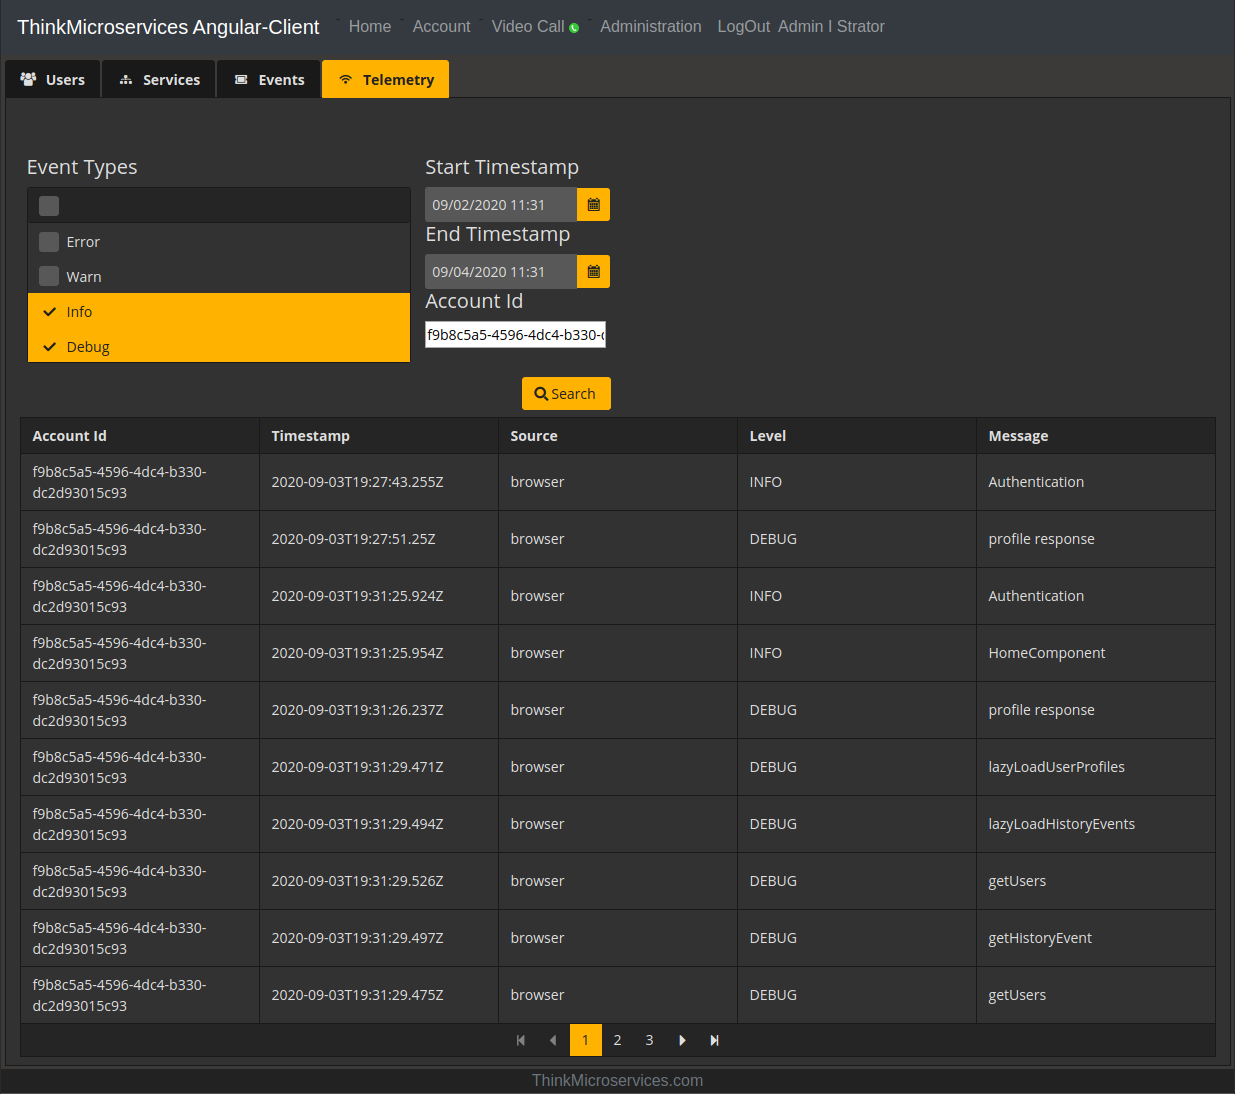
Clicking on a row in the results will display a dialog containing the telemetry event details.
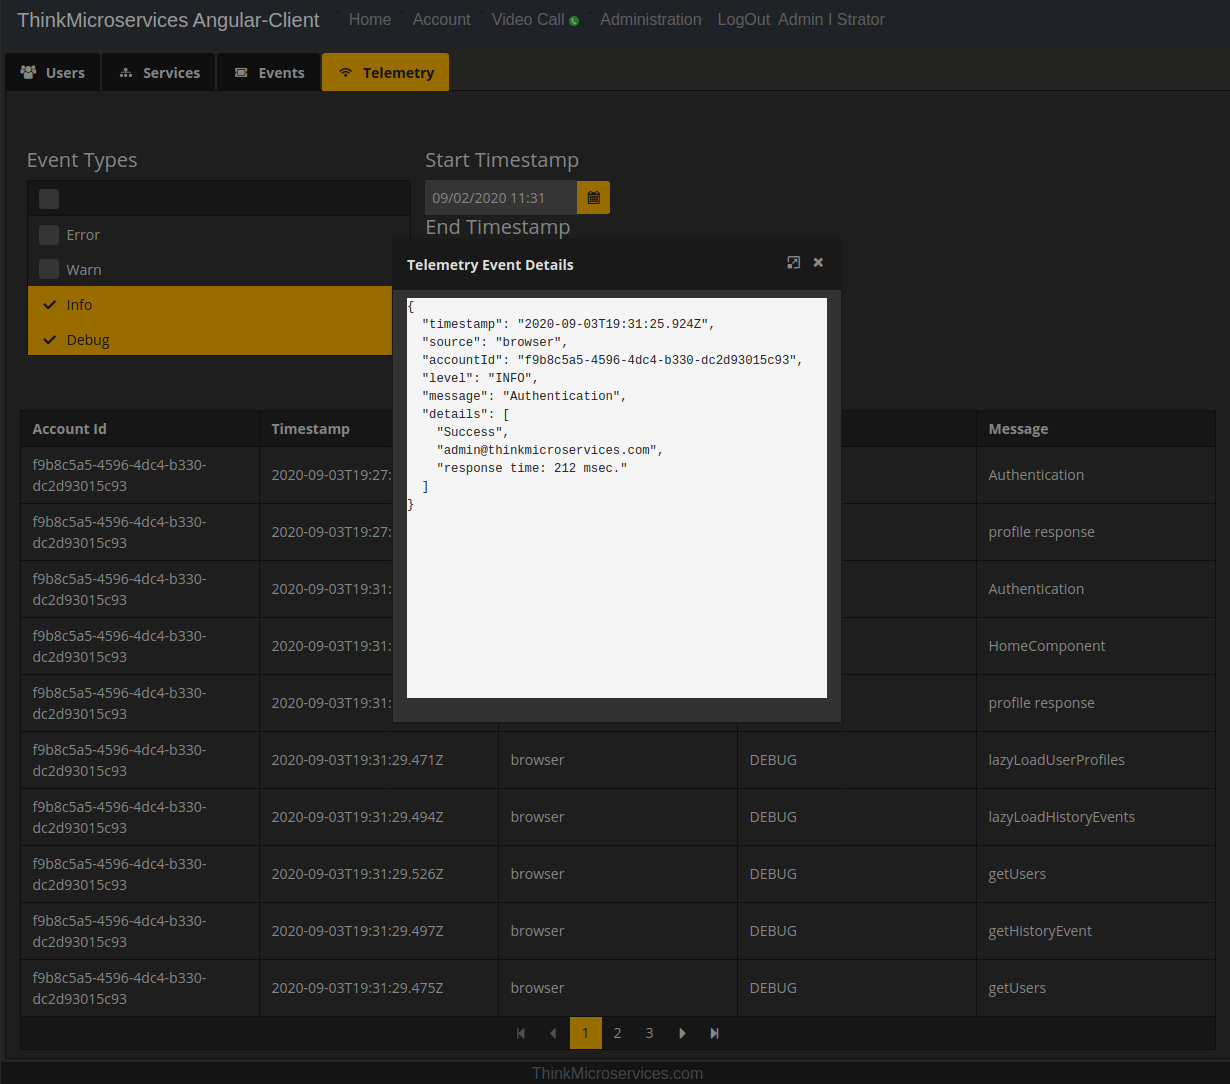
Here we see the telemetry event for a successful authentication of the admin@thinkmicroservices.com user.
Video Call
The Video Call menu option provides the client with the ability to make WebRTC-based video calls to other users connected to the application. If the Video Call feature is enabled, the client creates a web-socket connection to the PeerSignalingService. This connection allows the client to perform peer session registration and call signaling to other connected clients.
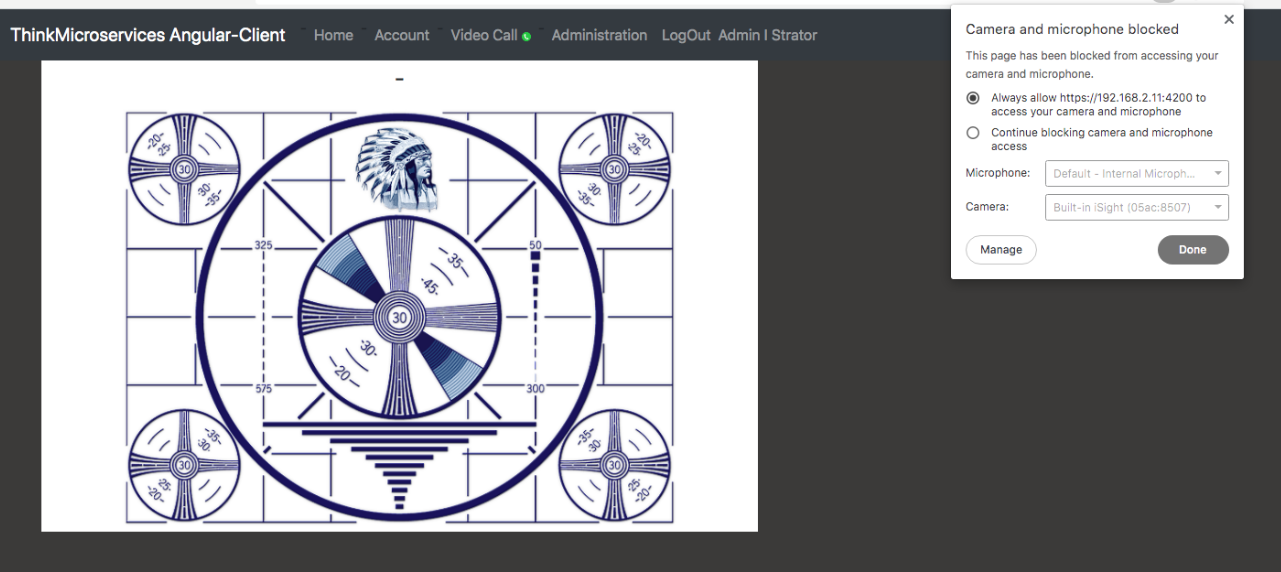
When a user selects Video Call for the first time, the browser will confirm that the user wants to grant the client access to the local camera and microphone. While the application is waiting for confirmation or any time the video stream is unavailable, the client will display the test pattern image.
After enabling the camera and microphone, the client will display the local video stream and a list of available users.
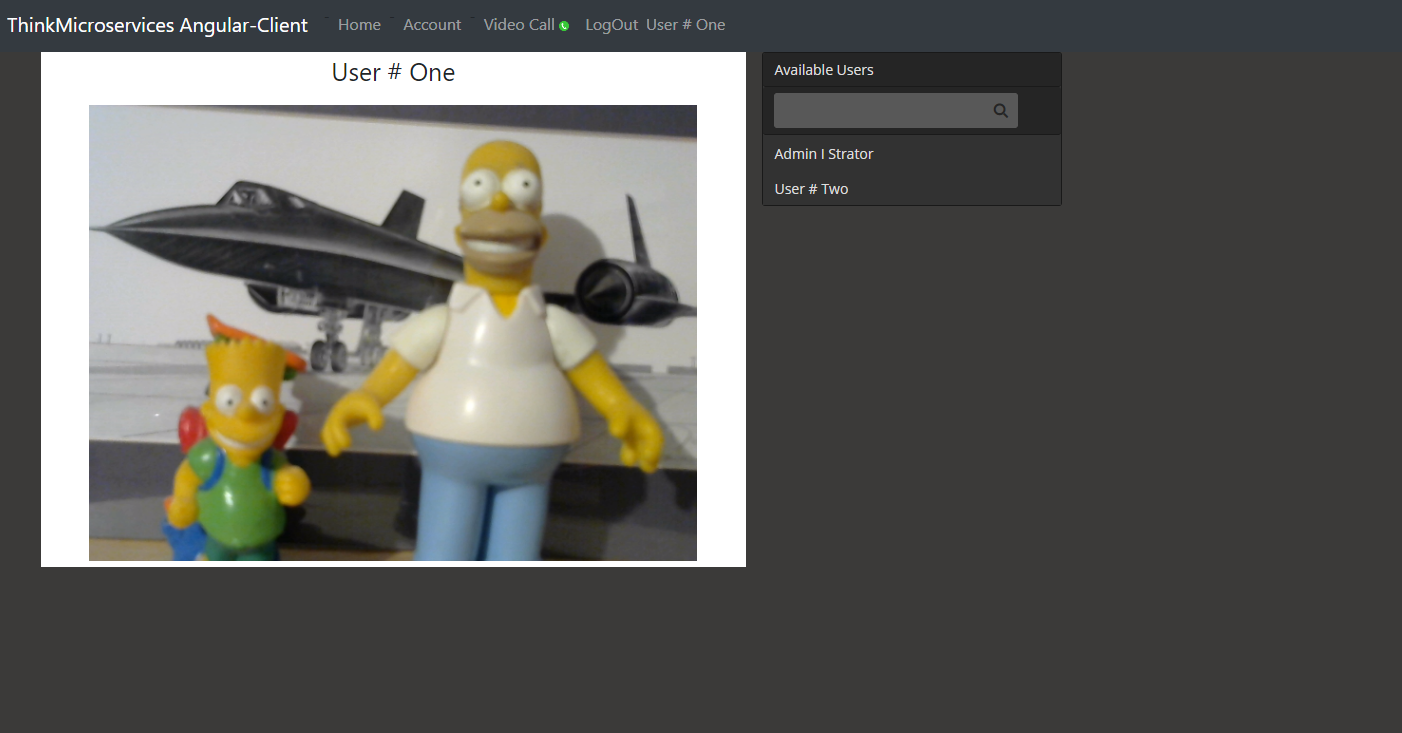
In another part of the universe, User # One has is logged in and is viewing their local live video stream.
If User # One right-clicks on the live stream, a context menu will appear containing the Show controls option. Clicking the Show controls menu item will overlay a set of controls over the video stream.
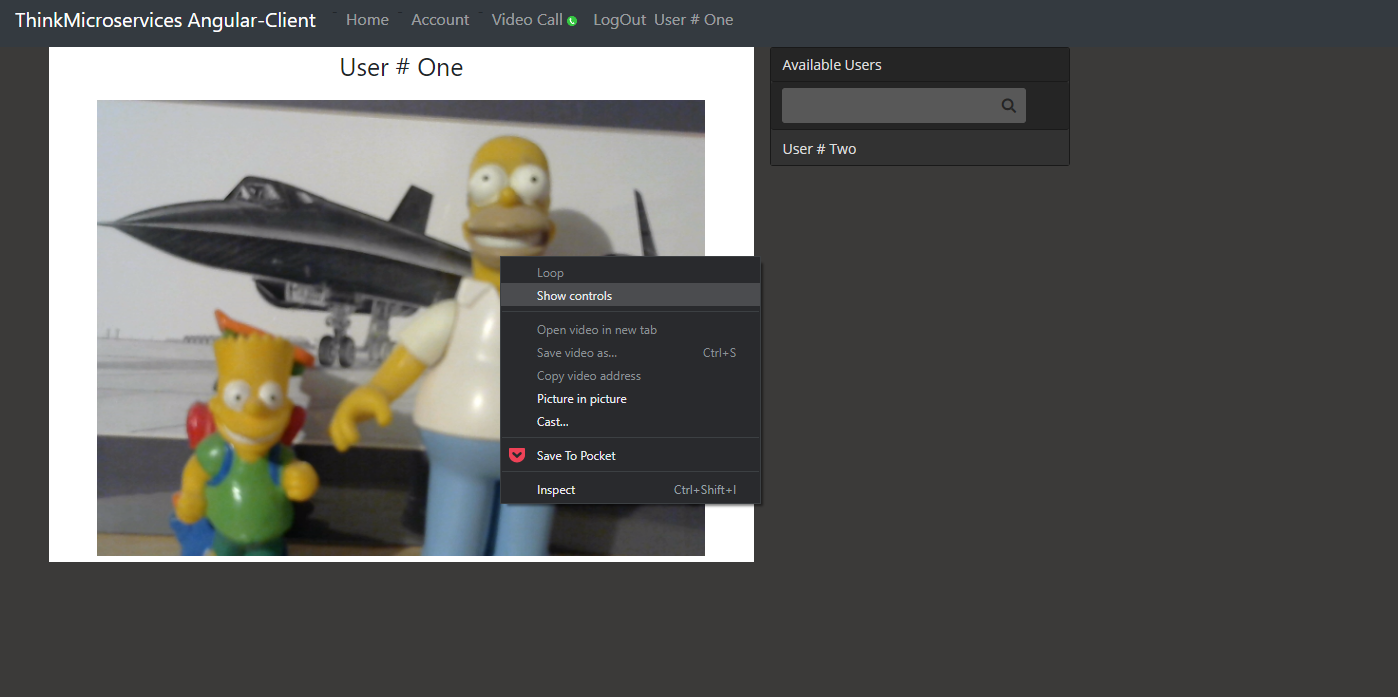
With these controls, we can control the stream's volume and toggle the video stream between its current size and fullscreen.
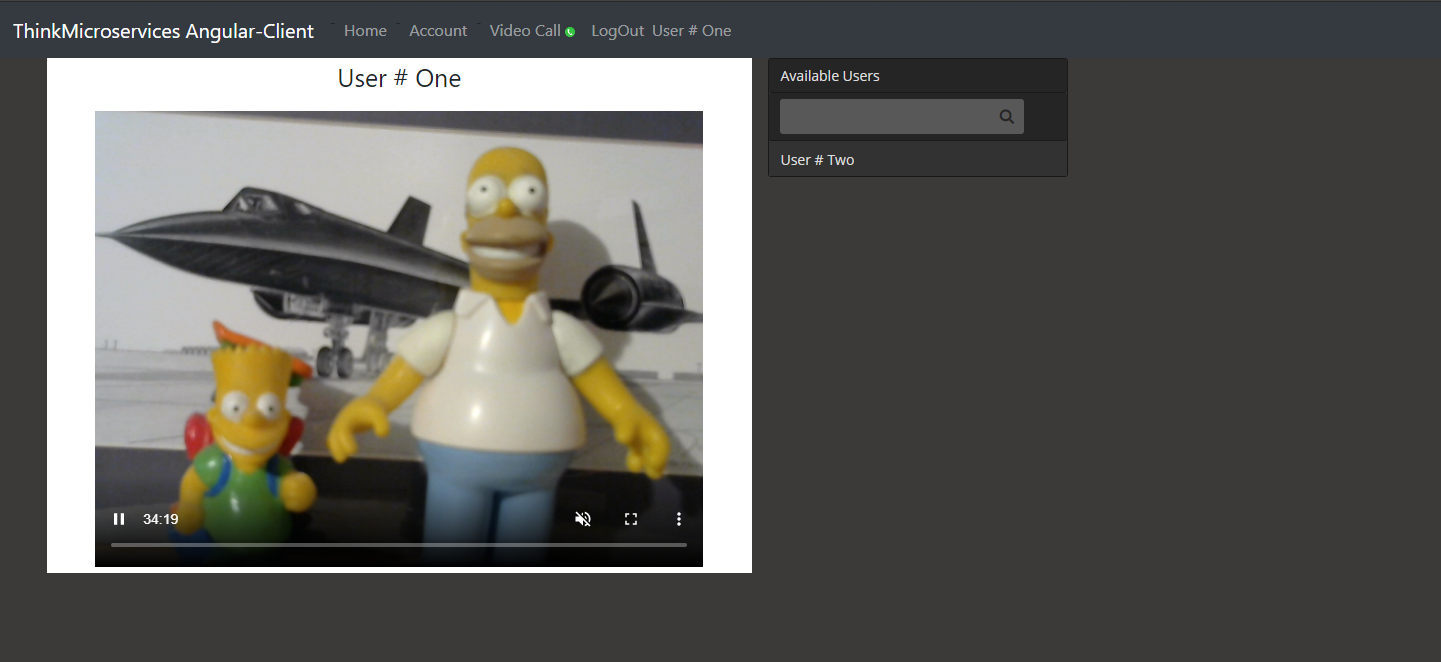
At this point, User # One is ready to accept calls.
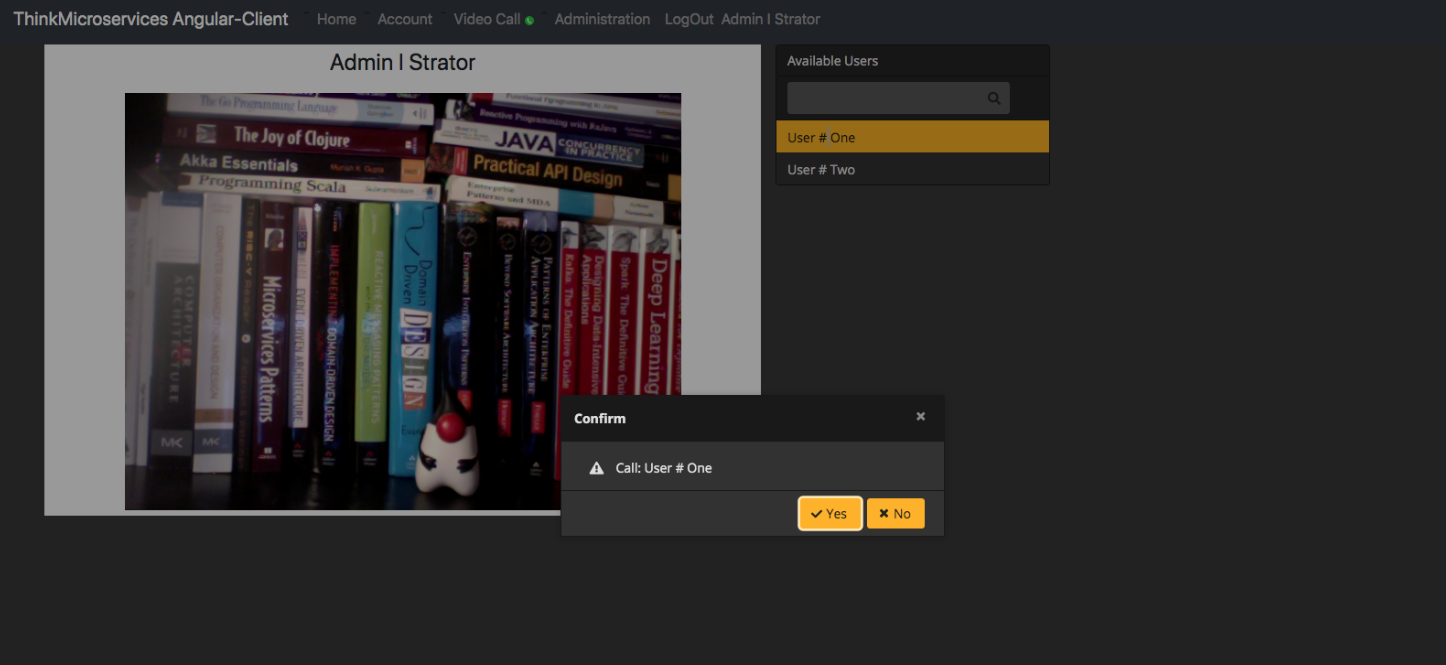
Meanwhile, Back at Admin I Strator's client, we see User # One Is now available. We initiate a call to User # One by selecting them from the Available Users list. A confirmation dialog is displayed, and the user clicks Yes to confirm the call.
User # One receives a call request confirmation from Admin I Strator and clicks Yes. Behind the scenes a series of messages are passed between the two client peers across the PeerSignalingService. When the negotiations have completed, each peer user is directly connected to the other.

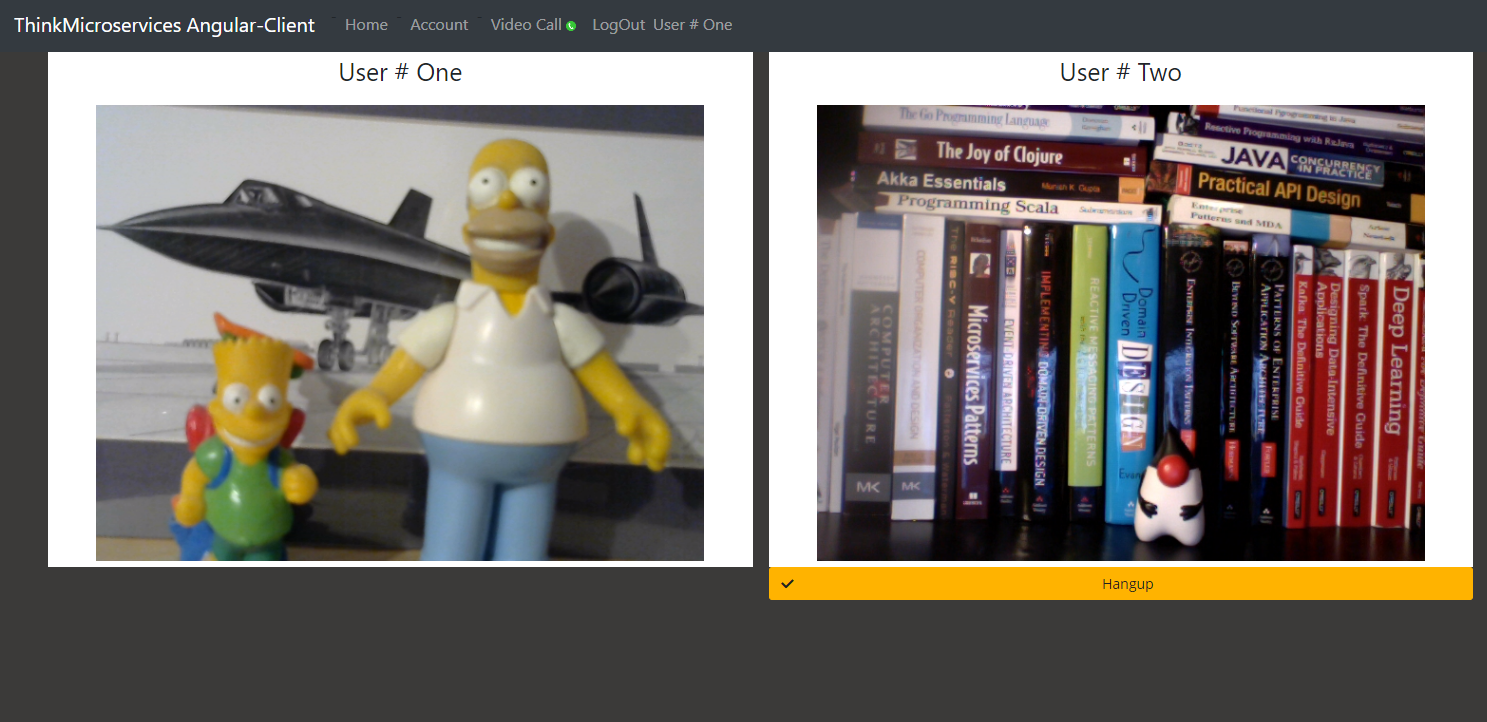
User # One client view
Admin I Strator client view
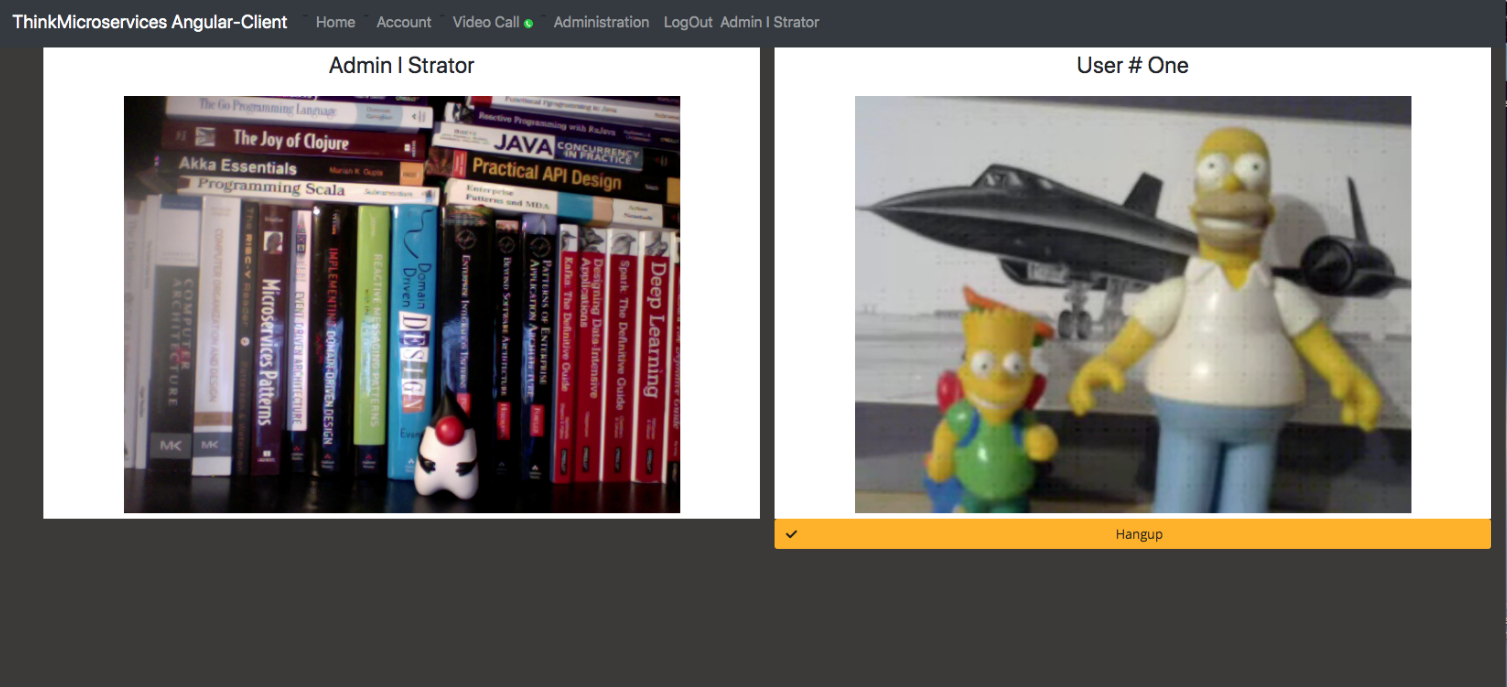 At this point, both parties are now streaming video and audio directly between their peer clients.
Both users have been communicating when Admin I Strator insults User # One. In a fit of pique, User # One clicks the Hangup button to terminate the call.
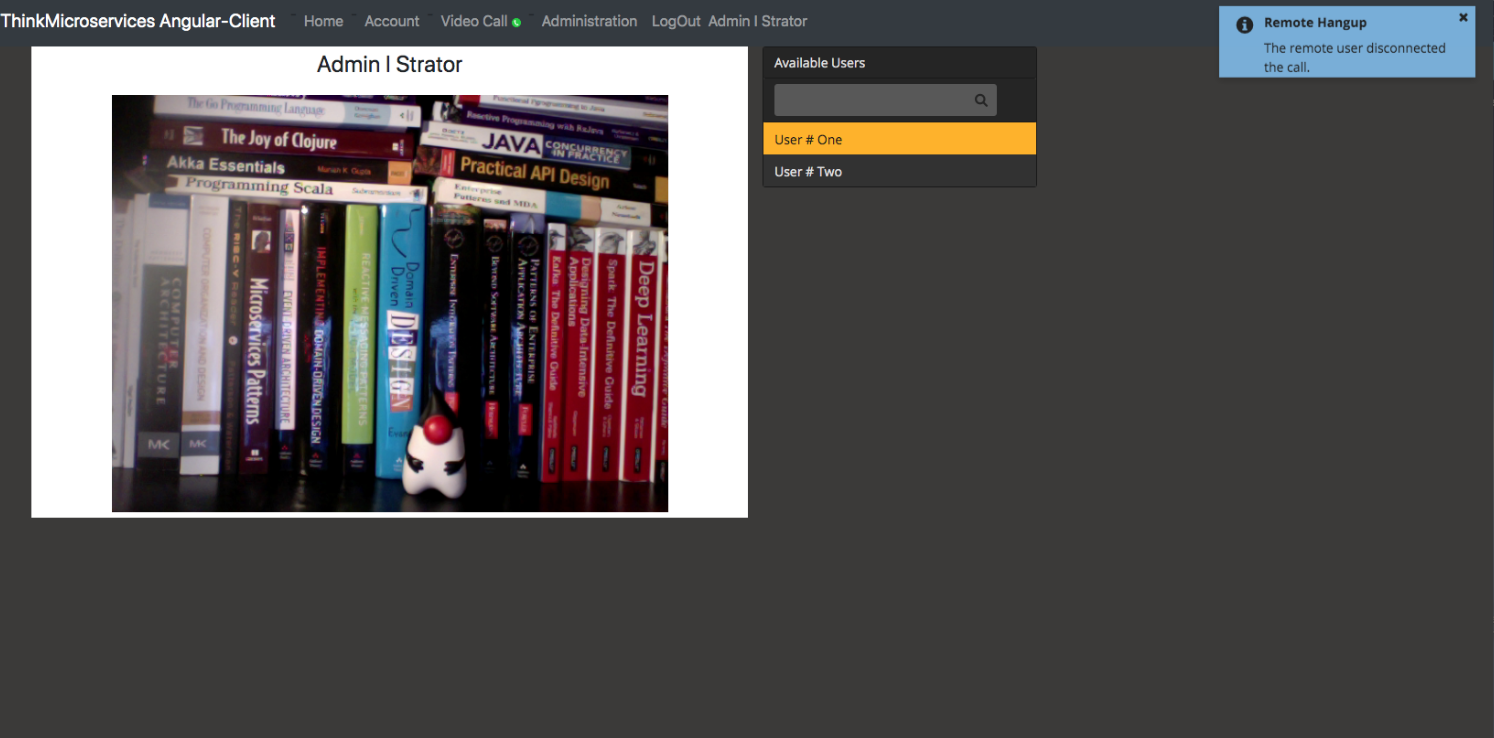
Admin I Strator is notified of the Remote Hangup, the remote video stream terminates, and the Available User list reappears.
LogOut
The Logout top-level menu option is the simplest of all client features. It performs the logout function by removing any local session data and terminates any peer-signaling connections made while logged in.

Twitter
Facebook
Reddit
LinkedIn
Email