

Arch De Triomphe, Paris by Pixabay
Introduction
in this article, we will build the API Gateway Service. In the past article API Gateway Pattern we discussed how to avoid tight coupling between our application clients and our application servicesand the benefits this service facade brings to our application. In this article we will implement a Spring Cloud Gateway to mediate access to the backend services.Requirements
Before you get started, you will need the following:- Java
- Maven
- Docker
- Docker-Compose
Building the API Gateway
Our fourth service leverages the Spring framework's spring-cloud-starter-gateway dependency. This dependency reduces the API Gateway service codebase and enables a configuration-driven approach to service routing.Maven pom.xml
loading...The source
Our fourth service continues to look strikingly similar to its predecessors.loading...One of the primary benefits of leveraging the Spring Cloud Gateway is the ability to handle service routing via configuration.
Service Configuration
bootstrap.yml
loading...Here we see the application name configure, and remote configuration for remote configuration from the application's Configuration Service
application.yml
loading...Here we configure the Api Gateway Discovery Server client (Eureka), and we declare the service routing using the route configurations. Since this service acts as our central access point, we configure it to use HTTPS as the communication protocol. We accomplish this by configuring Spring's server.ssl configuration parameters. Here we configure four HTTPS parameters:
- key-store-path to the local keystore file.
- key-store-password-the keystore file password.
- keyStoreType-what type of key store we are using.
- keyAlias-the name (alias) of the key.
After we configure HTTPS support, we then define the APIGatewayService's service routing using the routes configuration parameter. This instructs the gateway how to map incoming request paths to the target service.. Our first a route content which represents our Content Service. We identify the service via its uri and assign it the lb:CONTENT-SERVICE value. This value identifies the protocol the API Gateway will use to access the service ( lb- load balanced) and the name registered with the Discovery Service ( CONTENT-SERVICE). The predicates identifies an array of URI request paths that the API Gateway will receive. The filters assigns an array of filters that will process the previously declared URIs.
In this example we see that our path is looking for everything that matches /content/**. We then rewrite the path to match the Content Services pathing.
As we add services to the application, we will continue to add additional routes for the services we wish to expose.
API-Gateway-Service Docker File
The following docker file will create our API Gateway Service container image.loading...Docker-Compose
We continue the practice of enhancing the previous Docker-Compose file to inclue the API-Gateway Service configuration.loading...API-Gateway Service In action
We can copy the Docker-Compose file above to your local machine, and run it from the command prompt:docker-compose -f ./dc-04-api-gateway.yml up -d
Once all the services have started, Point a web browser to http://localhost:8080/content.
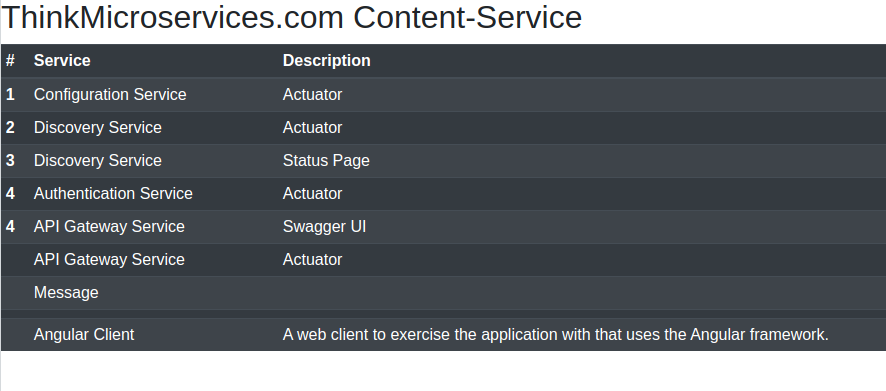
Here you see the Content-Service in action.
Metrics and Monitoring
To enable metrics for the API-Gateway Service, we will need to update our prometheus.yml configuration file to include the following scrape_configs: entry.
 #######################
 # api-gateway service #
 #######################

 - job_name: "api-gateway-service"
 scheme: https
 tls_config:
 # ca_file: /think-microservices.cert
 insecure_skip_verify: true
 metrics_path: "/actuator/prometheus"
 basic_auth:
 username: 'think'
 password: 'microservices'
 scrape_interval: 5s
 static_configs:
 - targets: ['api-gateway-service:8443']
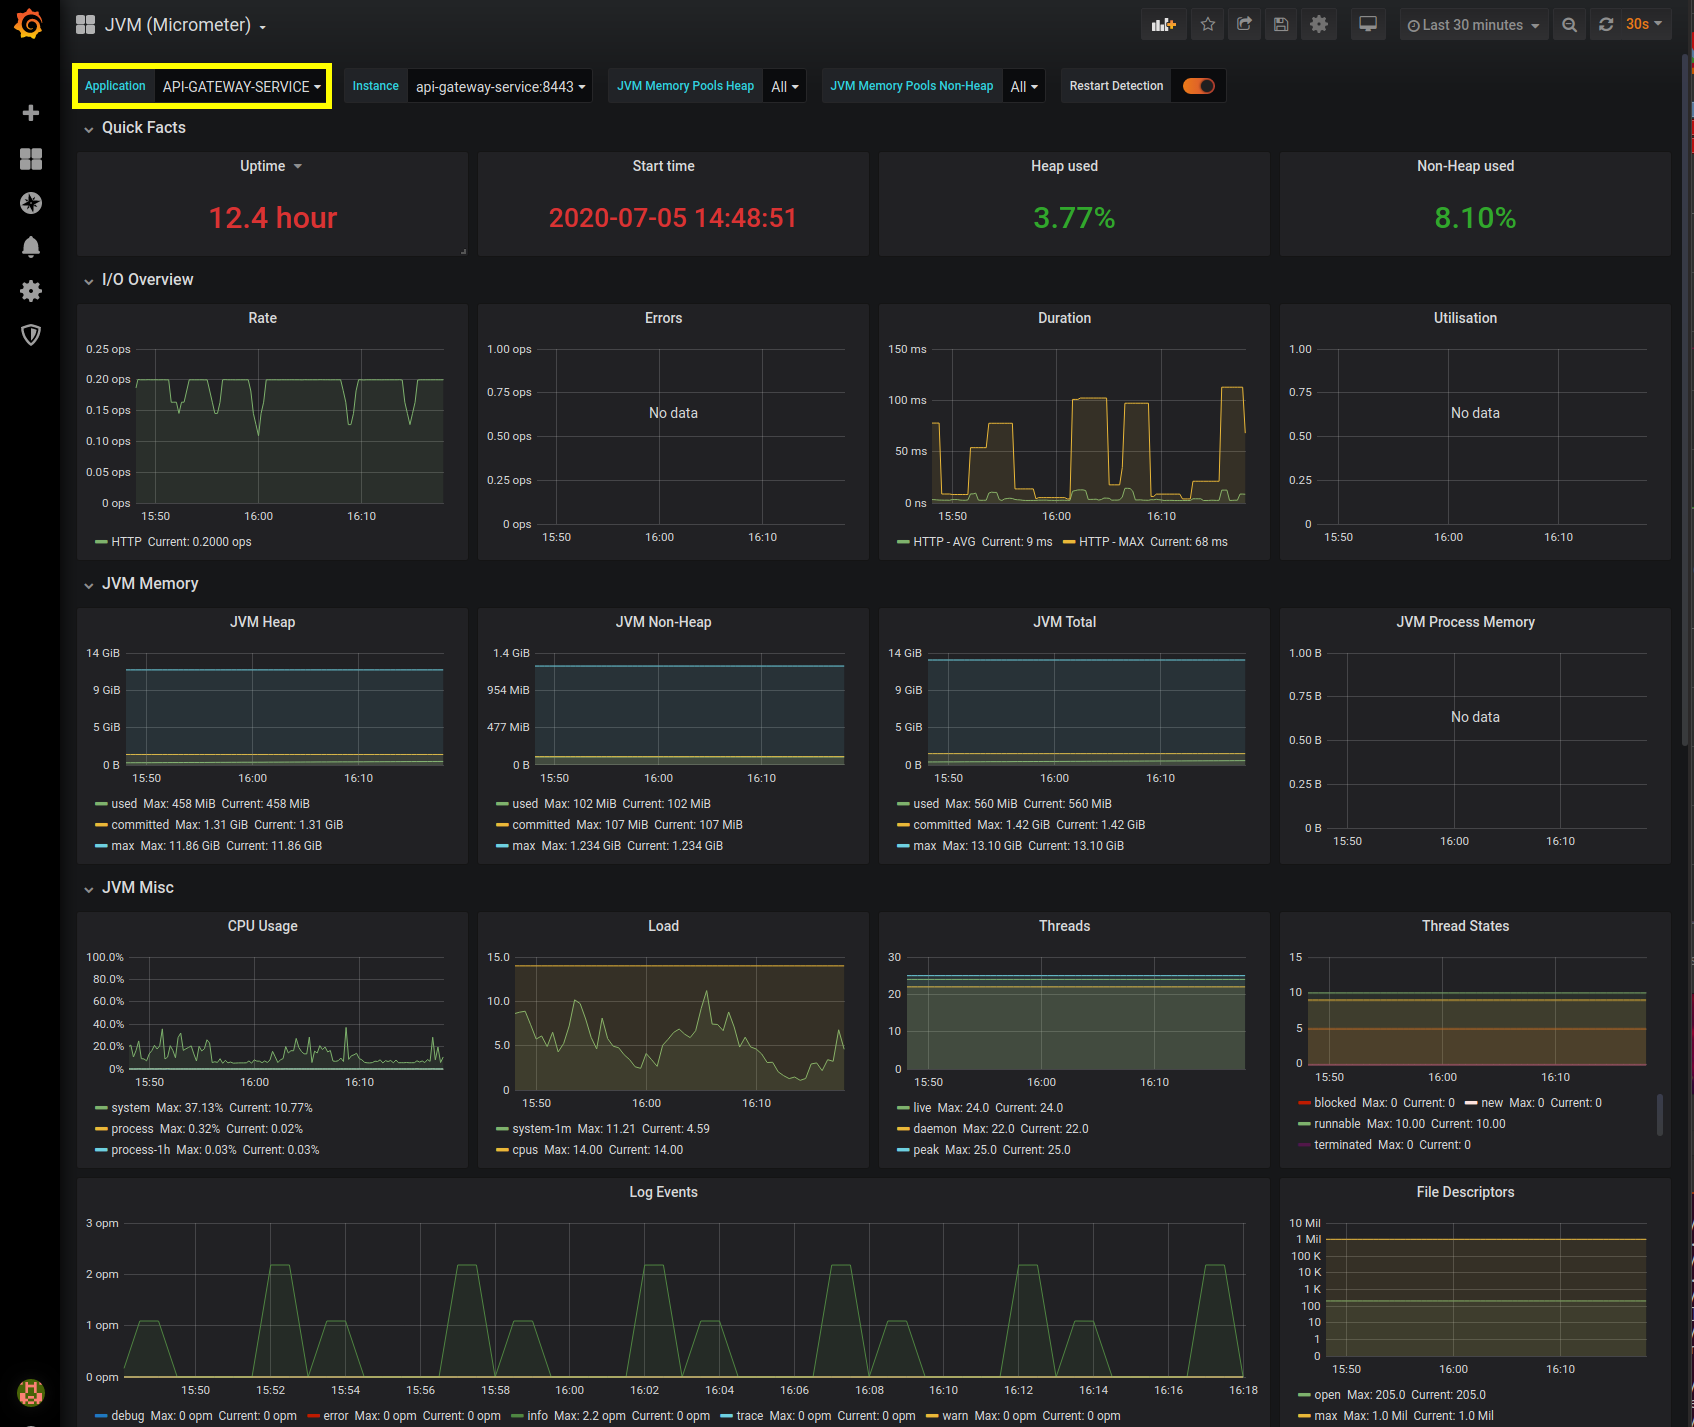
We will start by verifying the service's JVM metrics. Open up Grafana in your browser andavigate to the JVM (Micrometer) dashboard (or import it doesn't exist) we imported in the previous article. When the dashboard is displayed, select the API-GATEWAY-SERVICE from the Application drop-down.
Here we select Content-Service from the Application drop-down selector to view its JVM metrics.
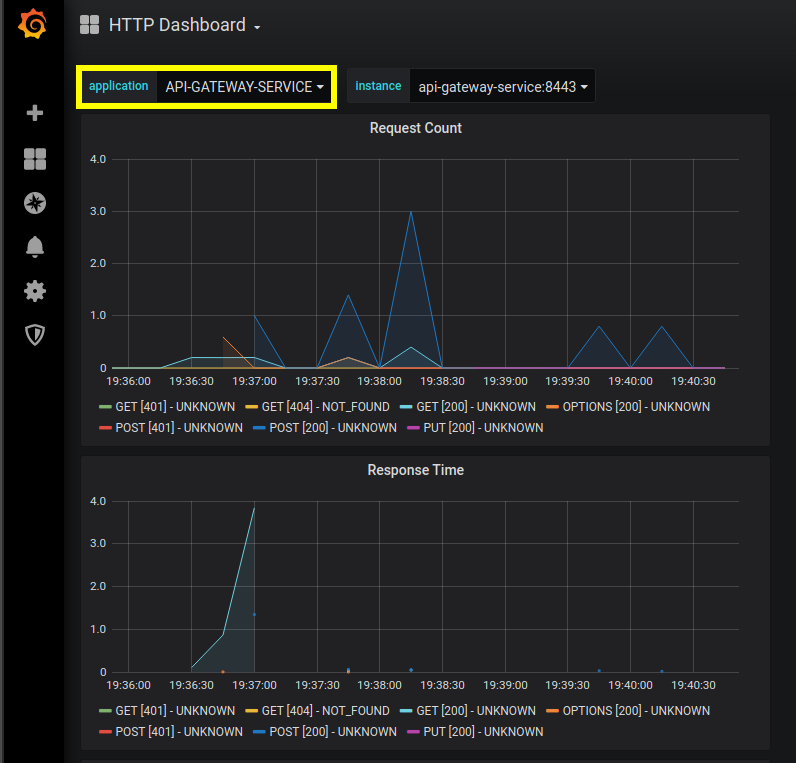
Switching over to the HTTP Dashboard, we can select API-GATEWAY-SERVICE and view its data.
Resources
- ApiGatewayService Github repository.
- ApiGatewayService Docker hub image.
- ThinkMicroservice ApiGatewayService Dashboard.

Twitter
Facebook
Reddit
LinkedIn
Email